3 simple steps to creating dynamic phasing animations
Playfully highlight different aspects of your design
Animate your viewers
The evolution of a design is a dynamic and iterative process – a story that's best told through highly captivating visuals. This is where animation takes center stage.
With Lumion, absolutely anyone can create engaging phasing animations with ease. These animated sequences go beyond static renderings, allowing you to illustrate the transformation of a space over time and provide clients with an immersive understanding of how a design comes together.
Ready to bring your design narrative to life? Follow these easy steps and we will show you how to create visually stunning phasing animations that delight and entertain.
It's easier than you might think
Create your own phased animation. Get the latest version of Lumion Pro free for 14 days and put this handy guide to the test.
Get your free Lumion trial:
Check the system requirements for your Windows PC or laptop.
Fill in the form with your details and email address.
You'll immediately receive an email to get started with Lumion Pro.
Füllen Sie das untenstehende Formular aus
See it all fall into place
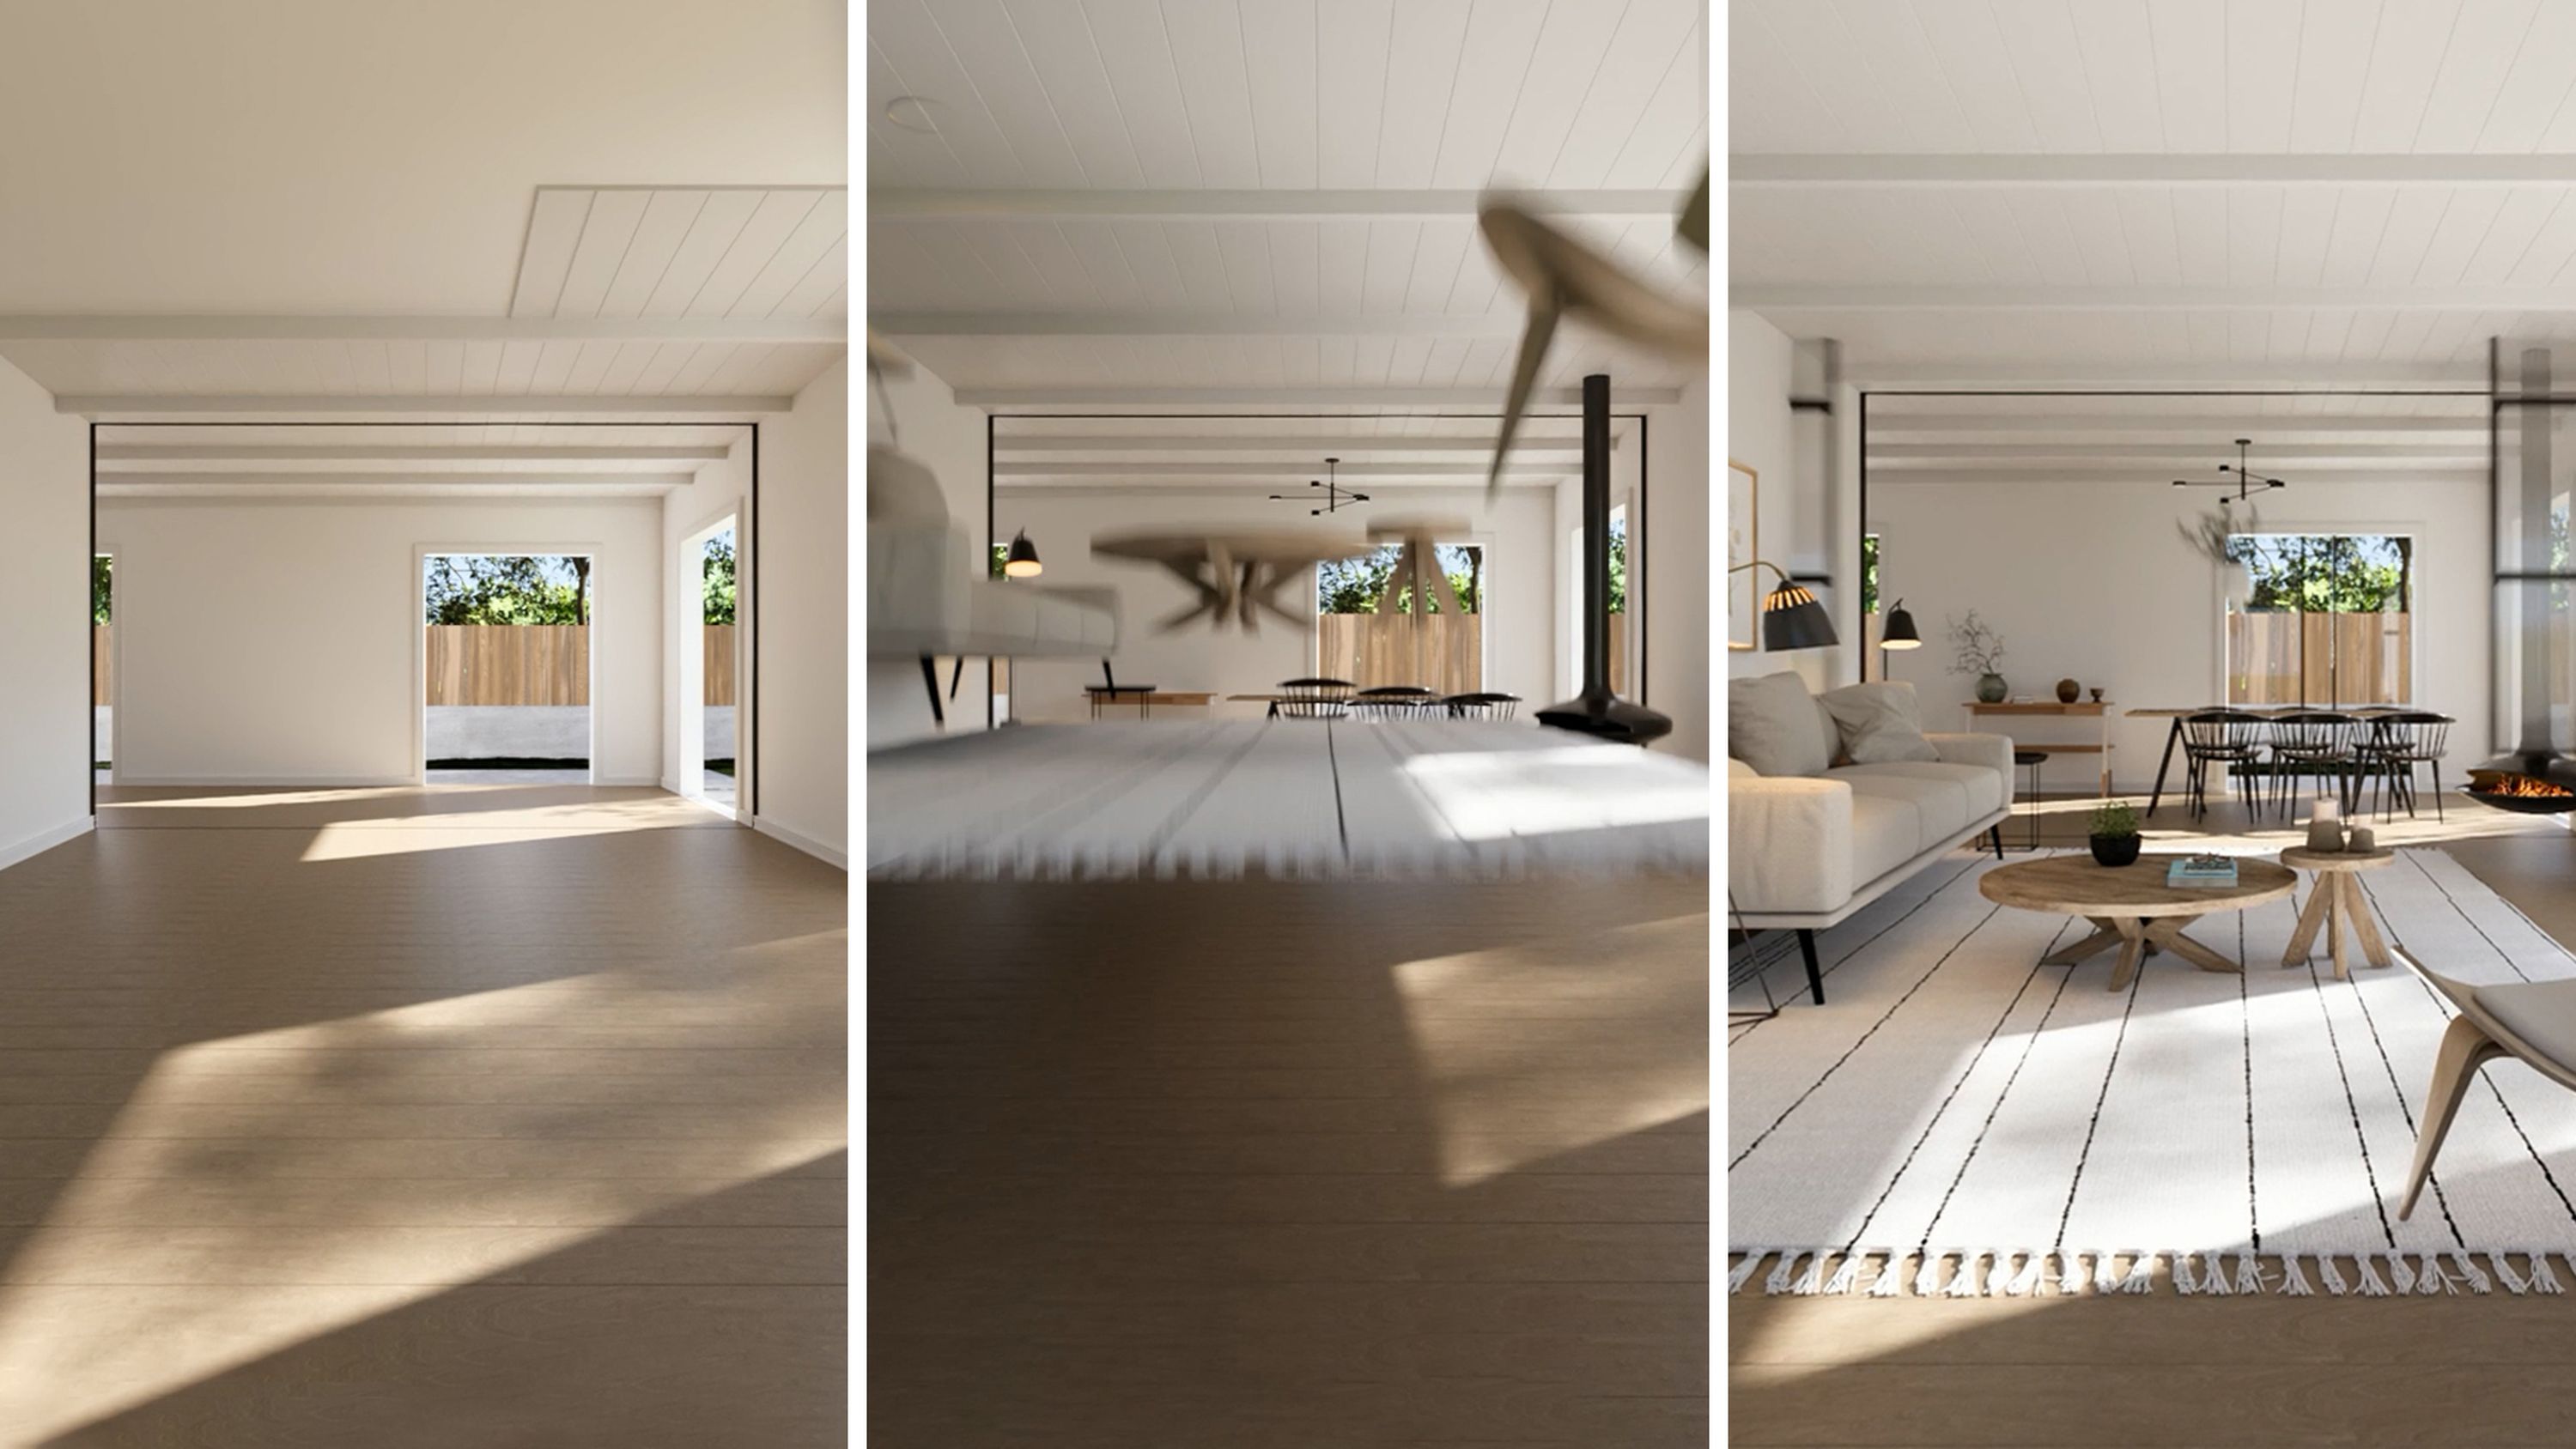
Watch our carefully crafted interior scene come together piece by piece in this quick guide to animated phasing. Then keep scrolling to read through the steps!
1. Import your objects
To start, click on Place and when the Imported Models window opens, select Import new model. Bring each object that you wish to animate into your scene, one by one.
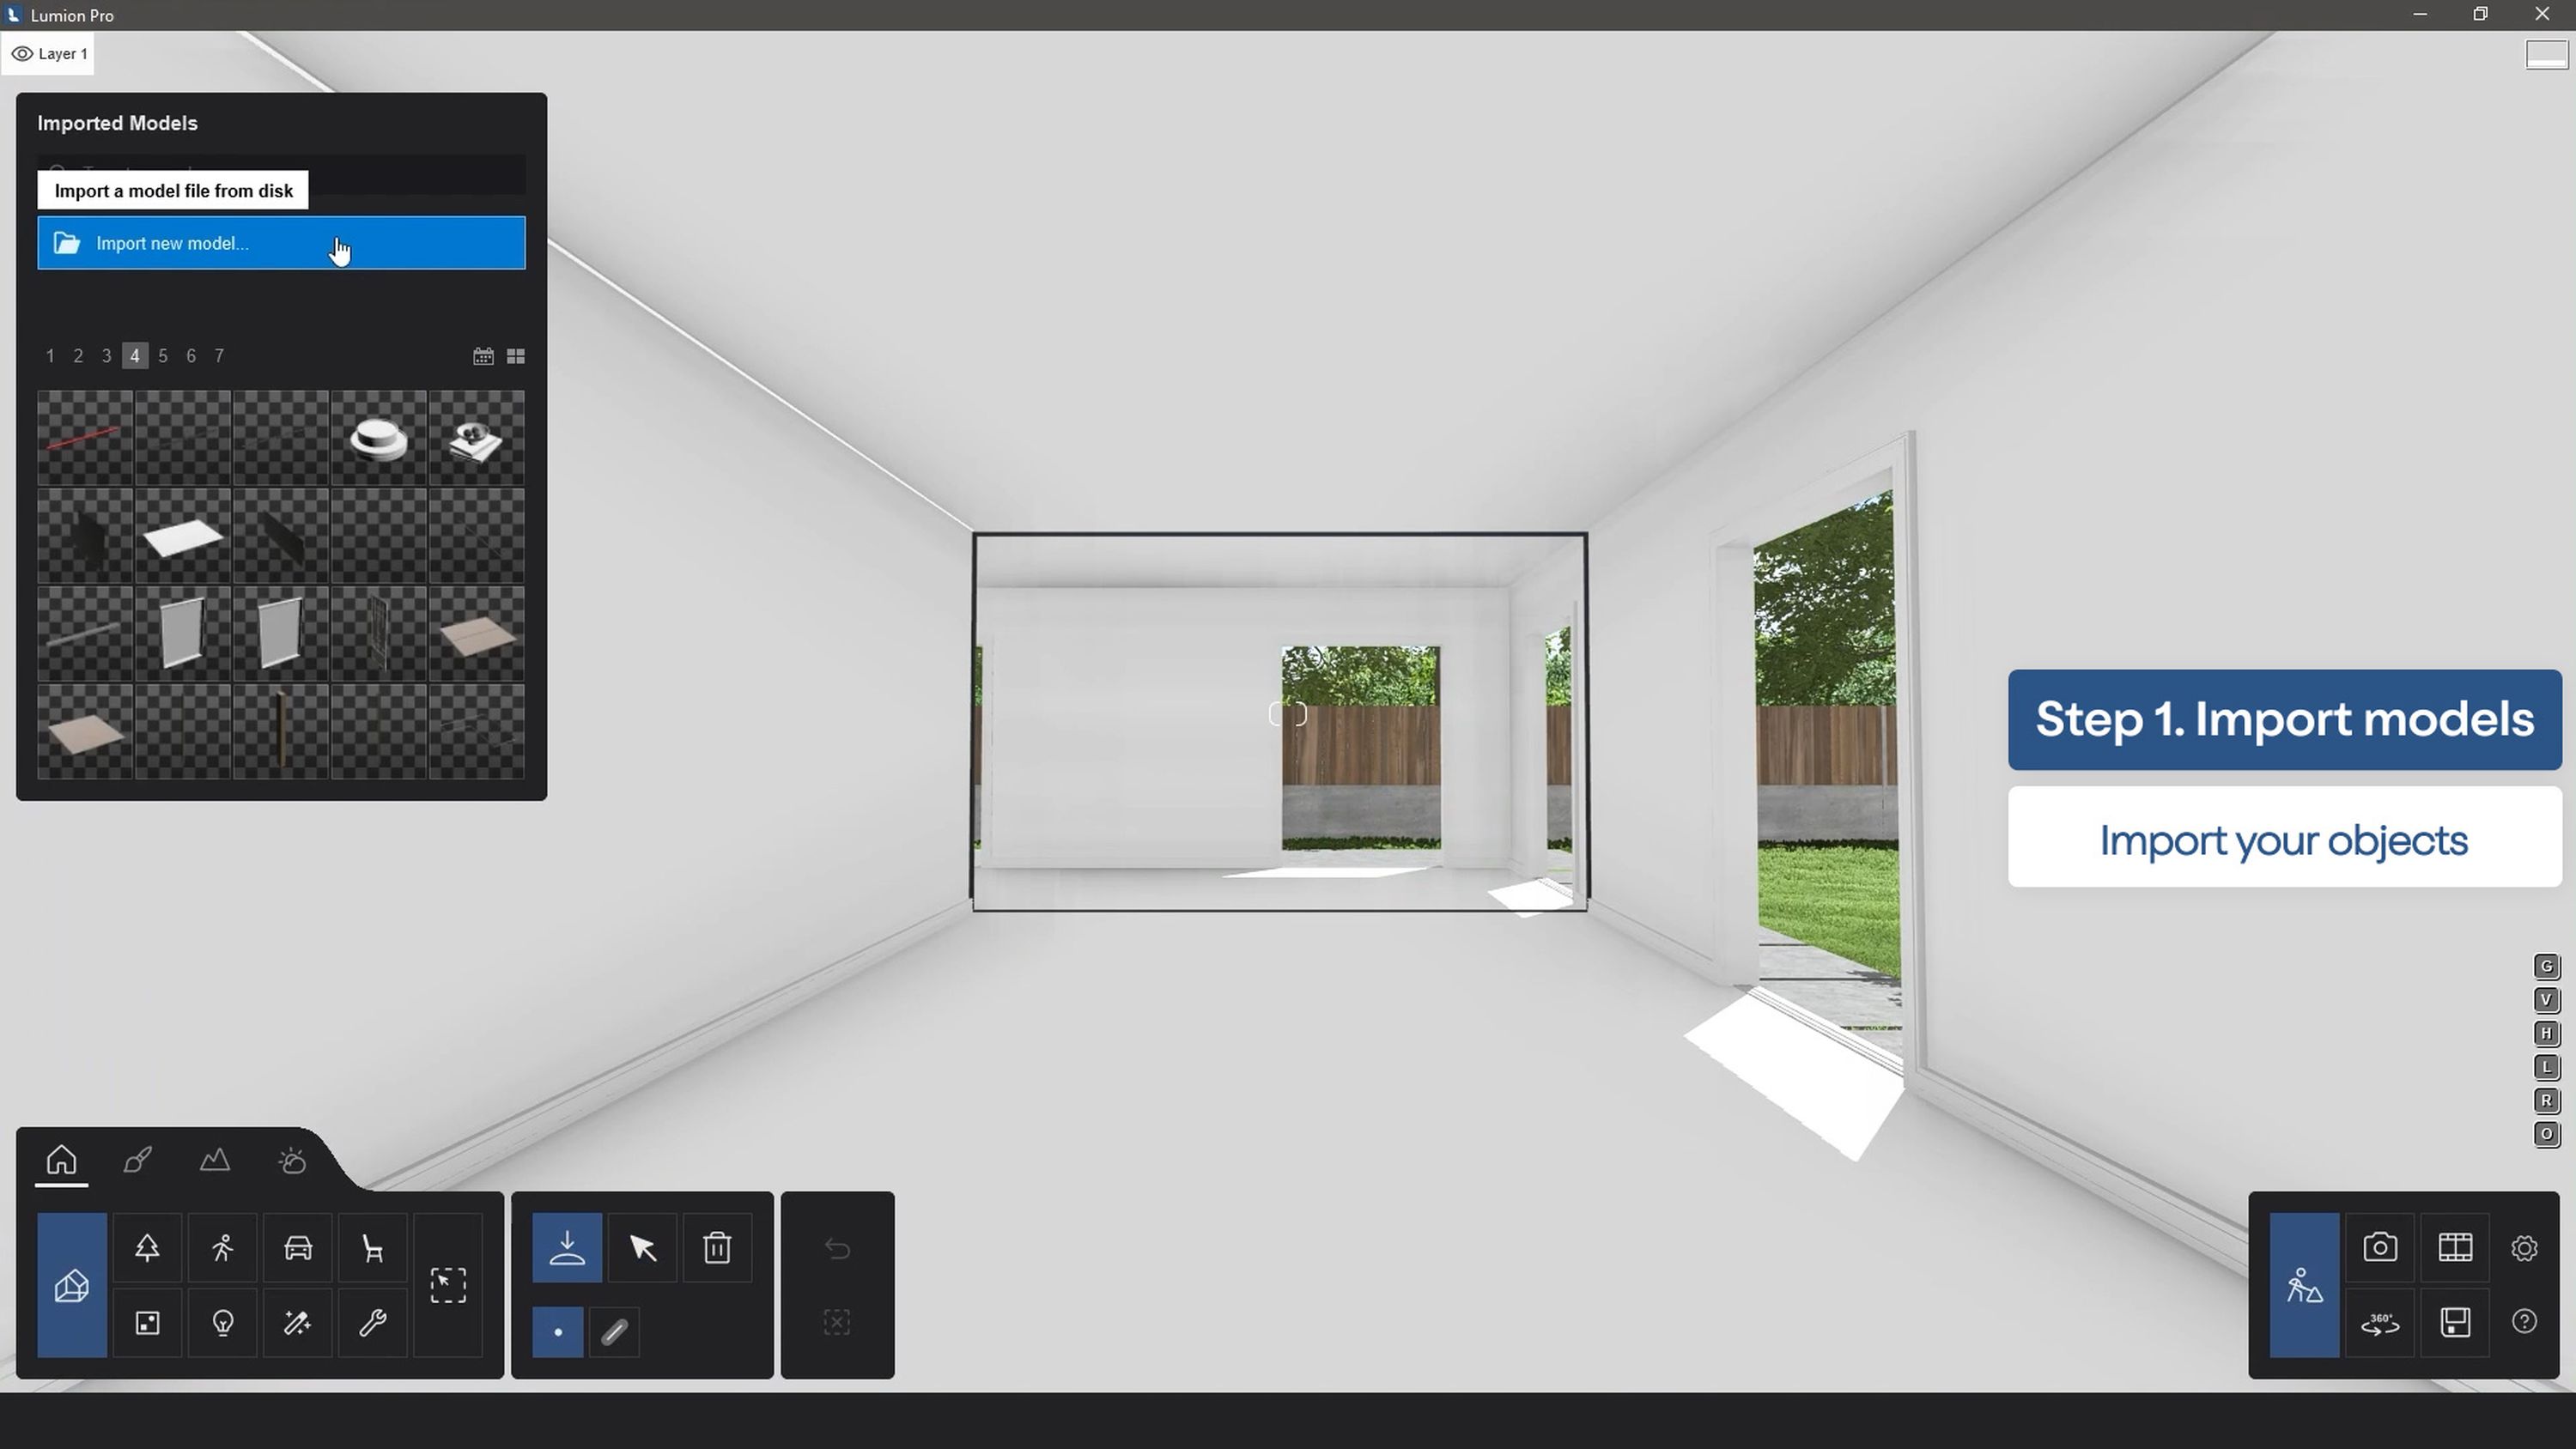
Continue to build the rest of the scene as normal. Position each object in their respective places within the scene, then add your preferred materials, lighting, and effects.
2. Assign to layers
It’s time to assign each of your objects to layers. Effective scene management is important, so group your items logically and assign them to different layers. For example, place all furniture items on one and all structural items such as walls and flooring on another.
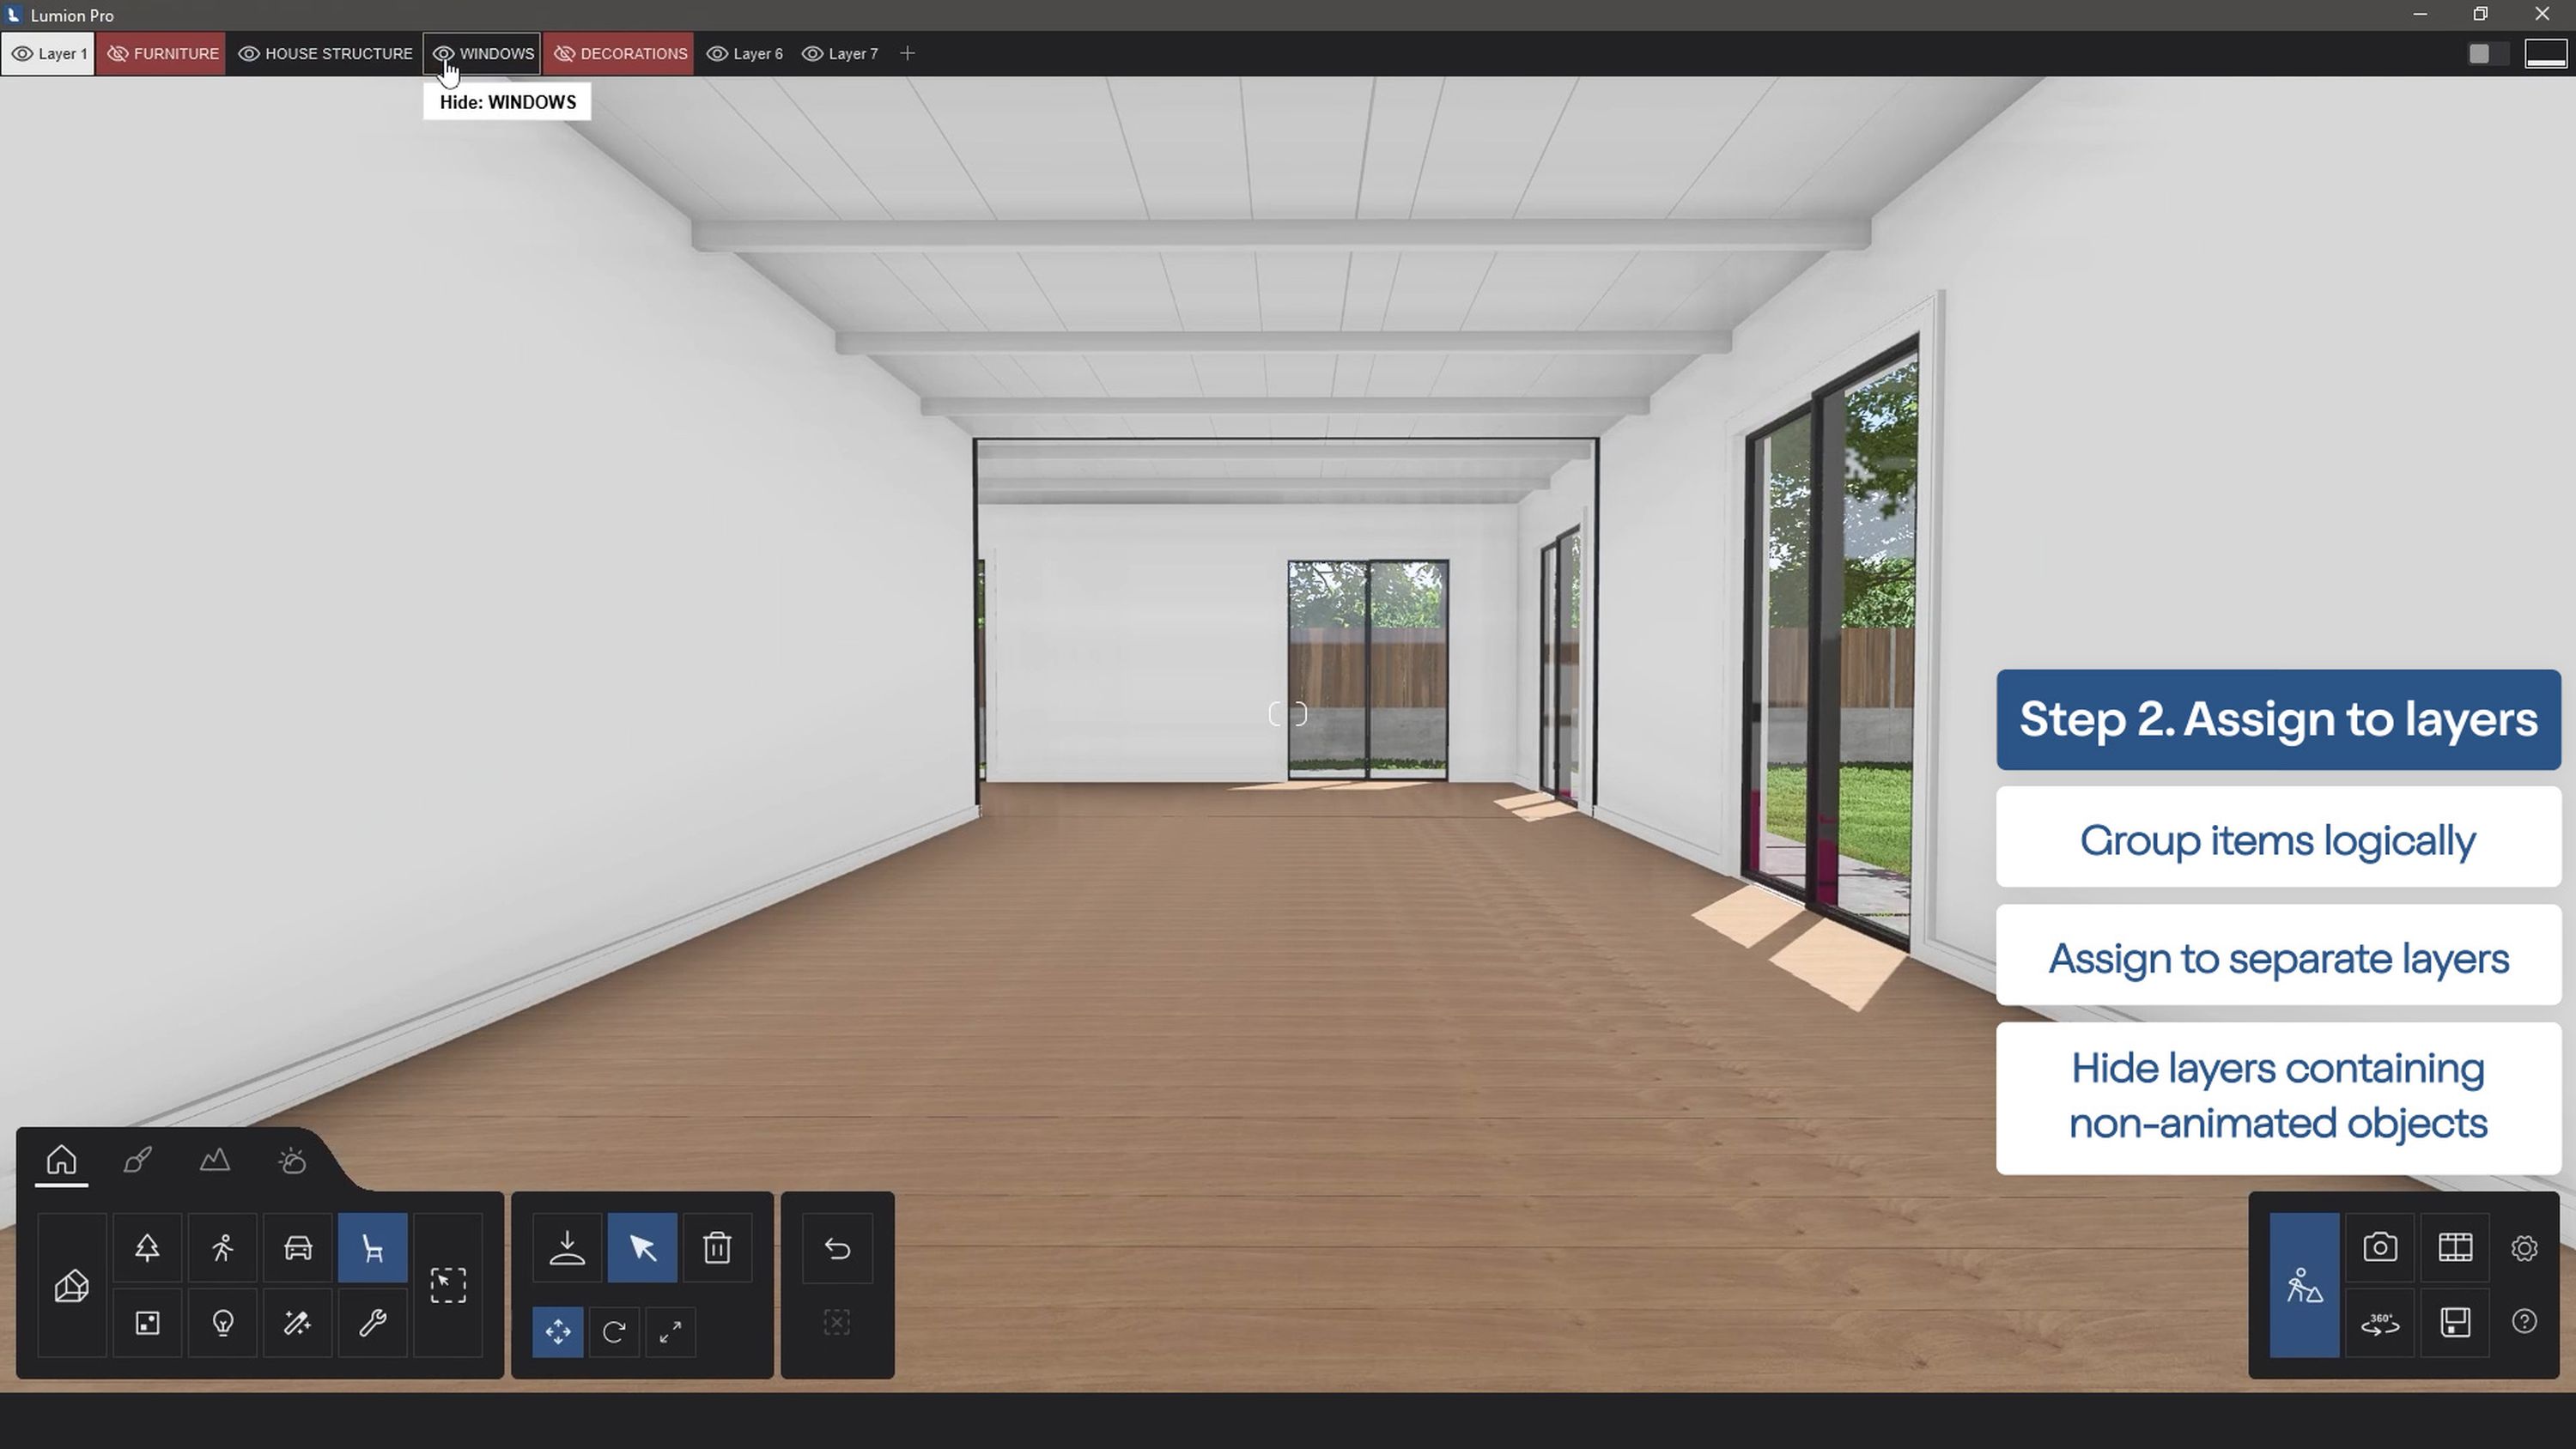
This will not only help to keep your project file clean and easy to navigate, it will also help speed up the process of applying animations. Simply hide any layers that contain objects you don't want to include in each animation.
3. Add phasing animation
Once you’re done with your layers, it’s time to head to movie mode. Click on Add effect, go to the Animation tab, then choose Animated phasing.
Under the effect name, click Edit, then choose Add to add phasing effects to selected objects. Hit Select objects to choose what to animate.
Next, adjust the Duration of time your items will be moving for, then choose the type of animation the objects will have when they enter the scene.
Sky drop makes them fall down from the ceiling one by one.
Ground rise makes them appear individually from below the floor.
Pop in causes the objects to appear from the center point.
Implode uses the center of the group as a reference in making the objects appear or disappear.
So, find your favorite!
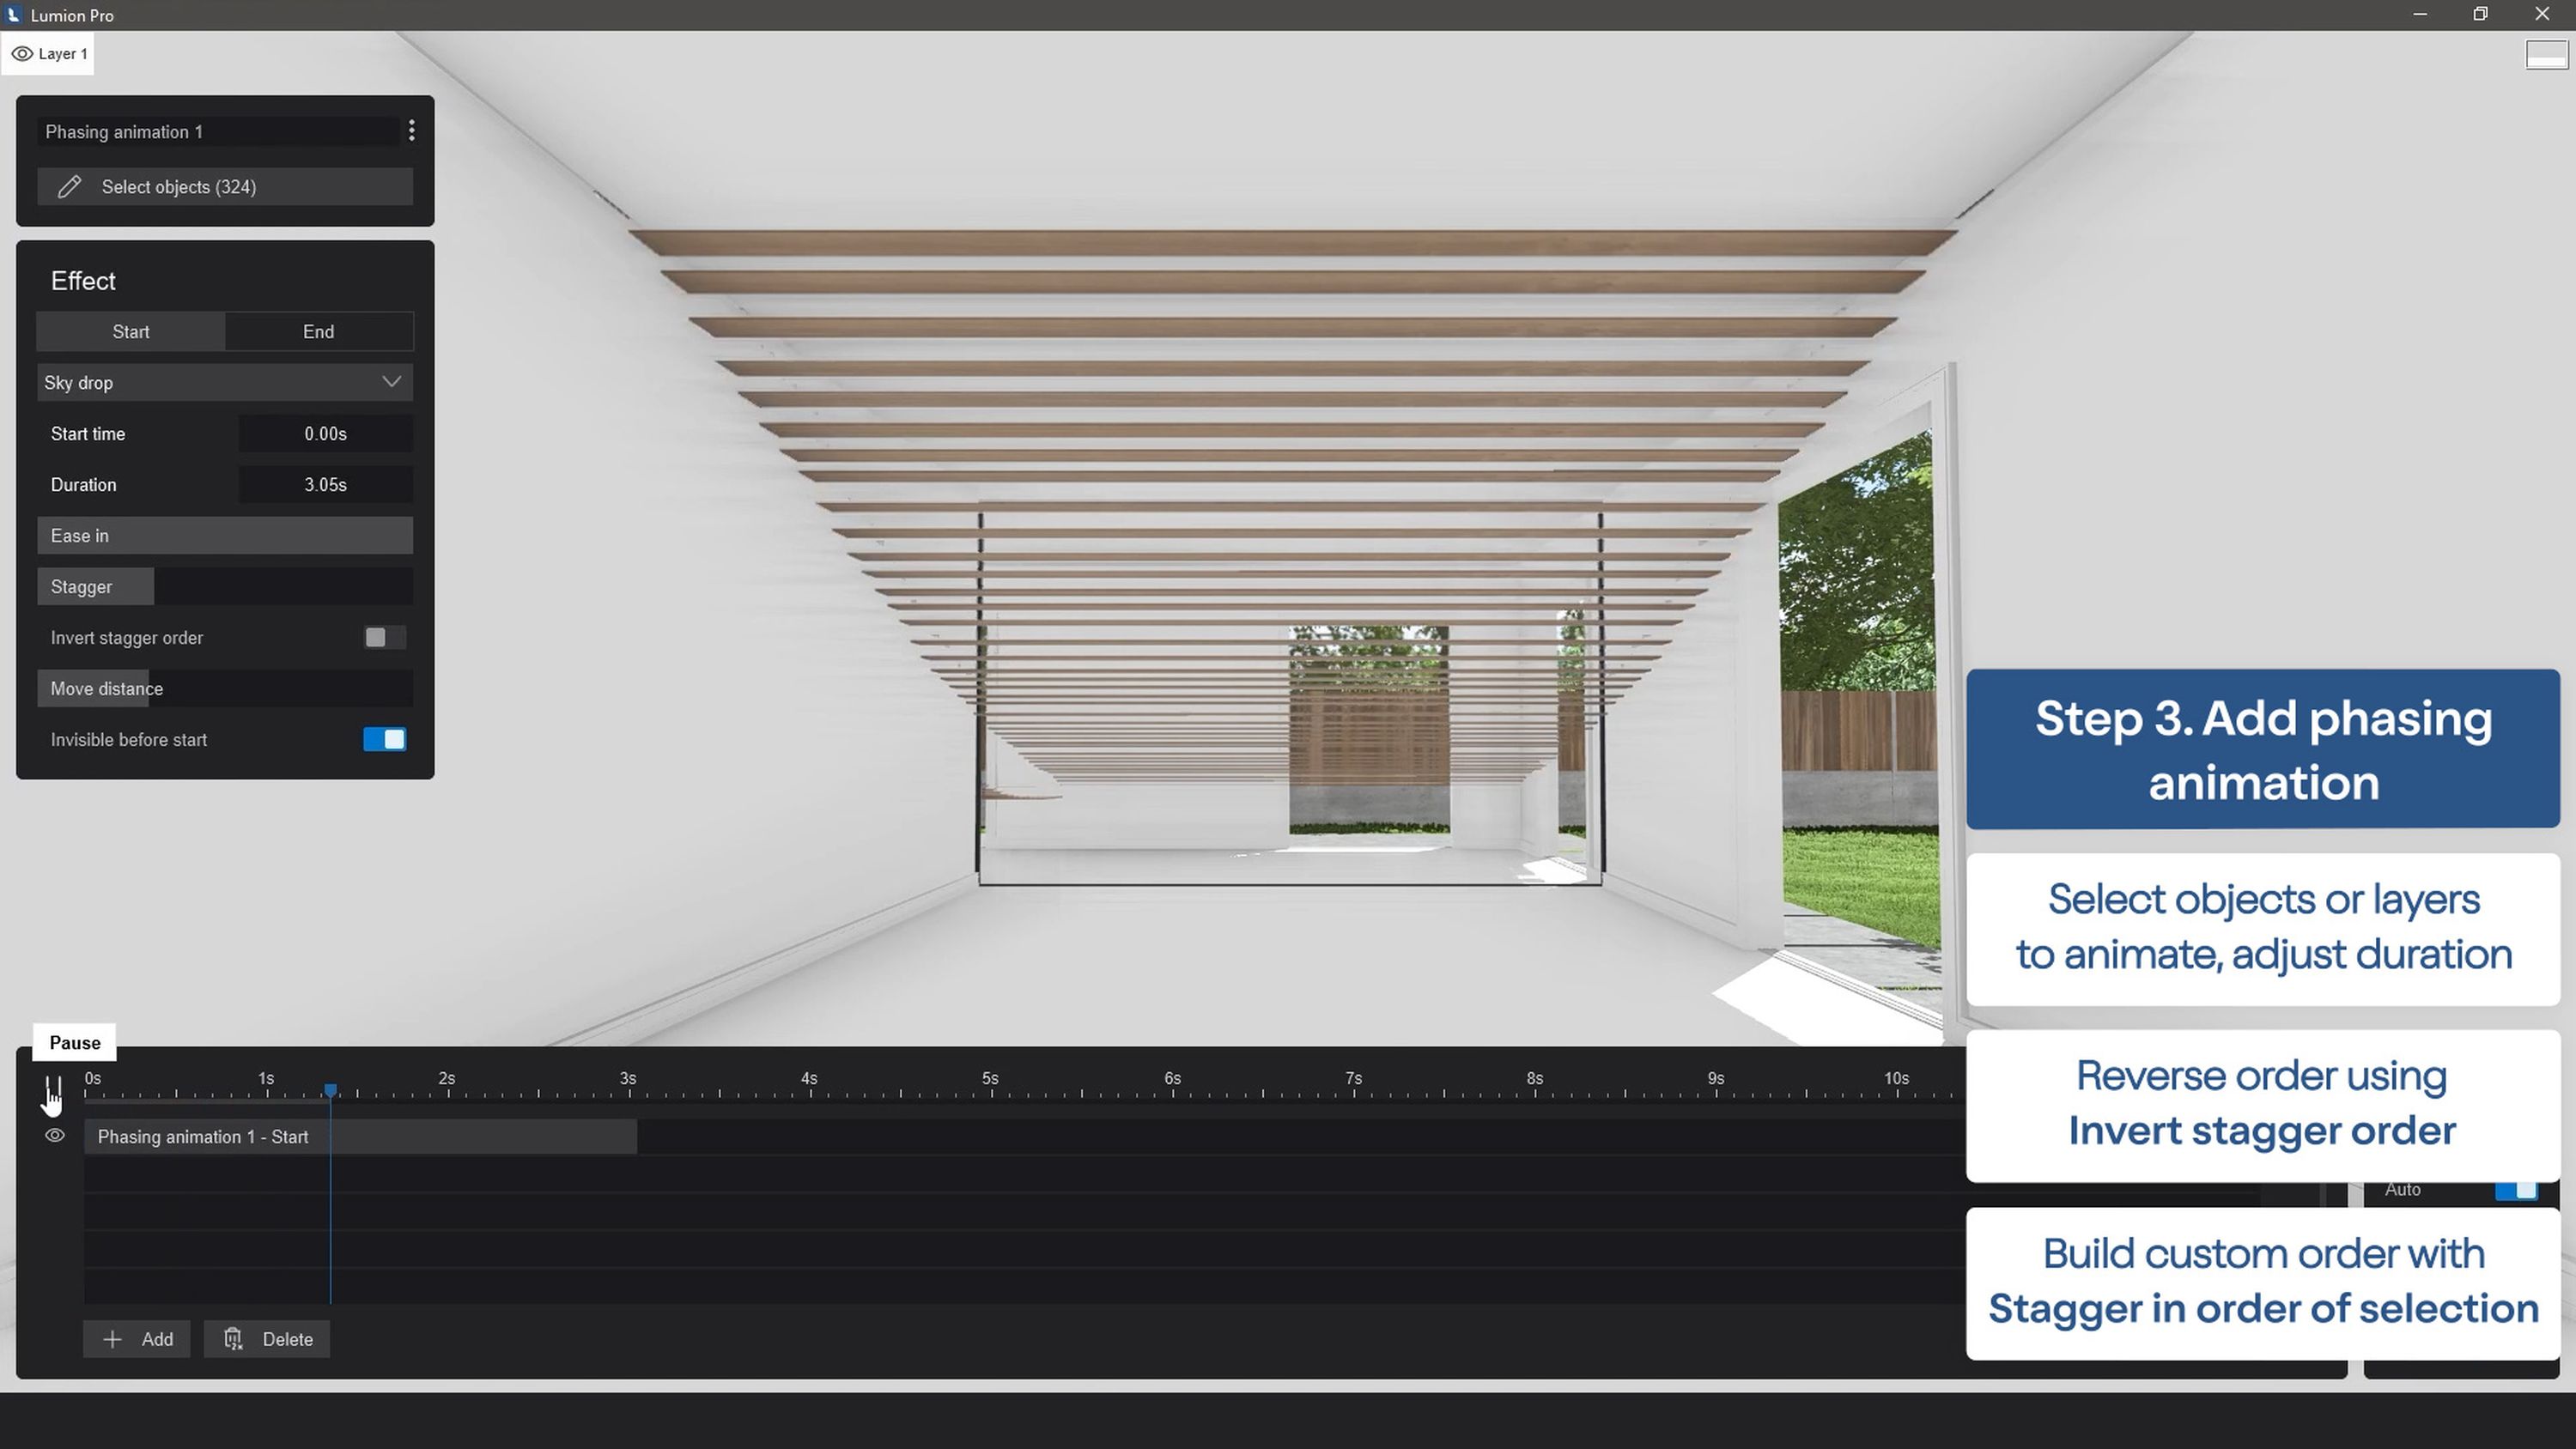
To reverse the order in which your objects appear, you can toggle Invert stagger order, or to specify an order of your own, you can select the items one by one rather than using a selection box and toggle Stagger in order of selection.
Repeat step 3 for the next set of objects, then save the changes by clicking the checkmark when you’re happy with the result.
There you have it – a simple yet effective phasing animation!
Set your designs in motion
Curious to try phased animations in one of your projects? It's easy! Simply sign up for a free 14-day trial and follow the steps outlined in this guide. You'll get complete access to all of the latest features and content in Lumion Pro, plus more tutorials and expert support to get you started.
We'd love to see what animations you can create with Lumion. Be sure to share your videos by tagging us with the hashtag #madewithlumion.
Let's stay connected
Enjoyed diving into this guide? Sign up to our newsletter and be the first to receive useful tips, rendering tutorials, and more.
