How to build scenes more efficiently
Discover four tips to speed up your workflow with Lumion

Streamline your Lumion workflow
Starting every Lumion scene from the ground up? Let's shift gears.
Embrace automation for those routine tasks, and you'll unlock a treasure trove of time savings, particularly when your projects share a similar visual style. Dive into these four straightforward workflow tips designed to fast-track your projects.
Tip 1
Layer your scene
Layers are your secret weapon for maintaining a pristine and structured scene. Think of them as your creative compartments, allowing you to categorize and maneuver the essential building blocks of your scene with ease and precision. Just like when using layers within a CAD or post-production software, being able to manipulate the properties and visibility of elements on a particular layer will make the whole project much easier to manage.
Picture this: your project effortlessly organized into layers, each housing its unique set of elements—foreground and background vegetation, 2D and 3D entourage. This isn't just about keeping things well organized; it's about gaining more control over your scene. You can add layers with a simple click, select all elements on a layer, or move a selection to another layer. You can easily toggle the visiblity of individual layers depending on what you want to see as you fine-tune your scene.
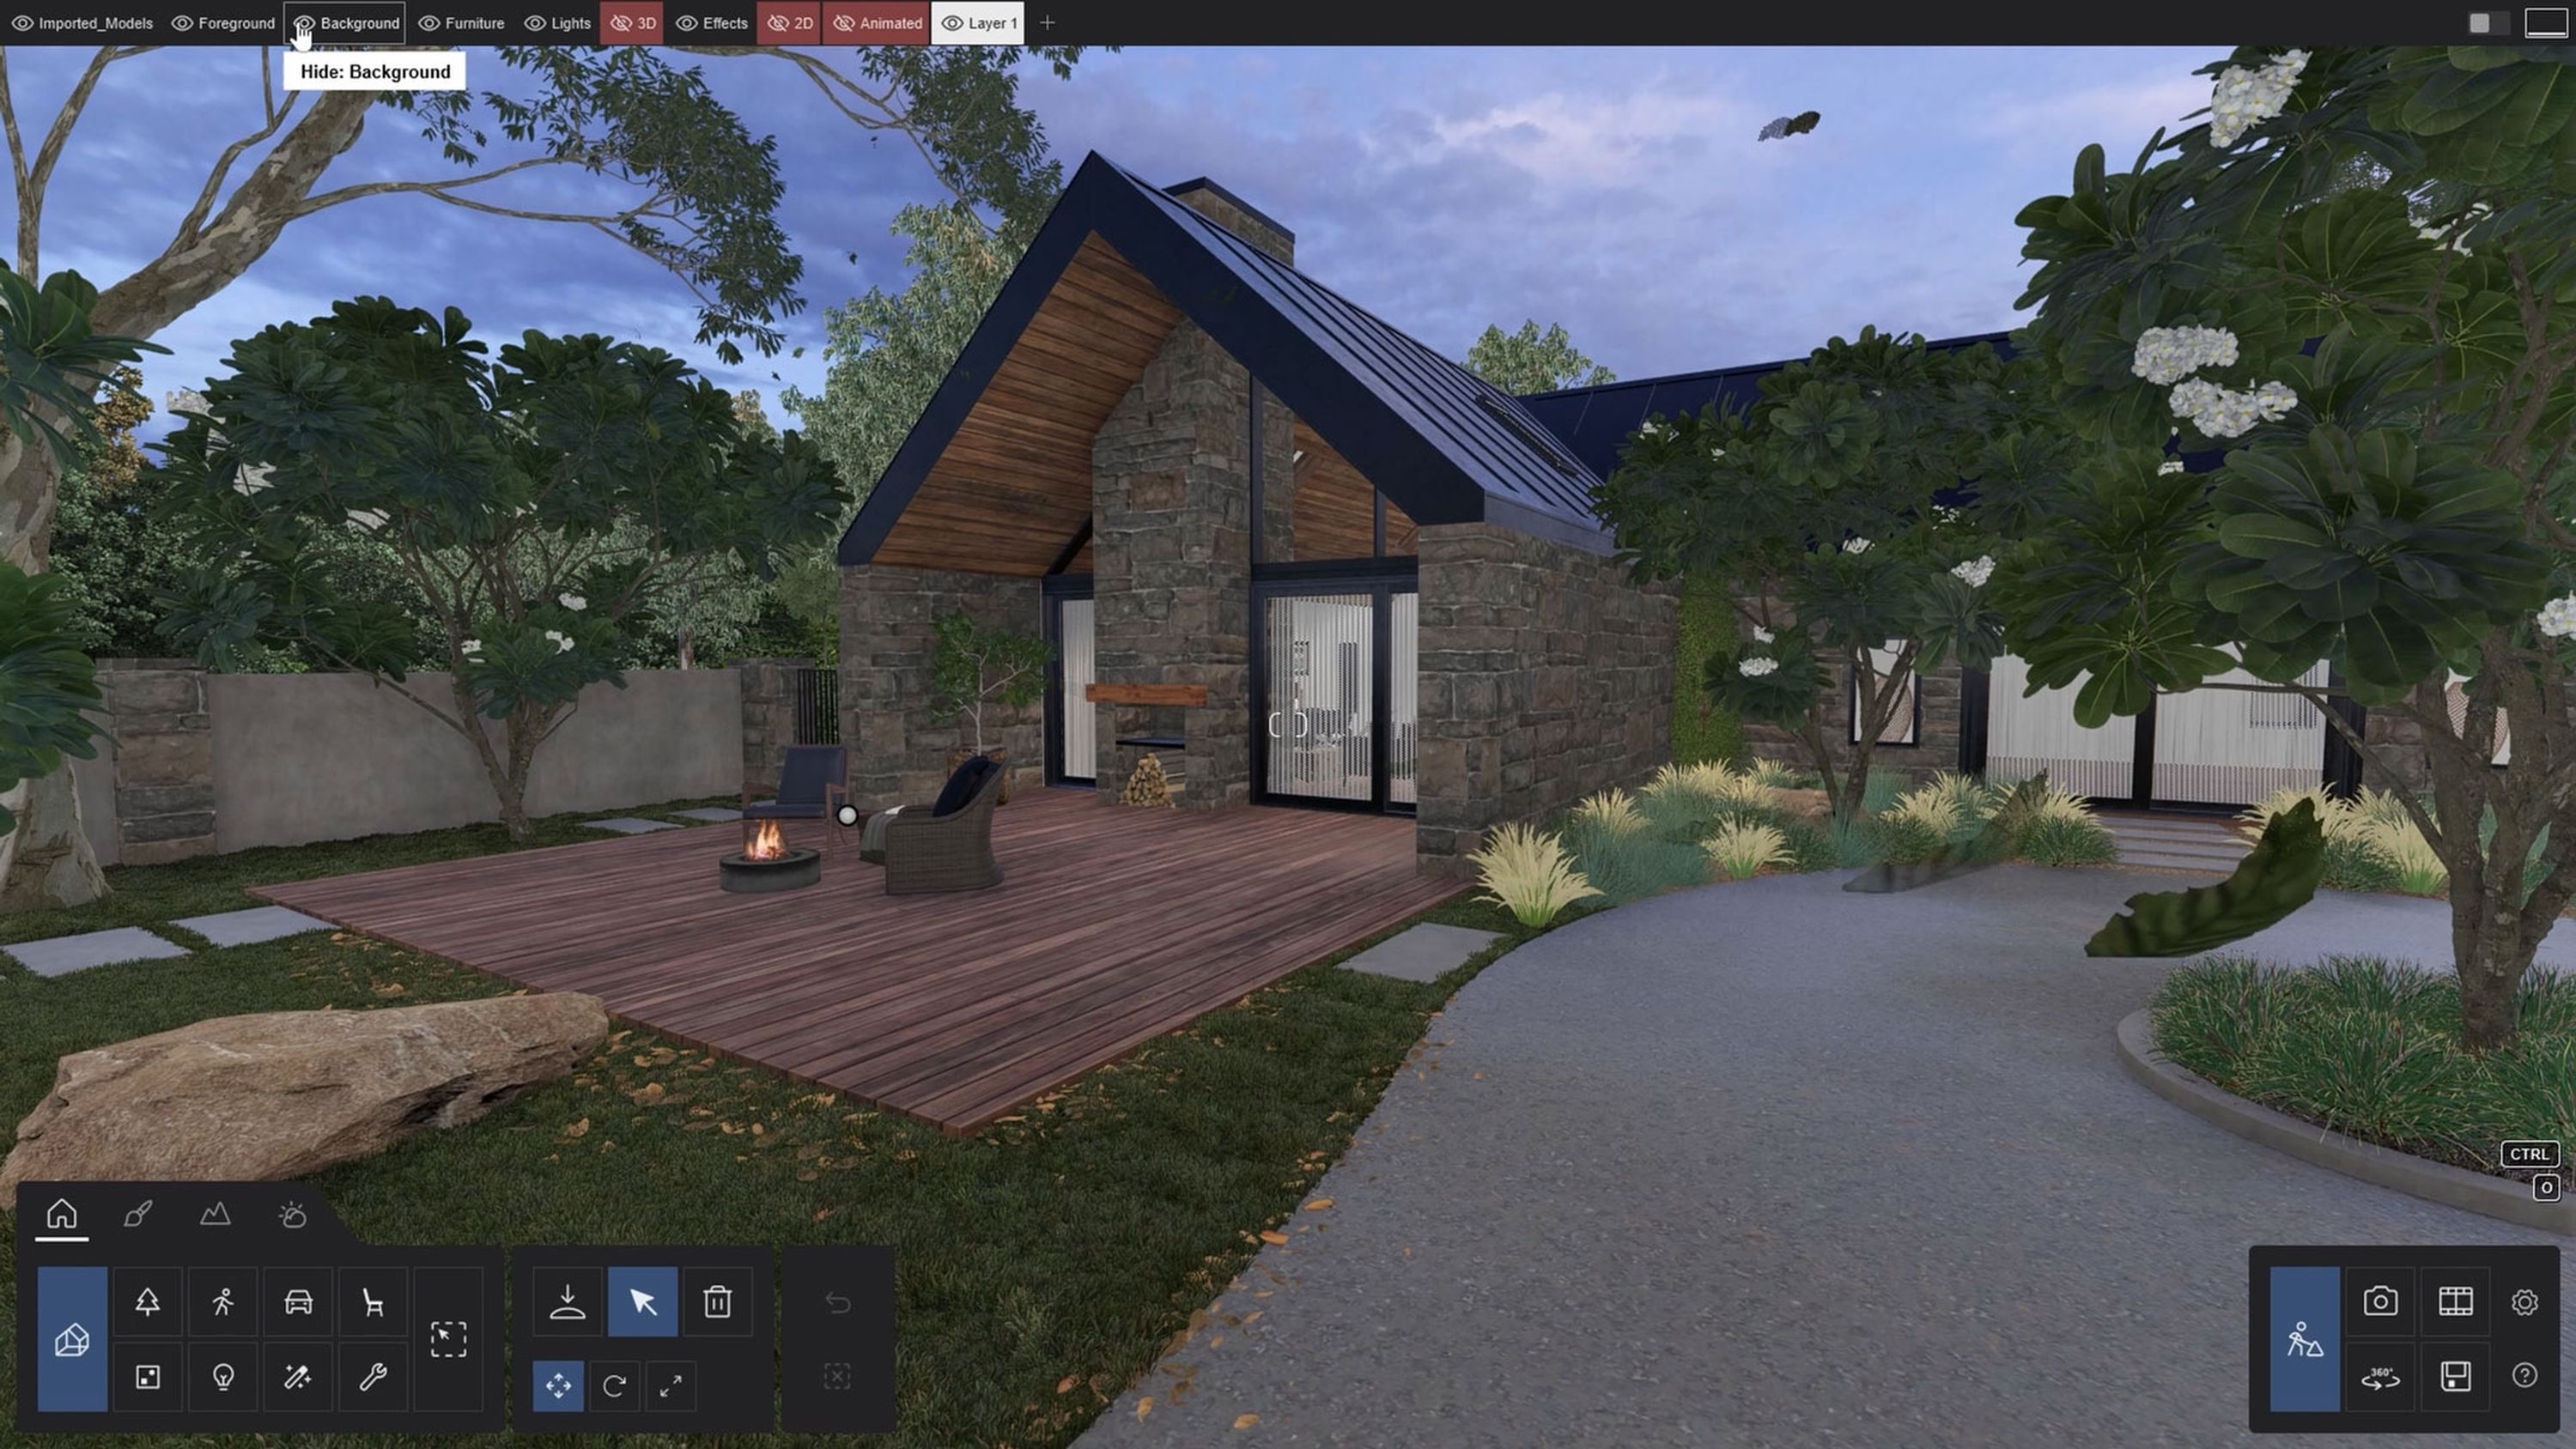
Cluttered project file? Delete empty layers to maintain a clean workspace. And when you've crafted the perfect layer structure for your scene, save it as a template to jumpstart future projects with your preferred layer structure ready to go. The layering feature in Lumion can really transform your workflow, making scene building faster and more efficient.
Tip 2
Create reusable asset collections
Dive into Lumion's vast universe of 10,000+ models to add rich context and detail to your projects. Navigating this wealth of content is a breeze, thanks to neatly organized collections and advanced search options. Ever tried pinpointing the perfect plant with its Latin name? In Lumion, it’s entirely possible and easy to do so.
Yet, the real game-changer lies in personalizing your library collections. Imagine never having to hunt down that perfect asset more than once. In Lumion you can create custom collections of assets that resonate with your projects' themes—like a curated set of vegetation items tailored to a certain geographical setting.
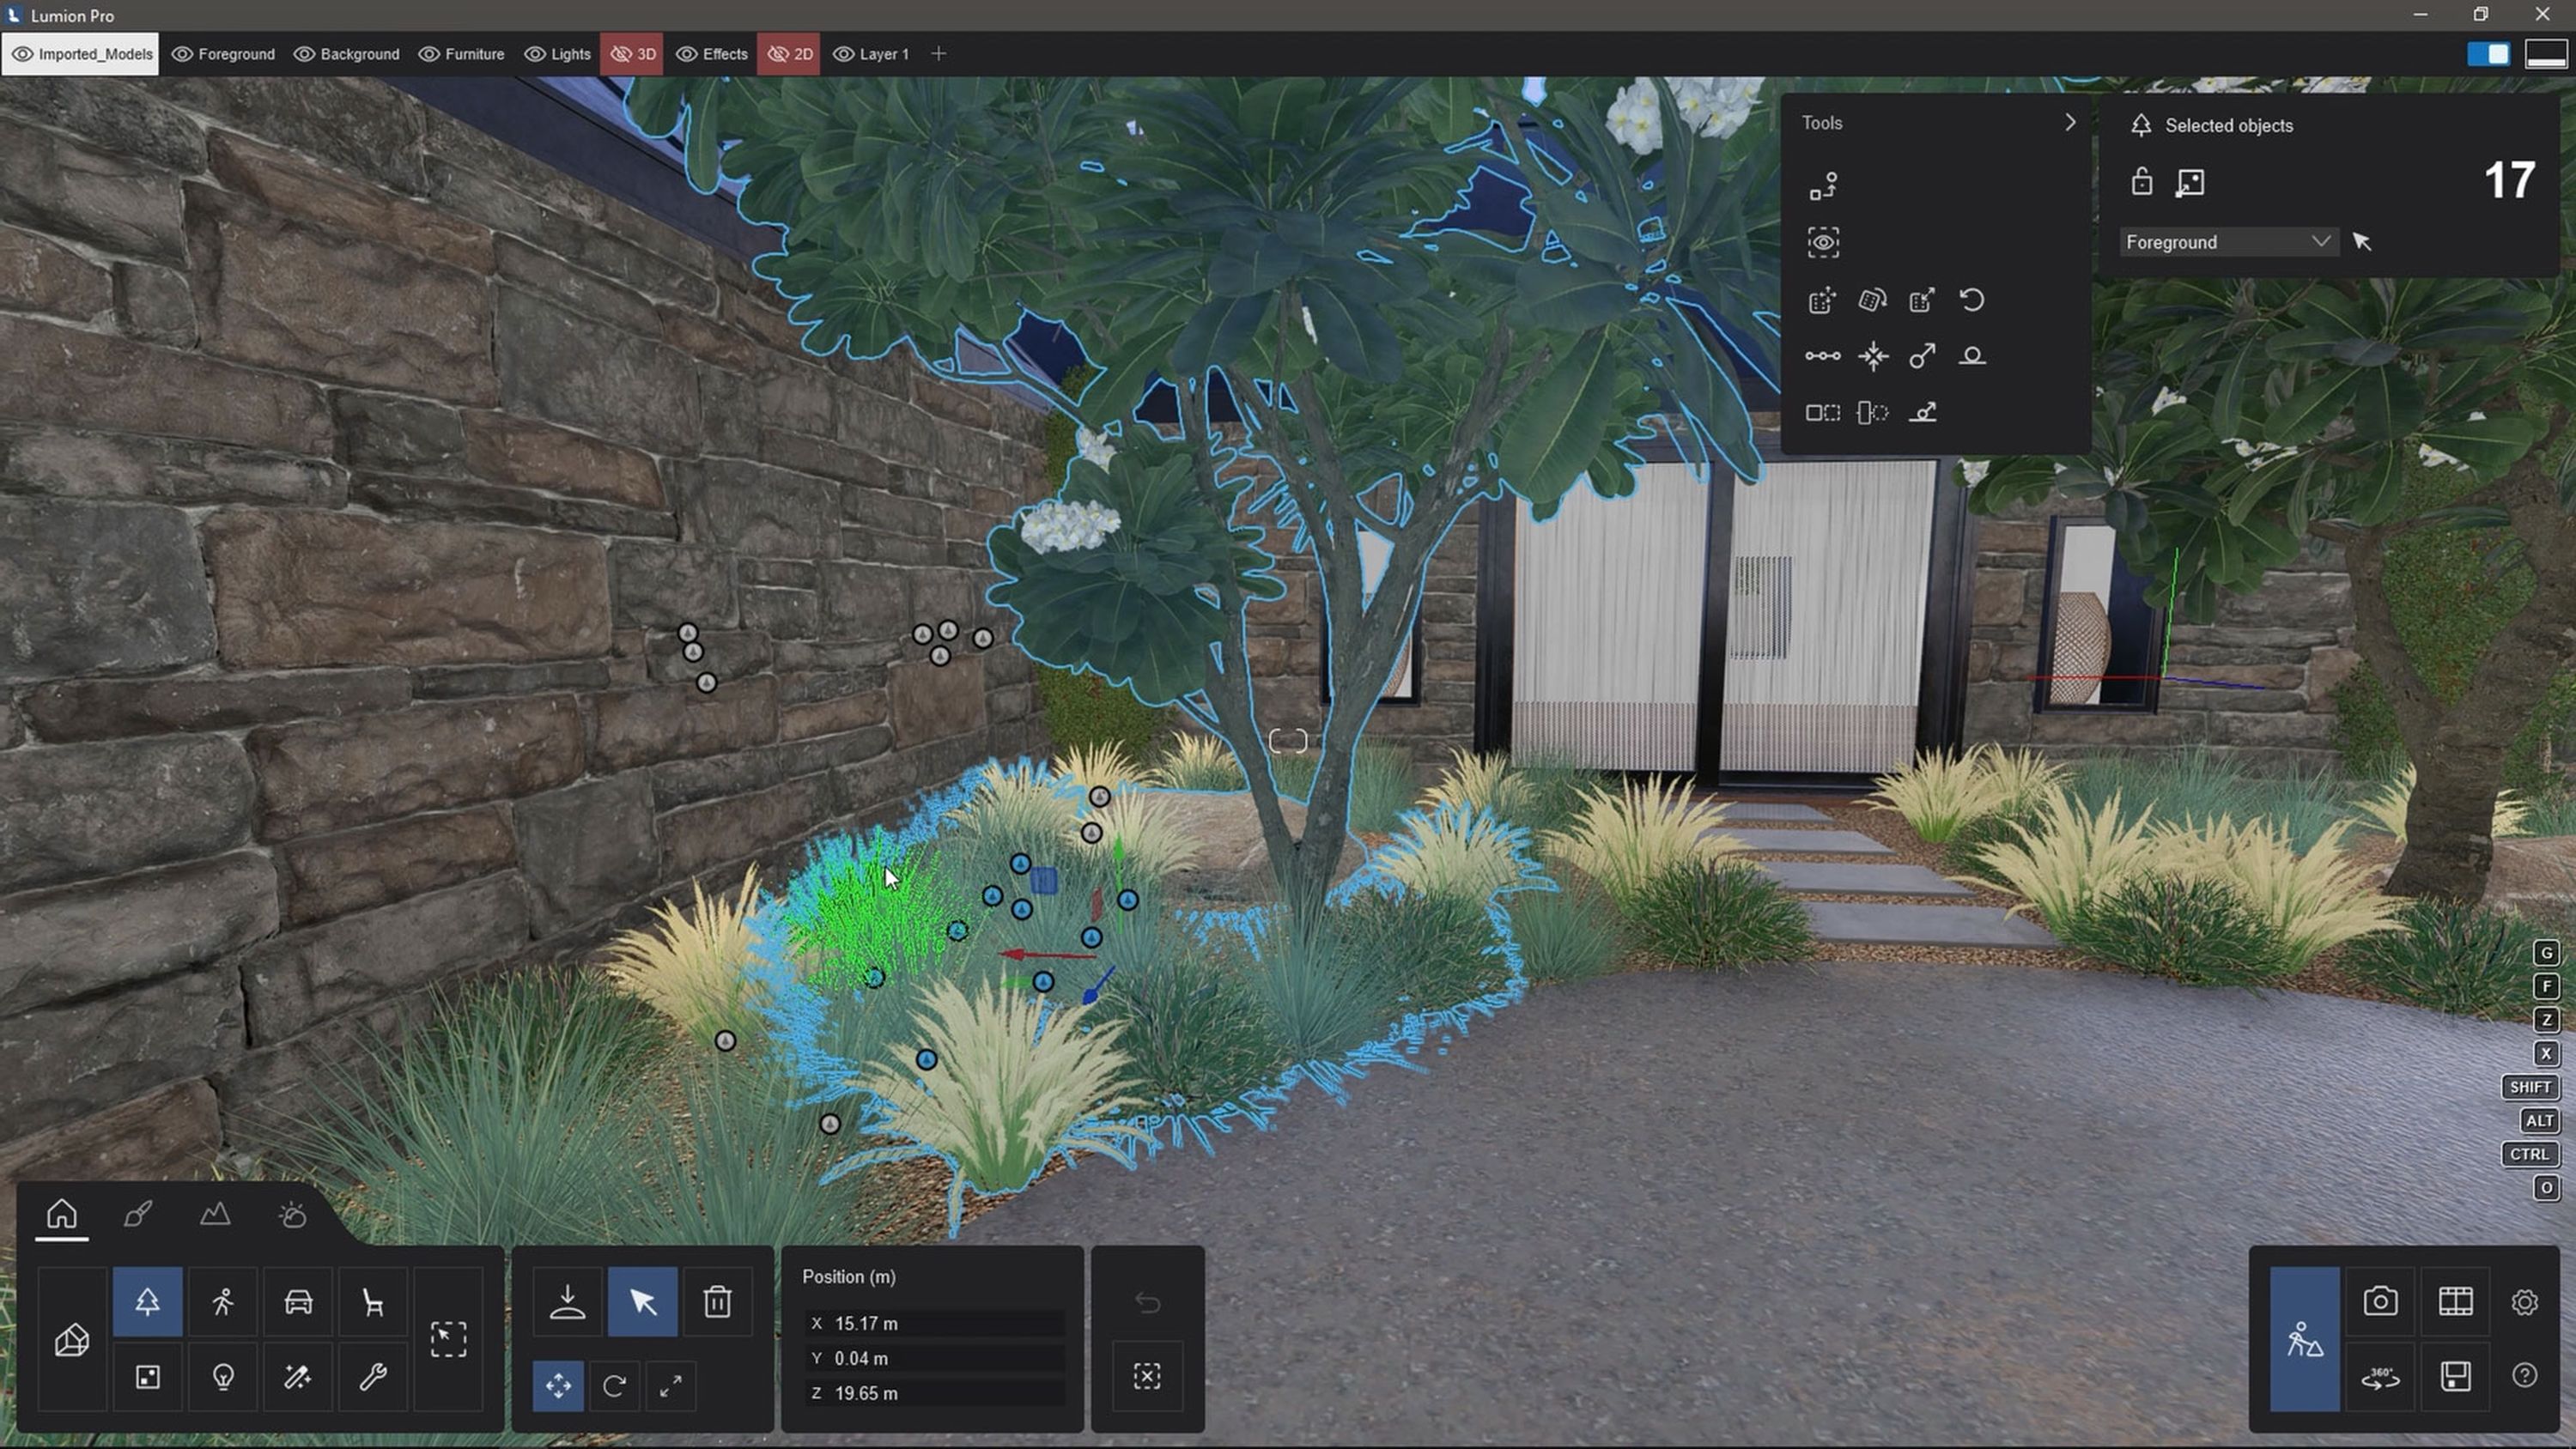
Simply assemble your chosen assets into a group, save it under a unique name, and store it on a shared drive where you or your collegues can easily access it.
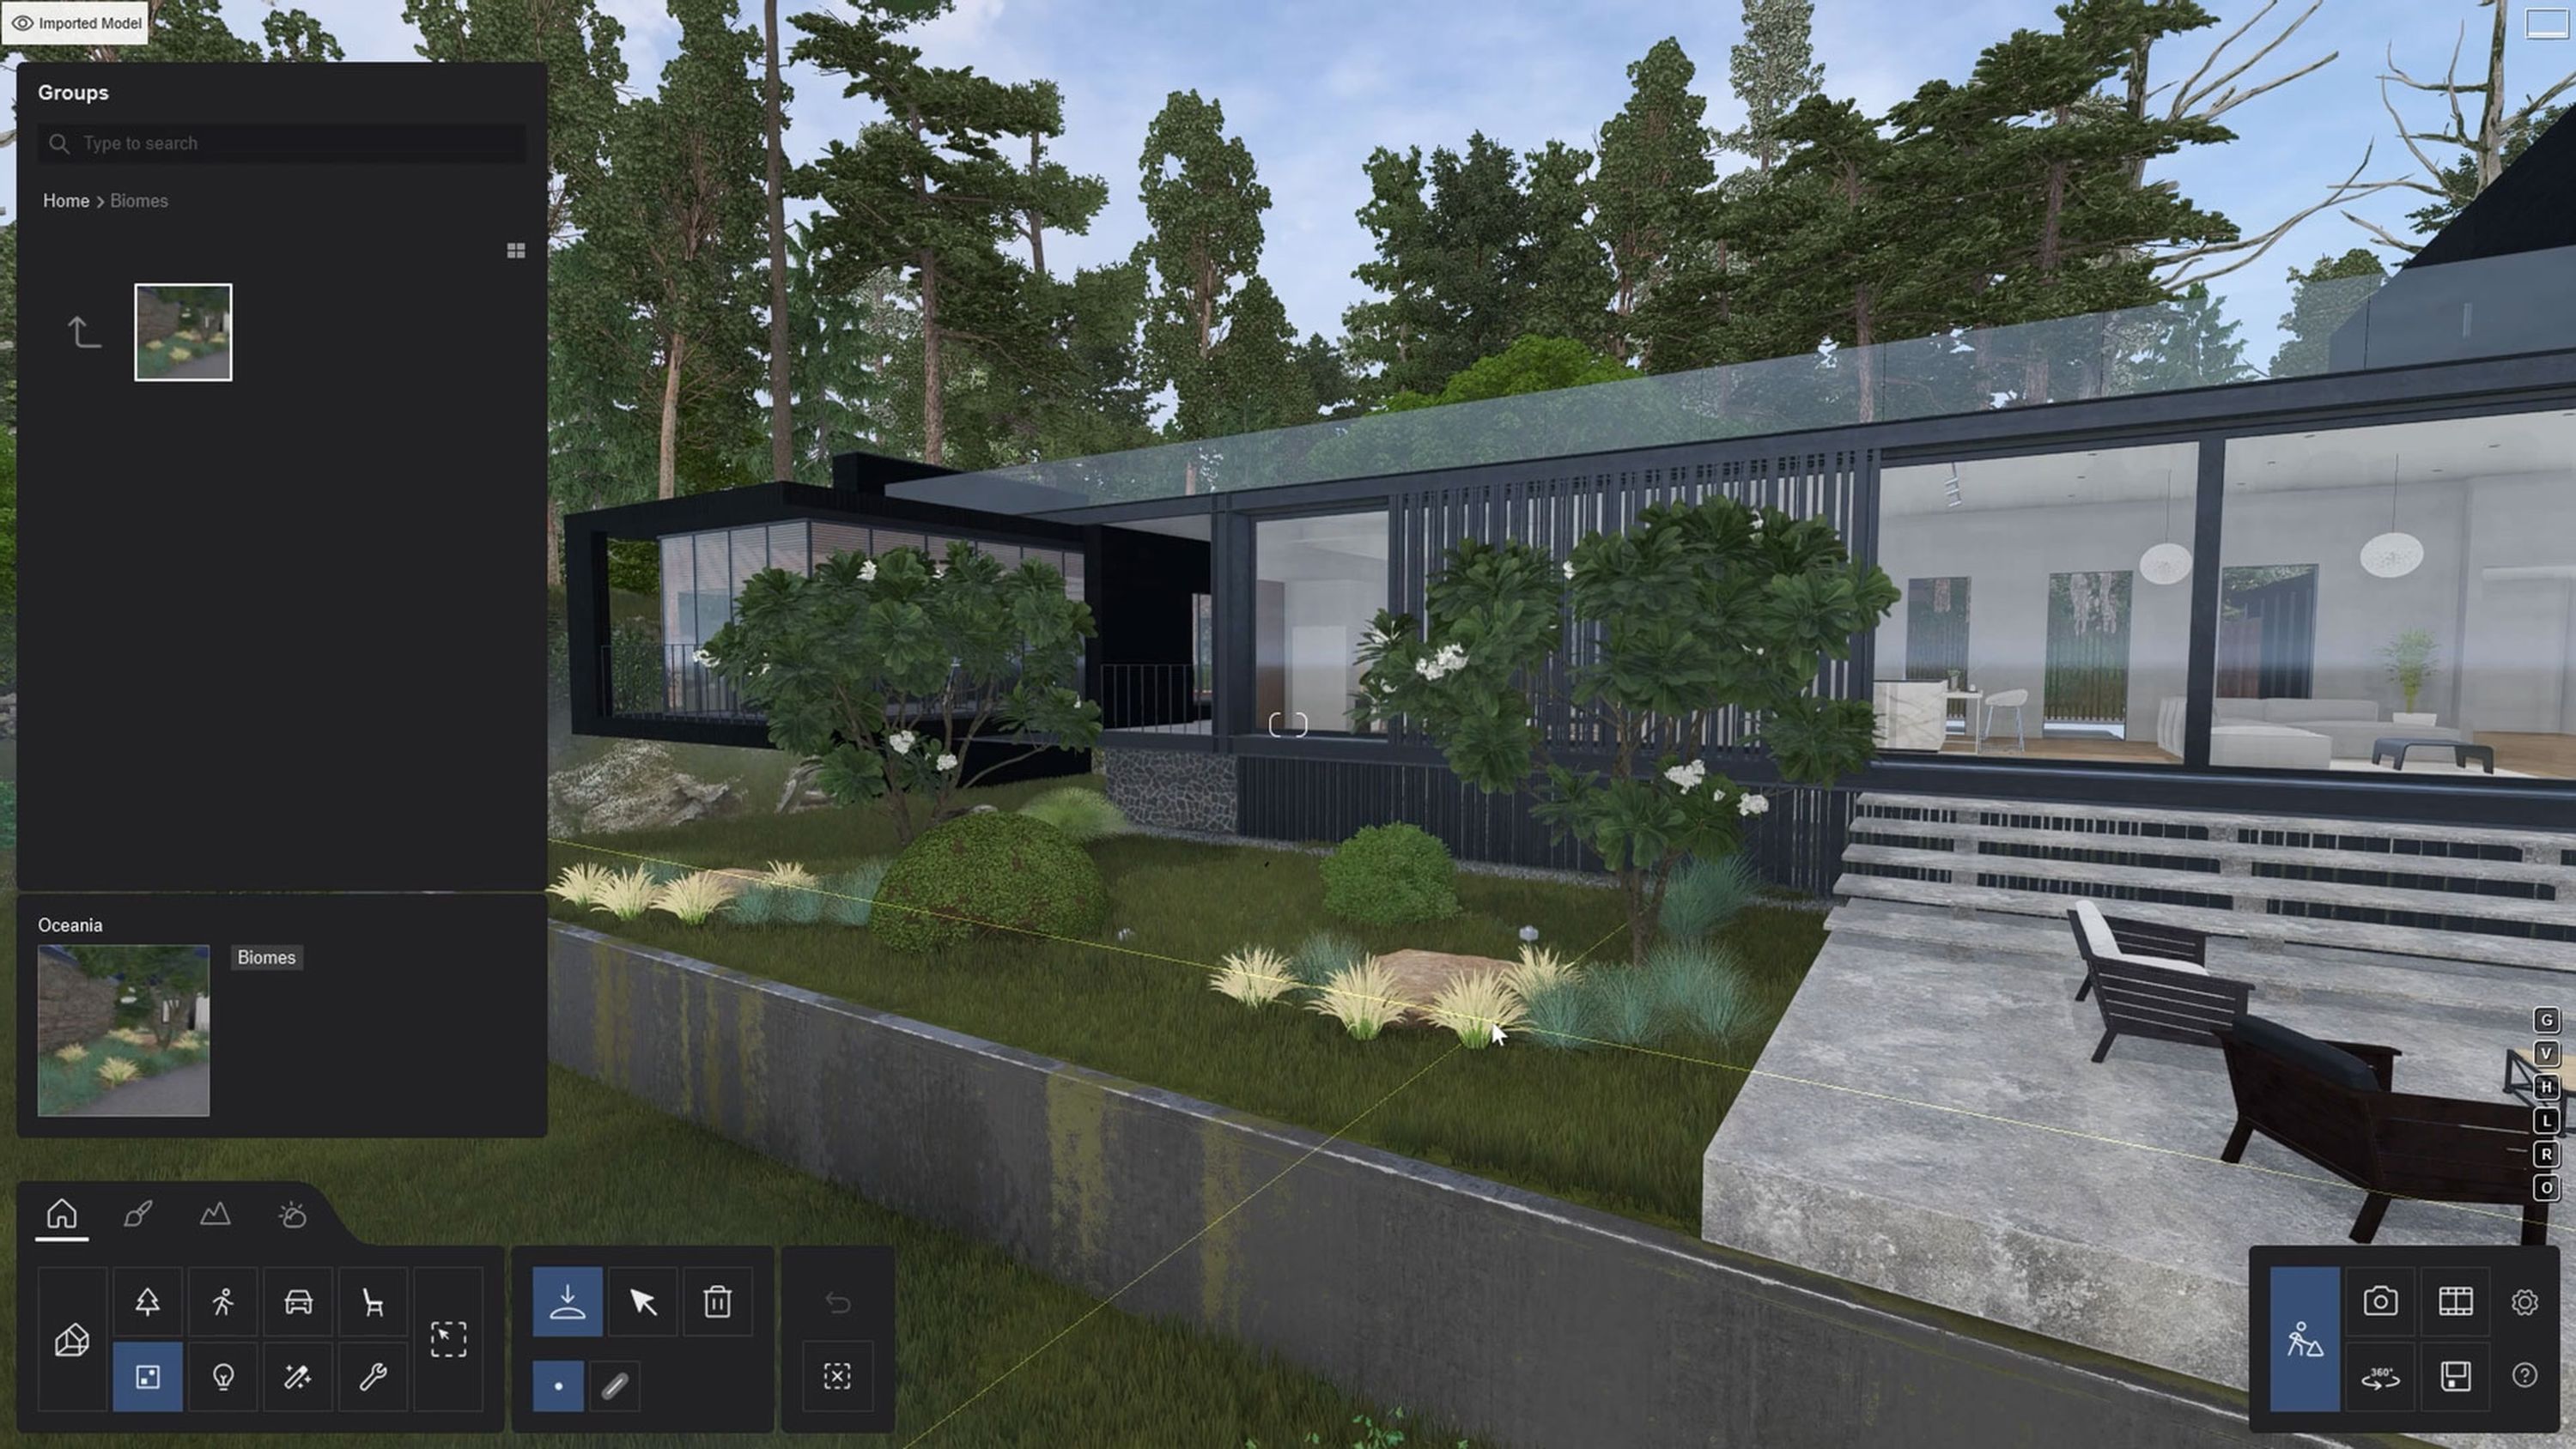
To reuse this collection across multiple projects, head to the asset library, select your group, then place it inside your Lumion project. Once added to your scene, you can then ungroup them and scatter them across your scene as you see fit.
With this quick trick, you’ll not only save precious time but also elevate your designs with a signature touch that sets your work apart.
Looking to experience Lumion?
No problem—you can put these efficiency tips to the test for free with a 14-day Lumion Pro trial.
Tip 3
Master material sets
The chances are, you have a common list of materials you use within almost every project. Quite often you'll find yourself using glass, grass, concrete, or asphalt. Just as with nature and entourage items, there’s no need for you to search for the same materials again and again.
Next time you assign material properties within a scene, use the option to save that material to disk. Storing your common materials to a shared drive will allow your entire team to use them too.
Applying these materials in future projects is as easy as a few clicks: select your target surface, navigate through the menu, and load your saved material.
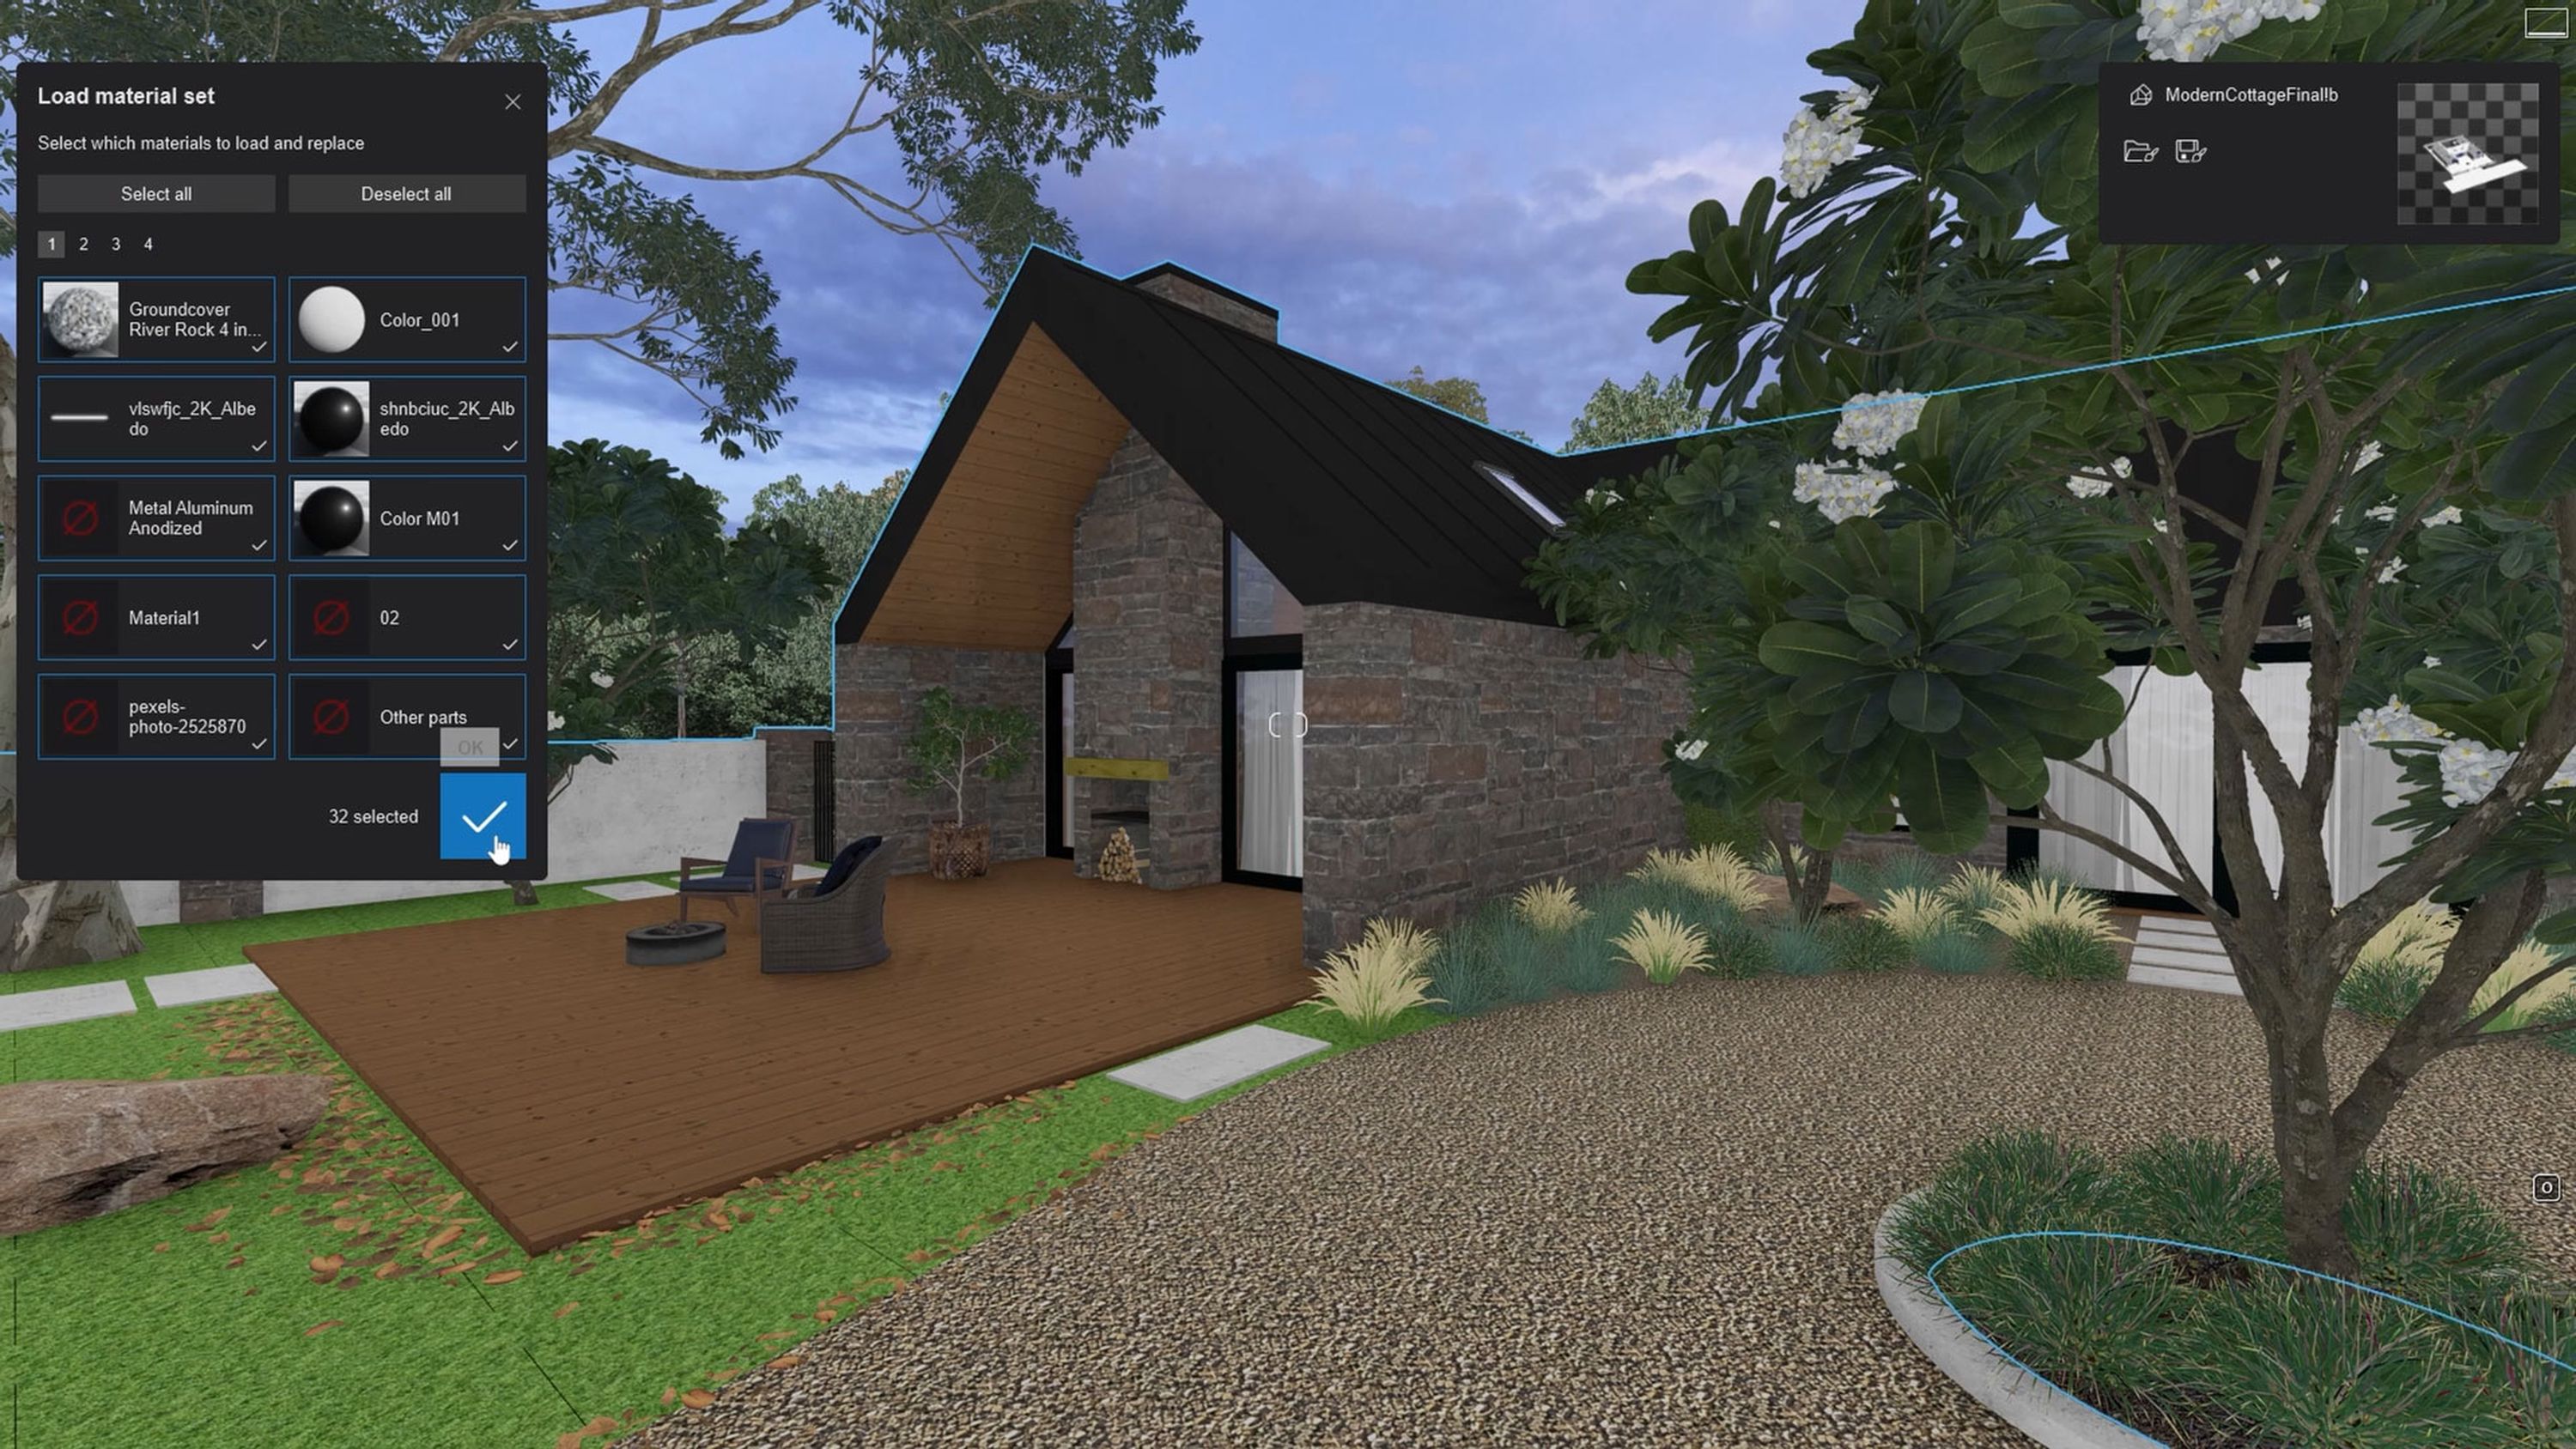
But why stop there? If your team shares material libraries within a modeling program, you can link those material names to Lumion and save them all as a material set. By keeping material names consistent between your CAD software and Lumion, you can create a seamless bridge that will speed up the entire model-to-render process.
The real magic happens with Lumion's LiveSync feature. With your modeling program active, click on LiveSync and load your material set. Your curated set of materials will be instantly assigned to your Lumion project with vibrant, physically based rendering (PBR) properties.
This tip isn't just about saving time; it’s about enhancing collaboration, consistency, and the overall quality of your projects.
Tip 4
Hone in your style with custom effects
If you're aiming for a distinctive and consistent visual style to set your projects apart, a custom effects (FX) stack will give you a strong foundation to build from.
Imagine you've pinpointed the perfect combination of real skies, 2-point perspective, reflection, color correction, depth of field, and precipitation. If you'd like to reuse a similar style across projects, simply save these settings as a custom FX stack that you and your team can easily reload and apply to new scenes. This visual shorthand will save you precious time and help eliminate repetitive work.
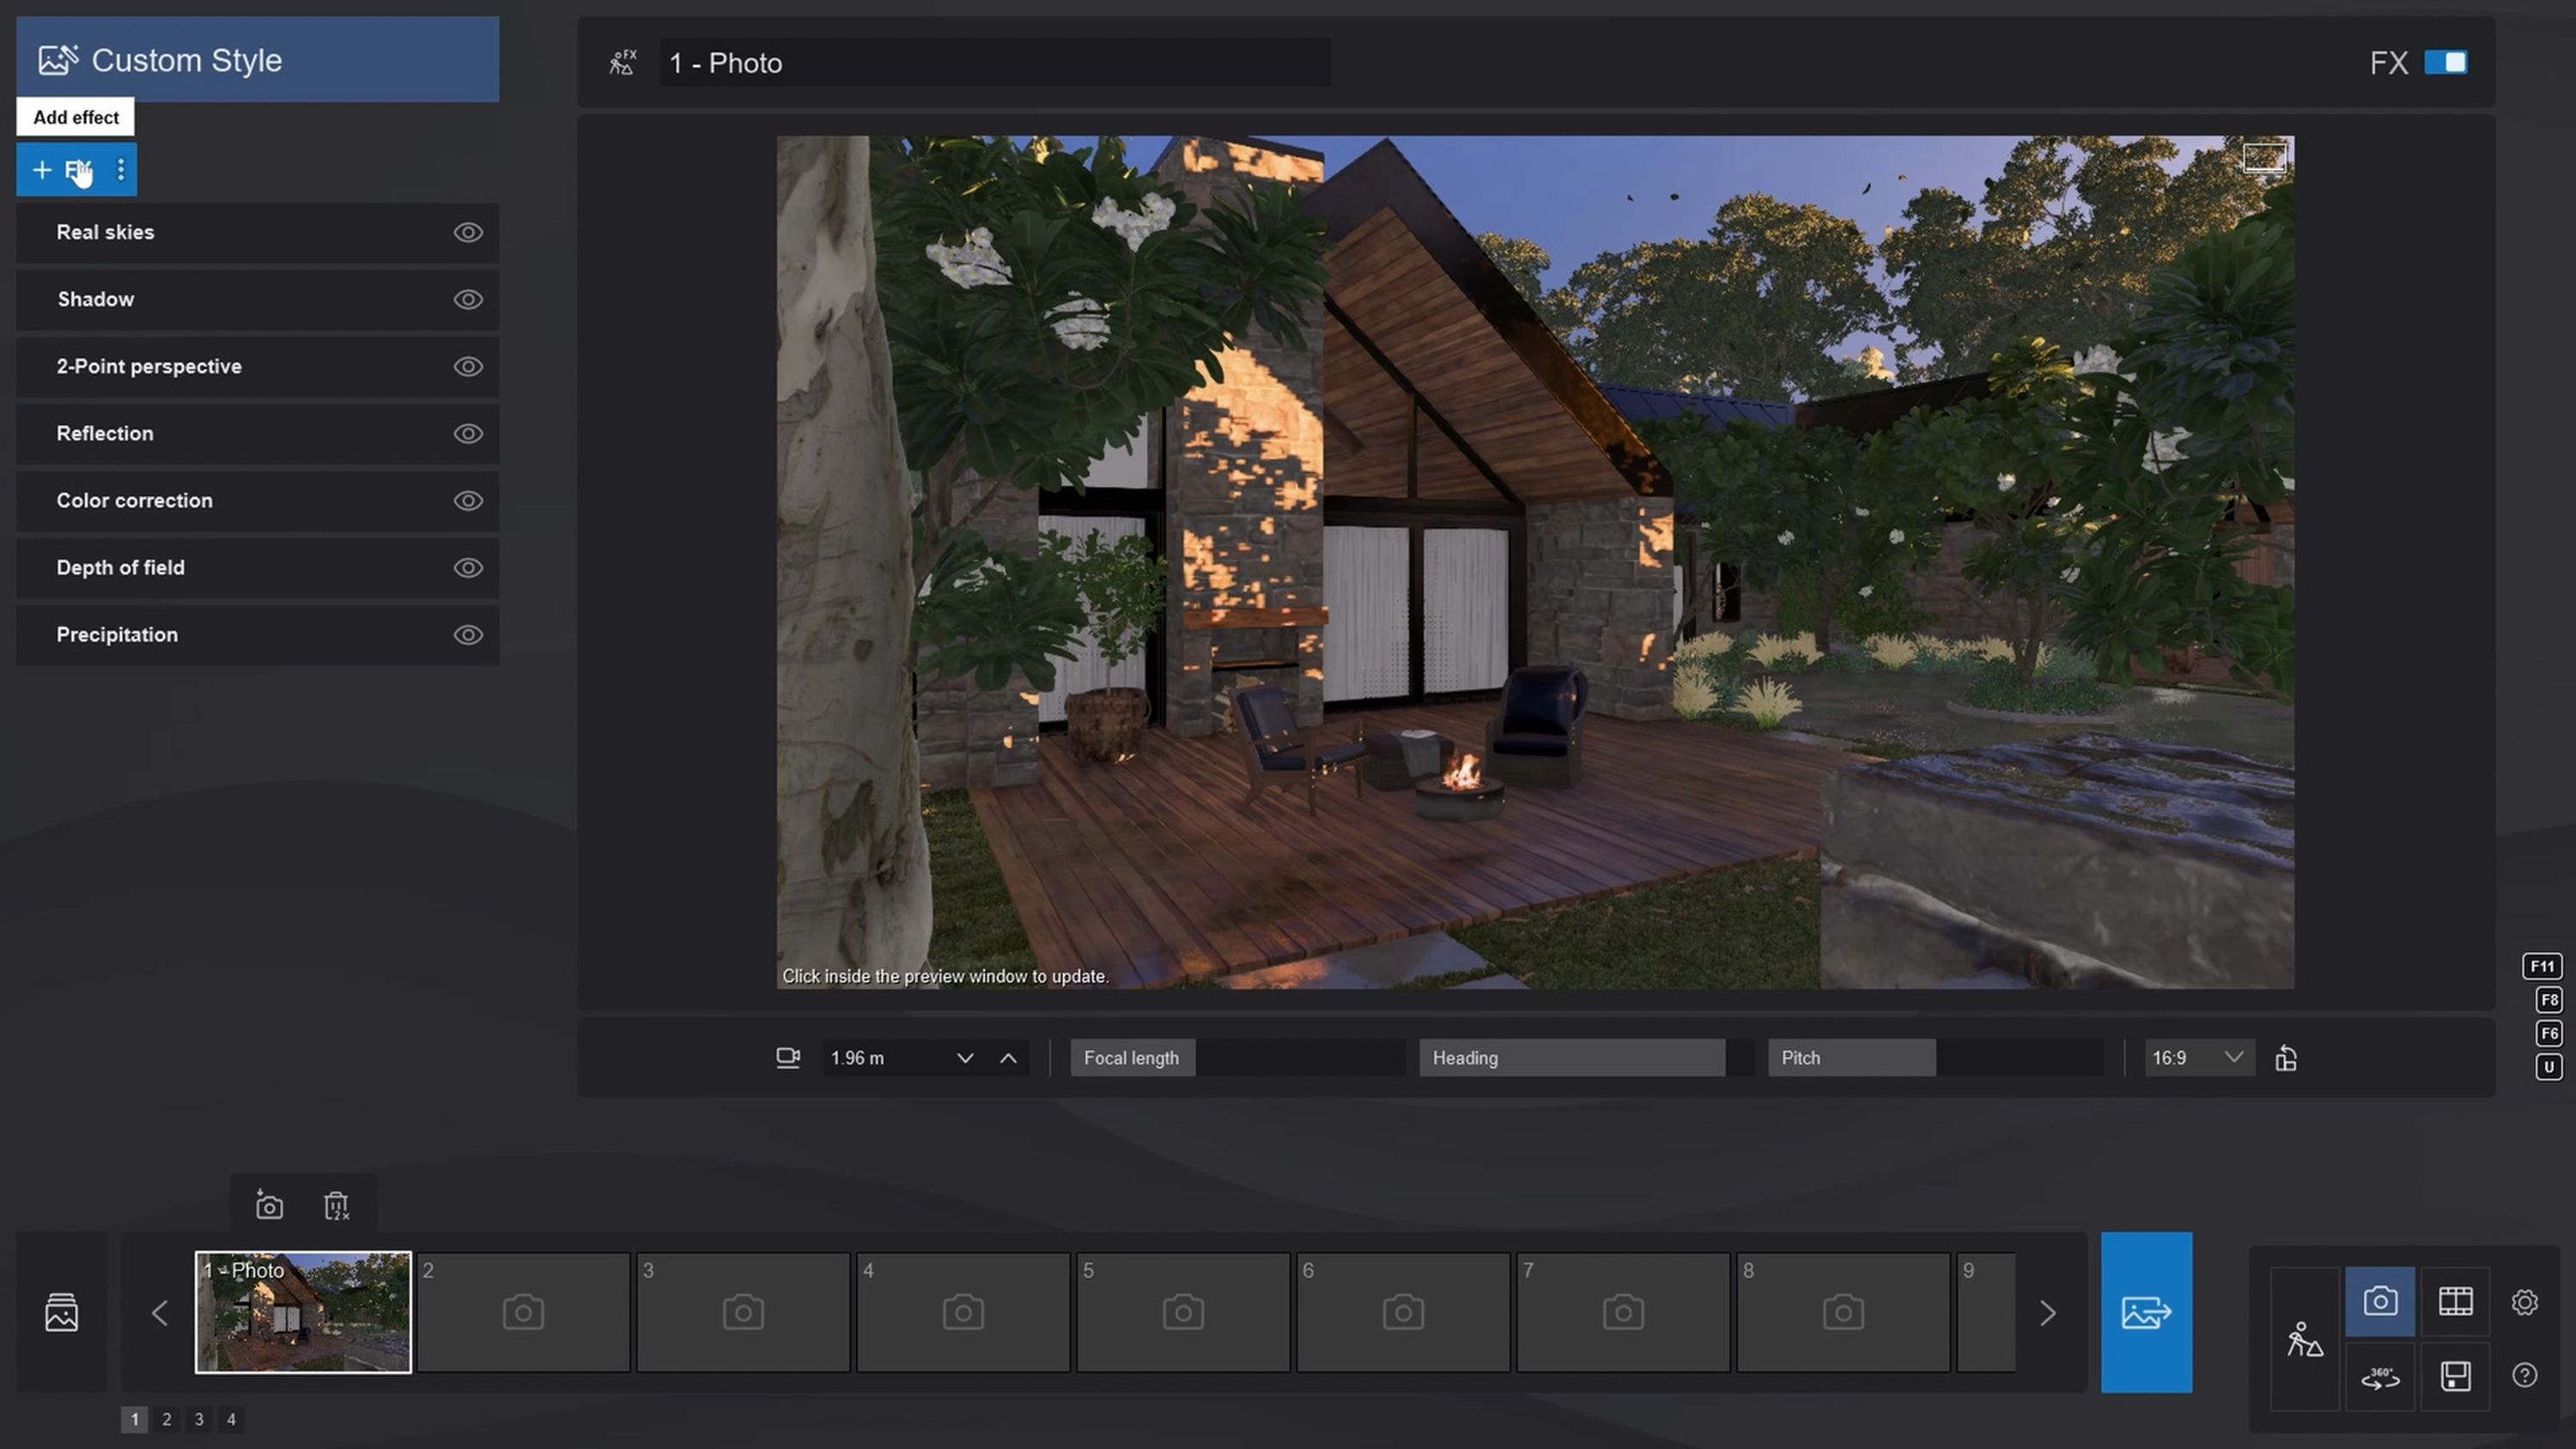
Integrating a custom FX stack into your project is just the beginning. Take things further by incorporating the layer visibility effect to create swift transitions between the different elements in your scene. For example, you can quickly hide 3D entourage items in stills, or 2D entourage in animations.

With custom FX stacks you can forge a signature look for every scenario—be it the serene ambiance of night scenes, the vibrant energy of day scenes, or the dynamic mood of seasonal weather conditions. By crafting dedicated FX stacks for these themes, you ensure that projects resonate with your unique aesthetic.
4X your efficiency
When combined, these simple yet effective tips have the power to transform your workflow, making the whole scene building process faster and more enjoyable:
Kickstart a project from a template with built-in layers to help you better organize assets and manage complex scenes.
Create material sets for your most frequently used textures and apply them to your scene with just a few clicks.
Group and save your preferred items to easily load and reuse them across multiple projects.
Craft your custom FX stack that will give your projects their signature look.
These four shortcuts can really lift your Lumion workflow. By incorporating them into your routine, you'll find yourself working not just faster, but also smarter and with greater efficiency.
Have fun rendering!
