A quick guide to building a green wall in Lumion
Follow these simple steps to create a life-like vertical garden
Walls that live and breathe
Green walls have become incredibly popular within architectural design, both for their aesthetic charm and environmental benefits. These vertical gardens are not only eye-catching, they also pack a punch for the environment. Green walls can help to improve air quality, insulation, and overall well-being for users of a building, making them a sustainable and valued addition to modern architectural practices.
For designers and architects, they can also provide a refreshing visual contrast while maximizing limited square footage within a design. They provide a simple but effective means of bringing a touch of nature into an urban landscape and creating them in Lumion is easier than you might think. Let’s dive in!
Create your own vertical garden
Start creating luscious green walls and much more with a Lumion Pro trial. Activate yours now and enjoy 14 days of unlimited access to all the latest features and content – completely free.
7 easy steps for building a green wall
1. Import your model
As always with Lumion, begin by loading or creating your scene. You can use one of the existing example scenes and import your 3D model or use LiveSync to establish a real-time connection with your CAD software. This allows you to make adjustments to the 3D model at any point in the process and immediately see them reflected in Lumion.
2. Apply materials
Once your model is loaded, move to the material editor and apply all of your project’s materials.
3. Add your base material
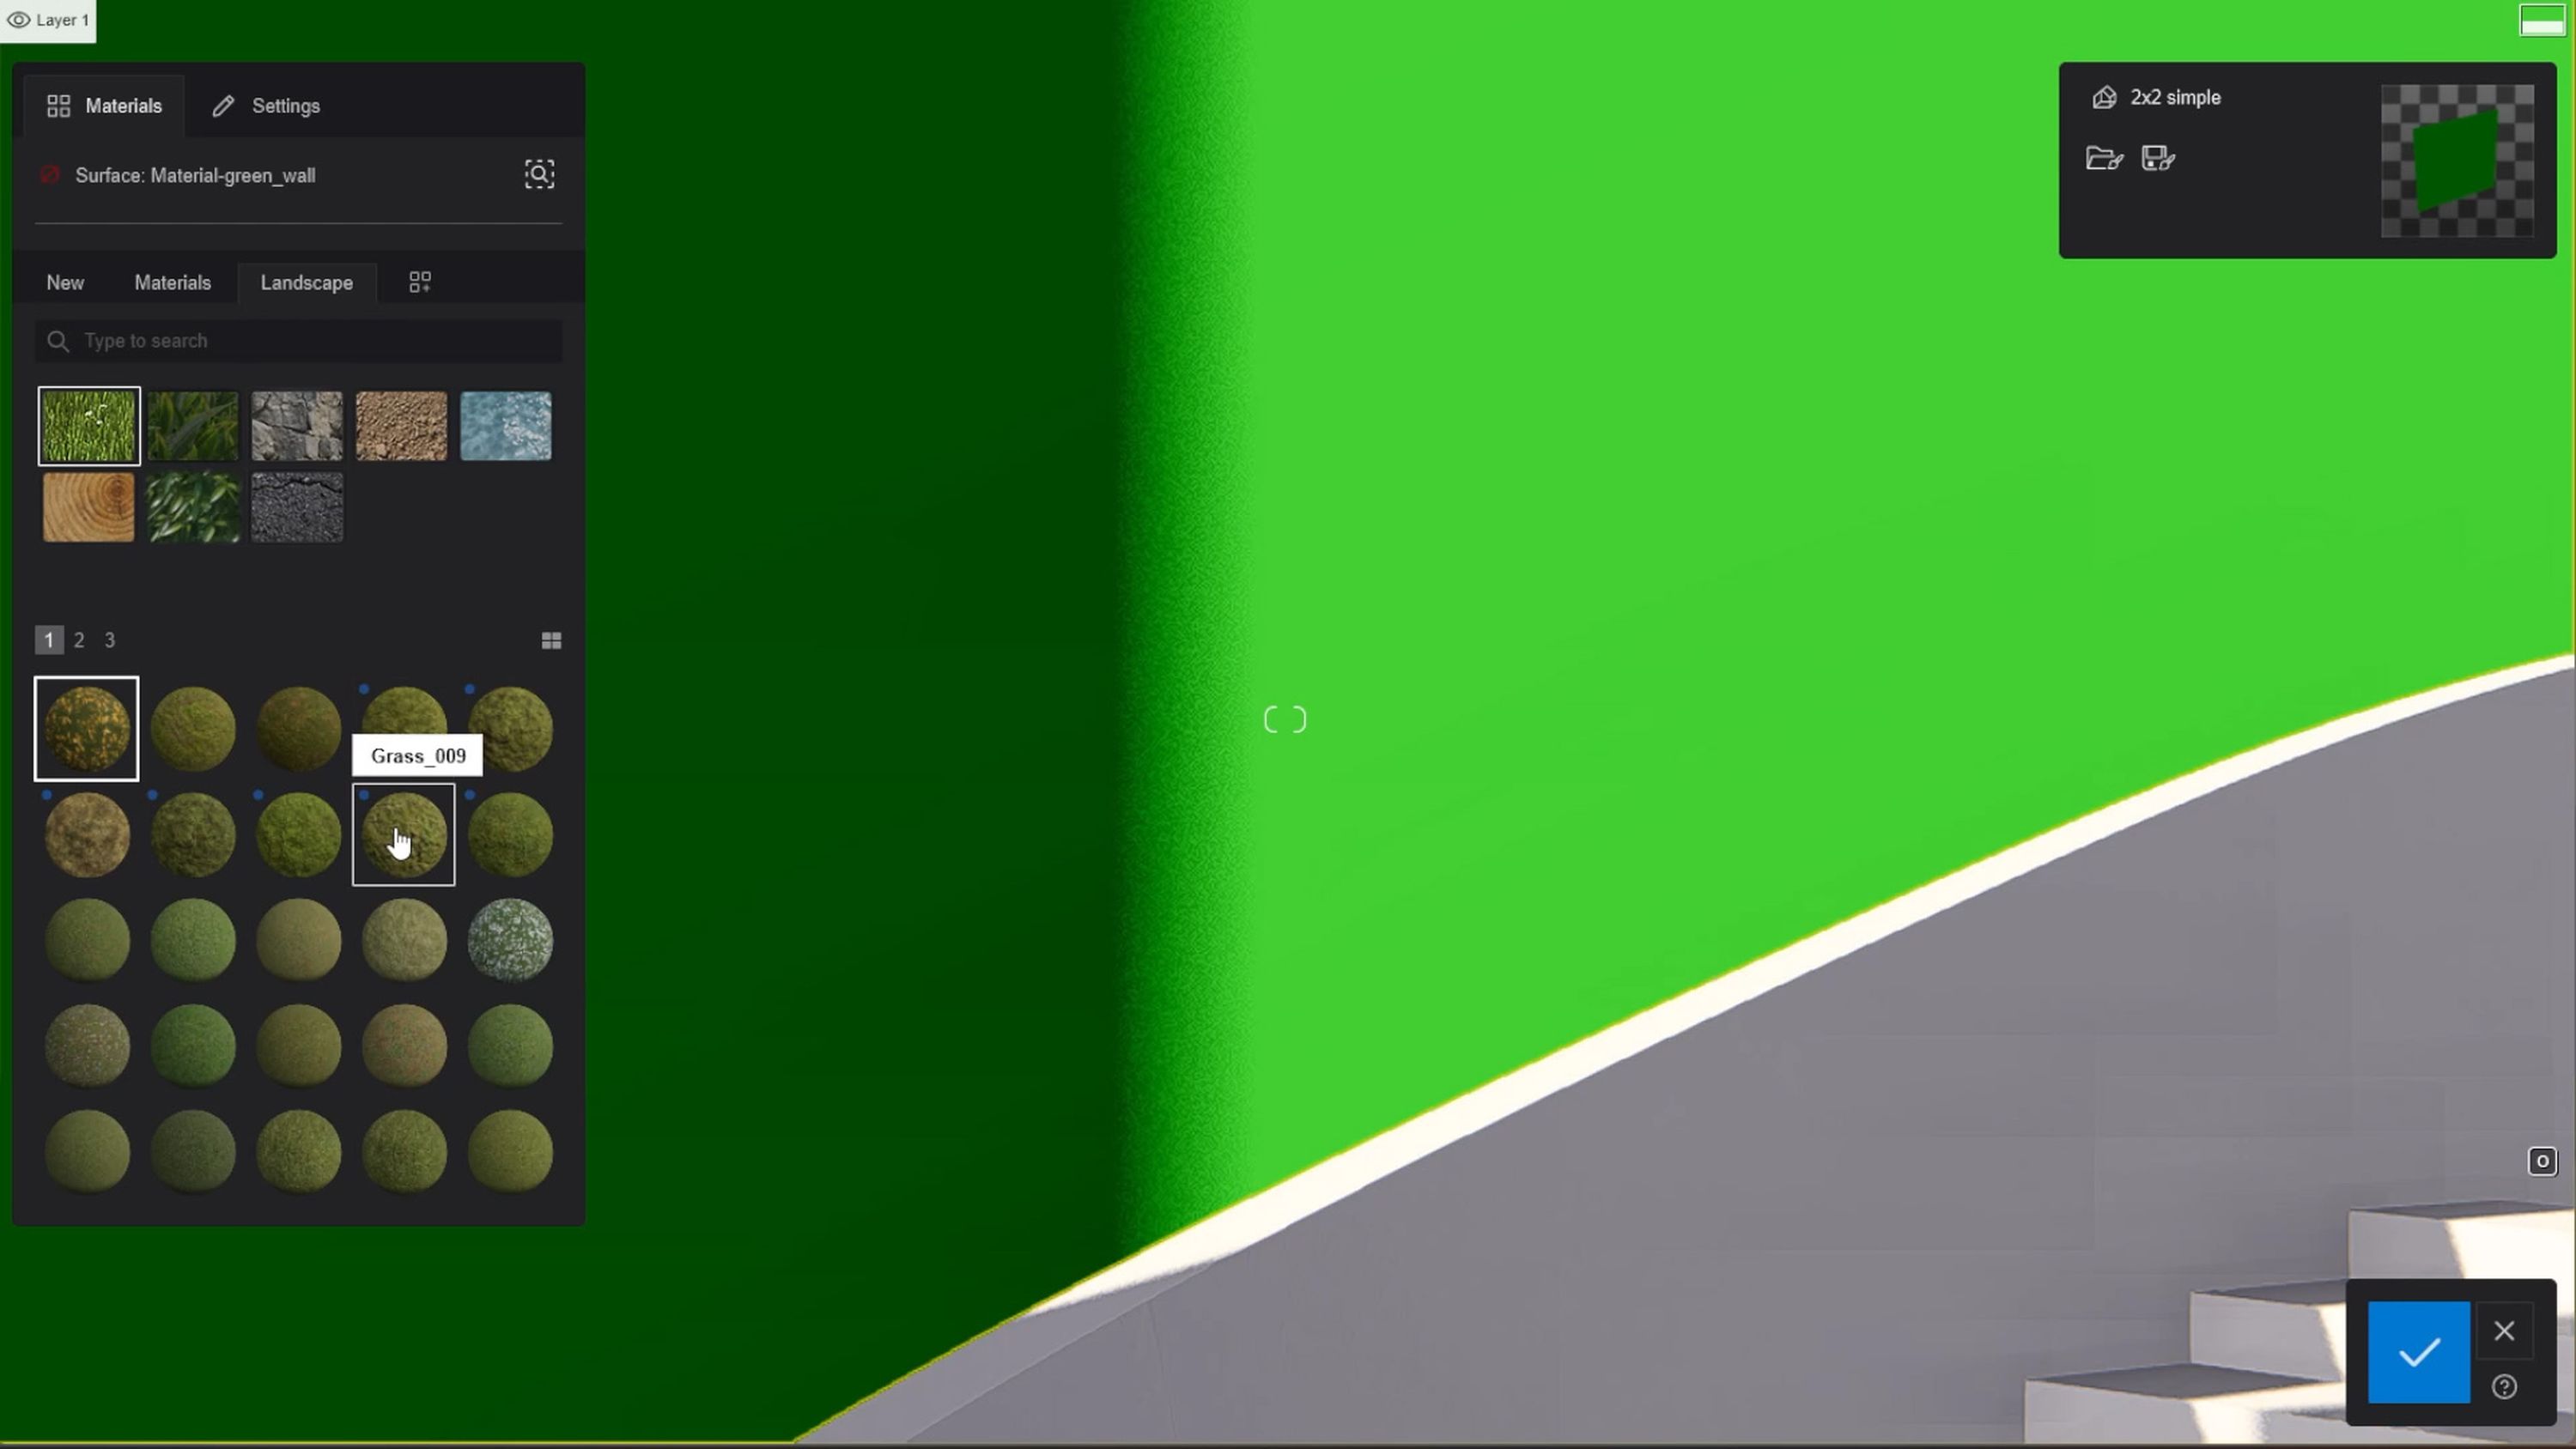
From there, while still in the material editor, click on the surface, wall or lattice that you wish to install a green wall onto.
Click on the landscape tab and then select a 2D grass or soil material from the library options within Lumion to use as a base material.
This will help you to achieve a more realistic and natural look to the green wall and help to cover any gaps that exist between plants. Adjust the map scale to suit your needs.
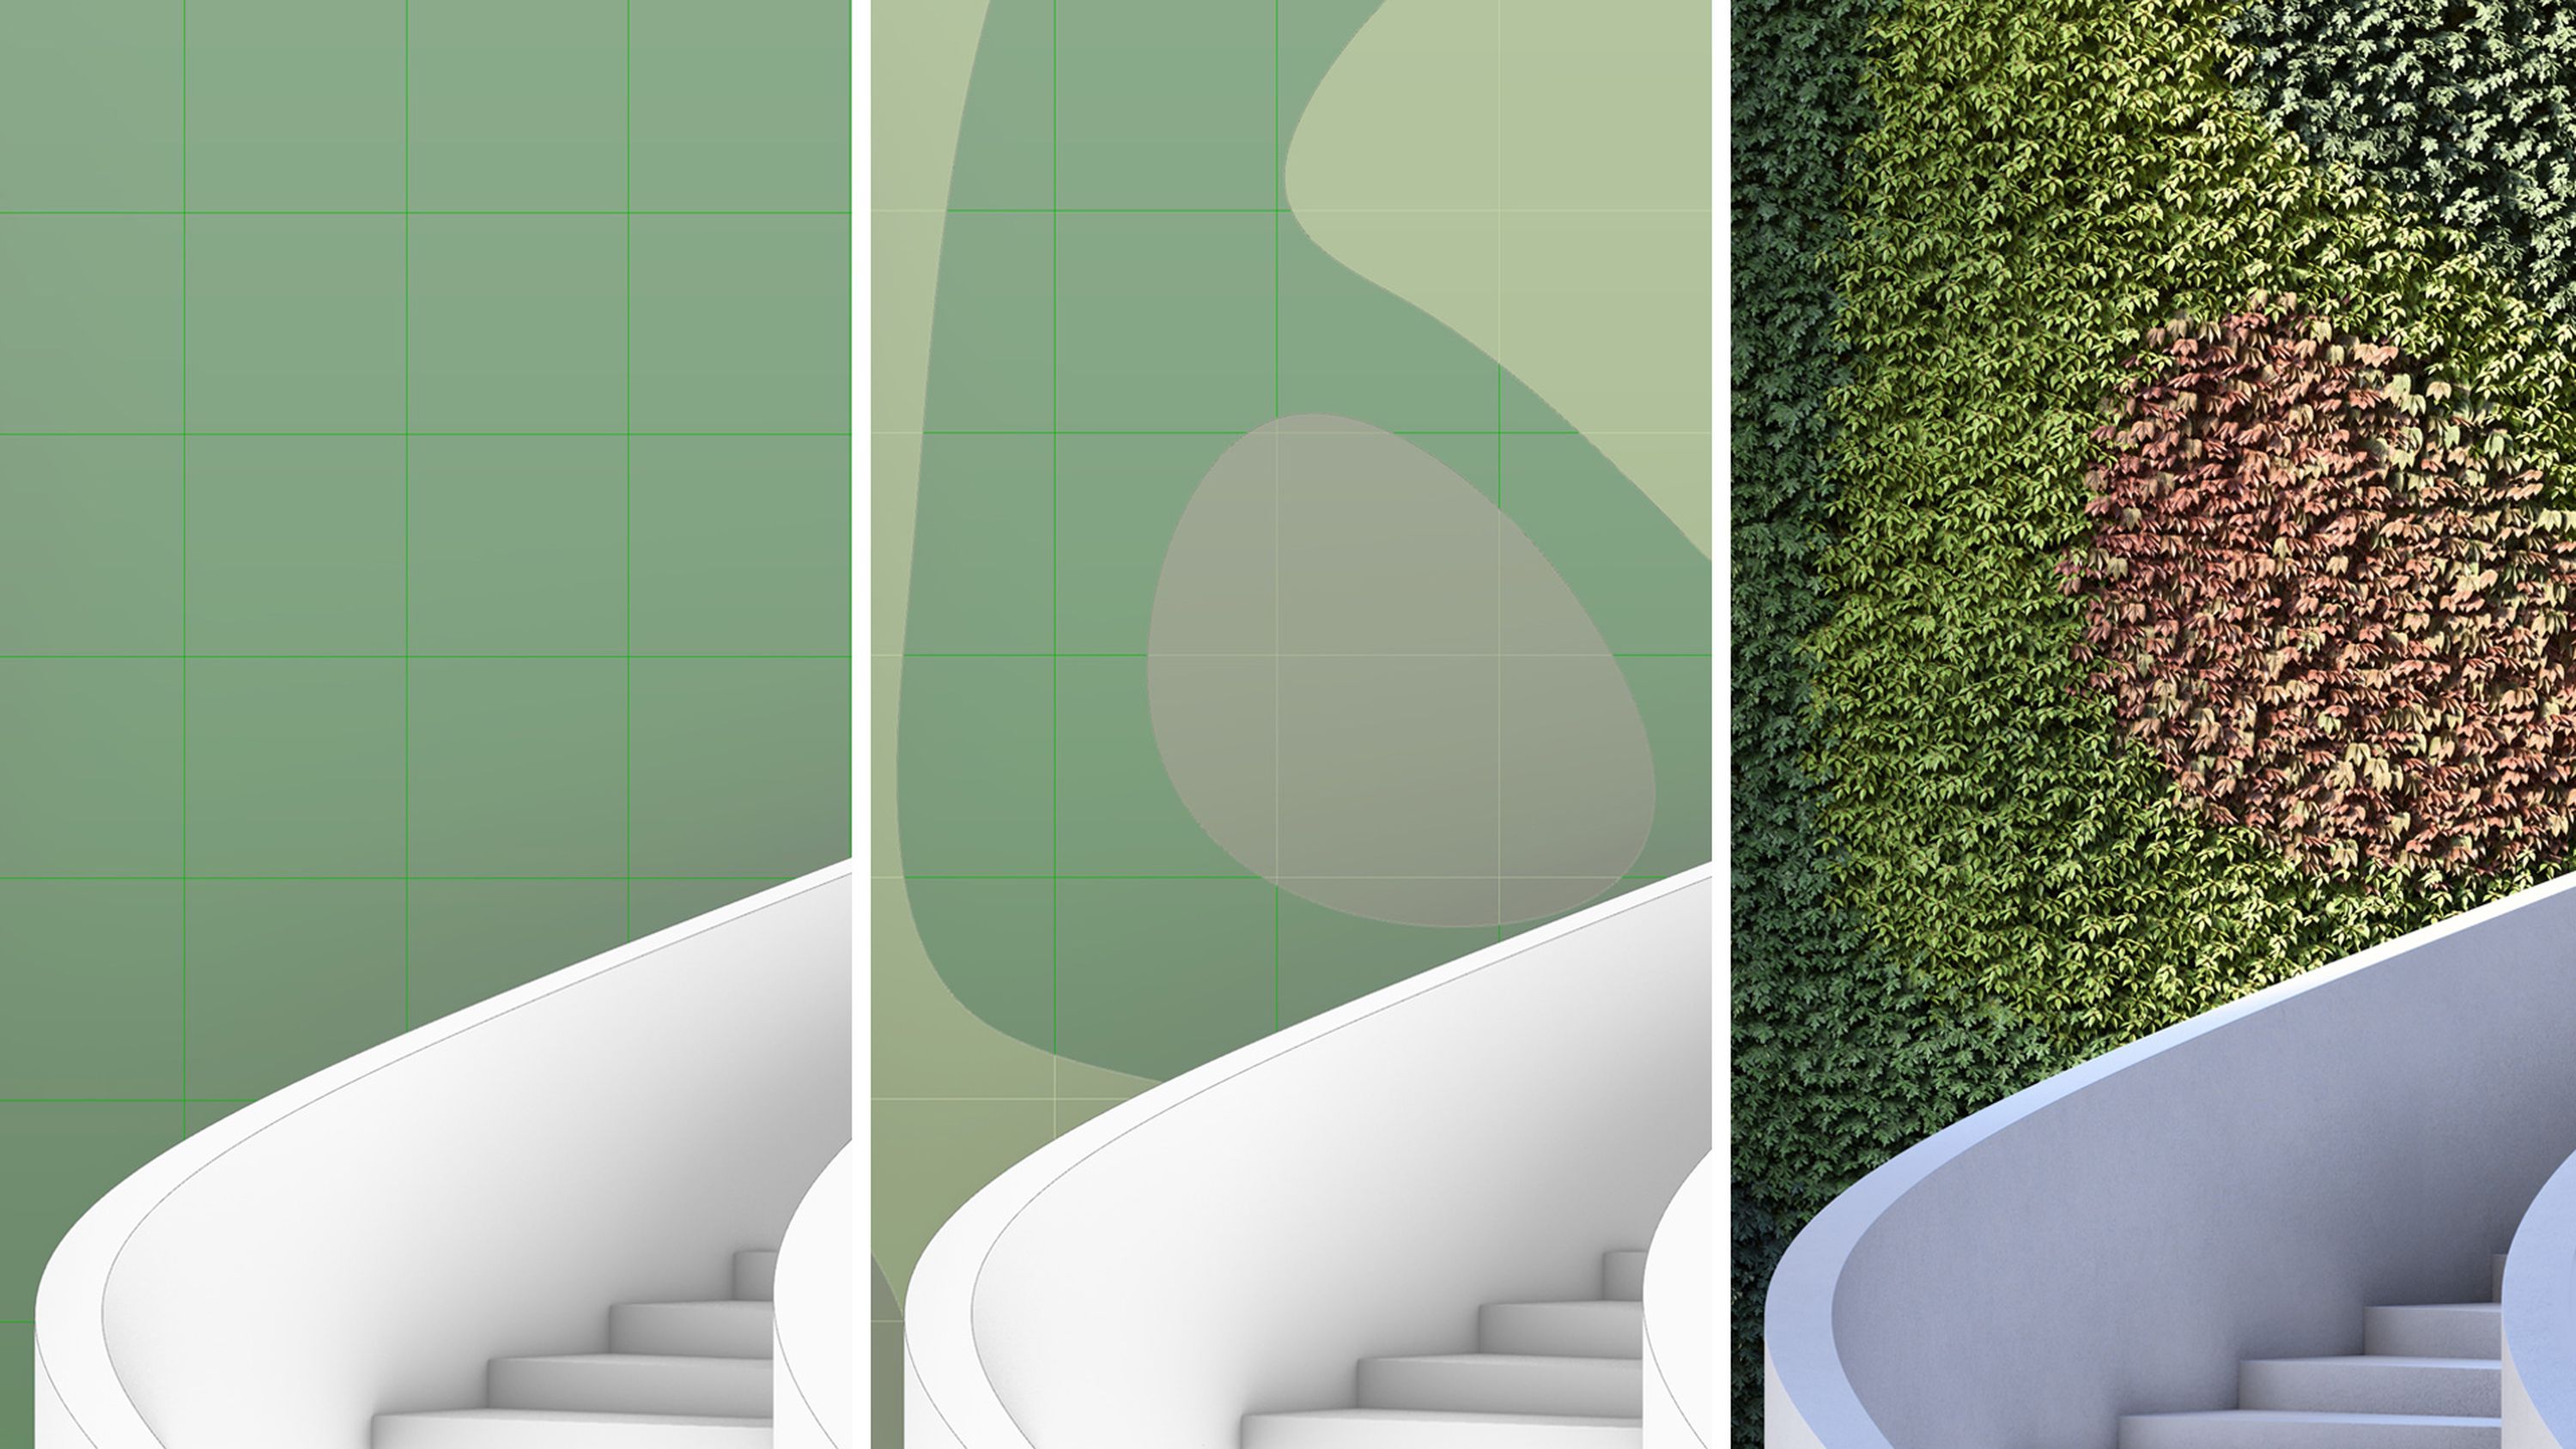
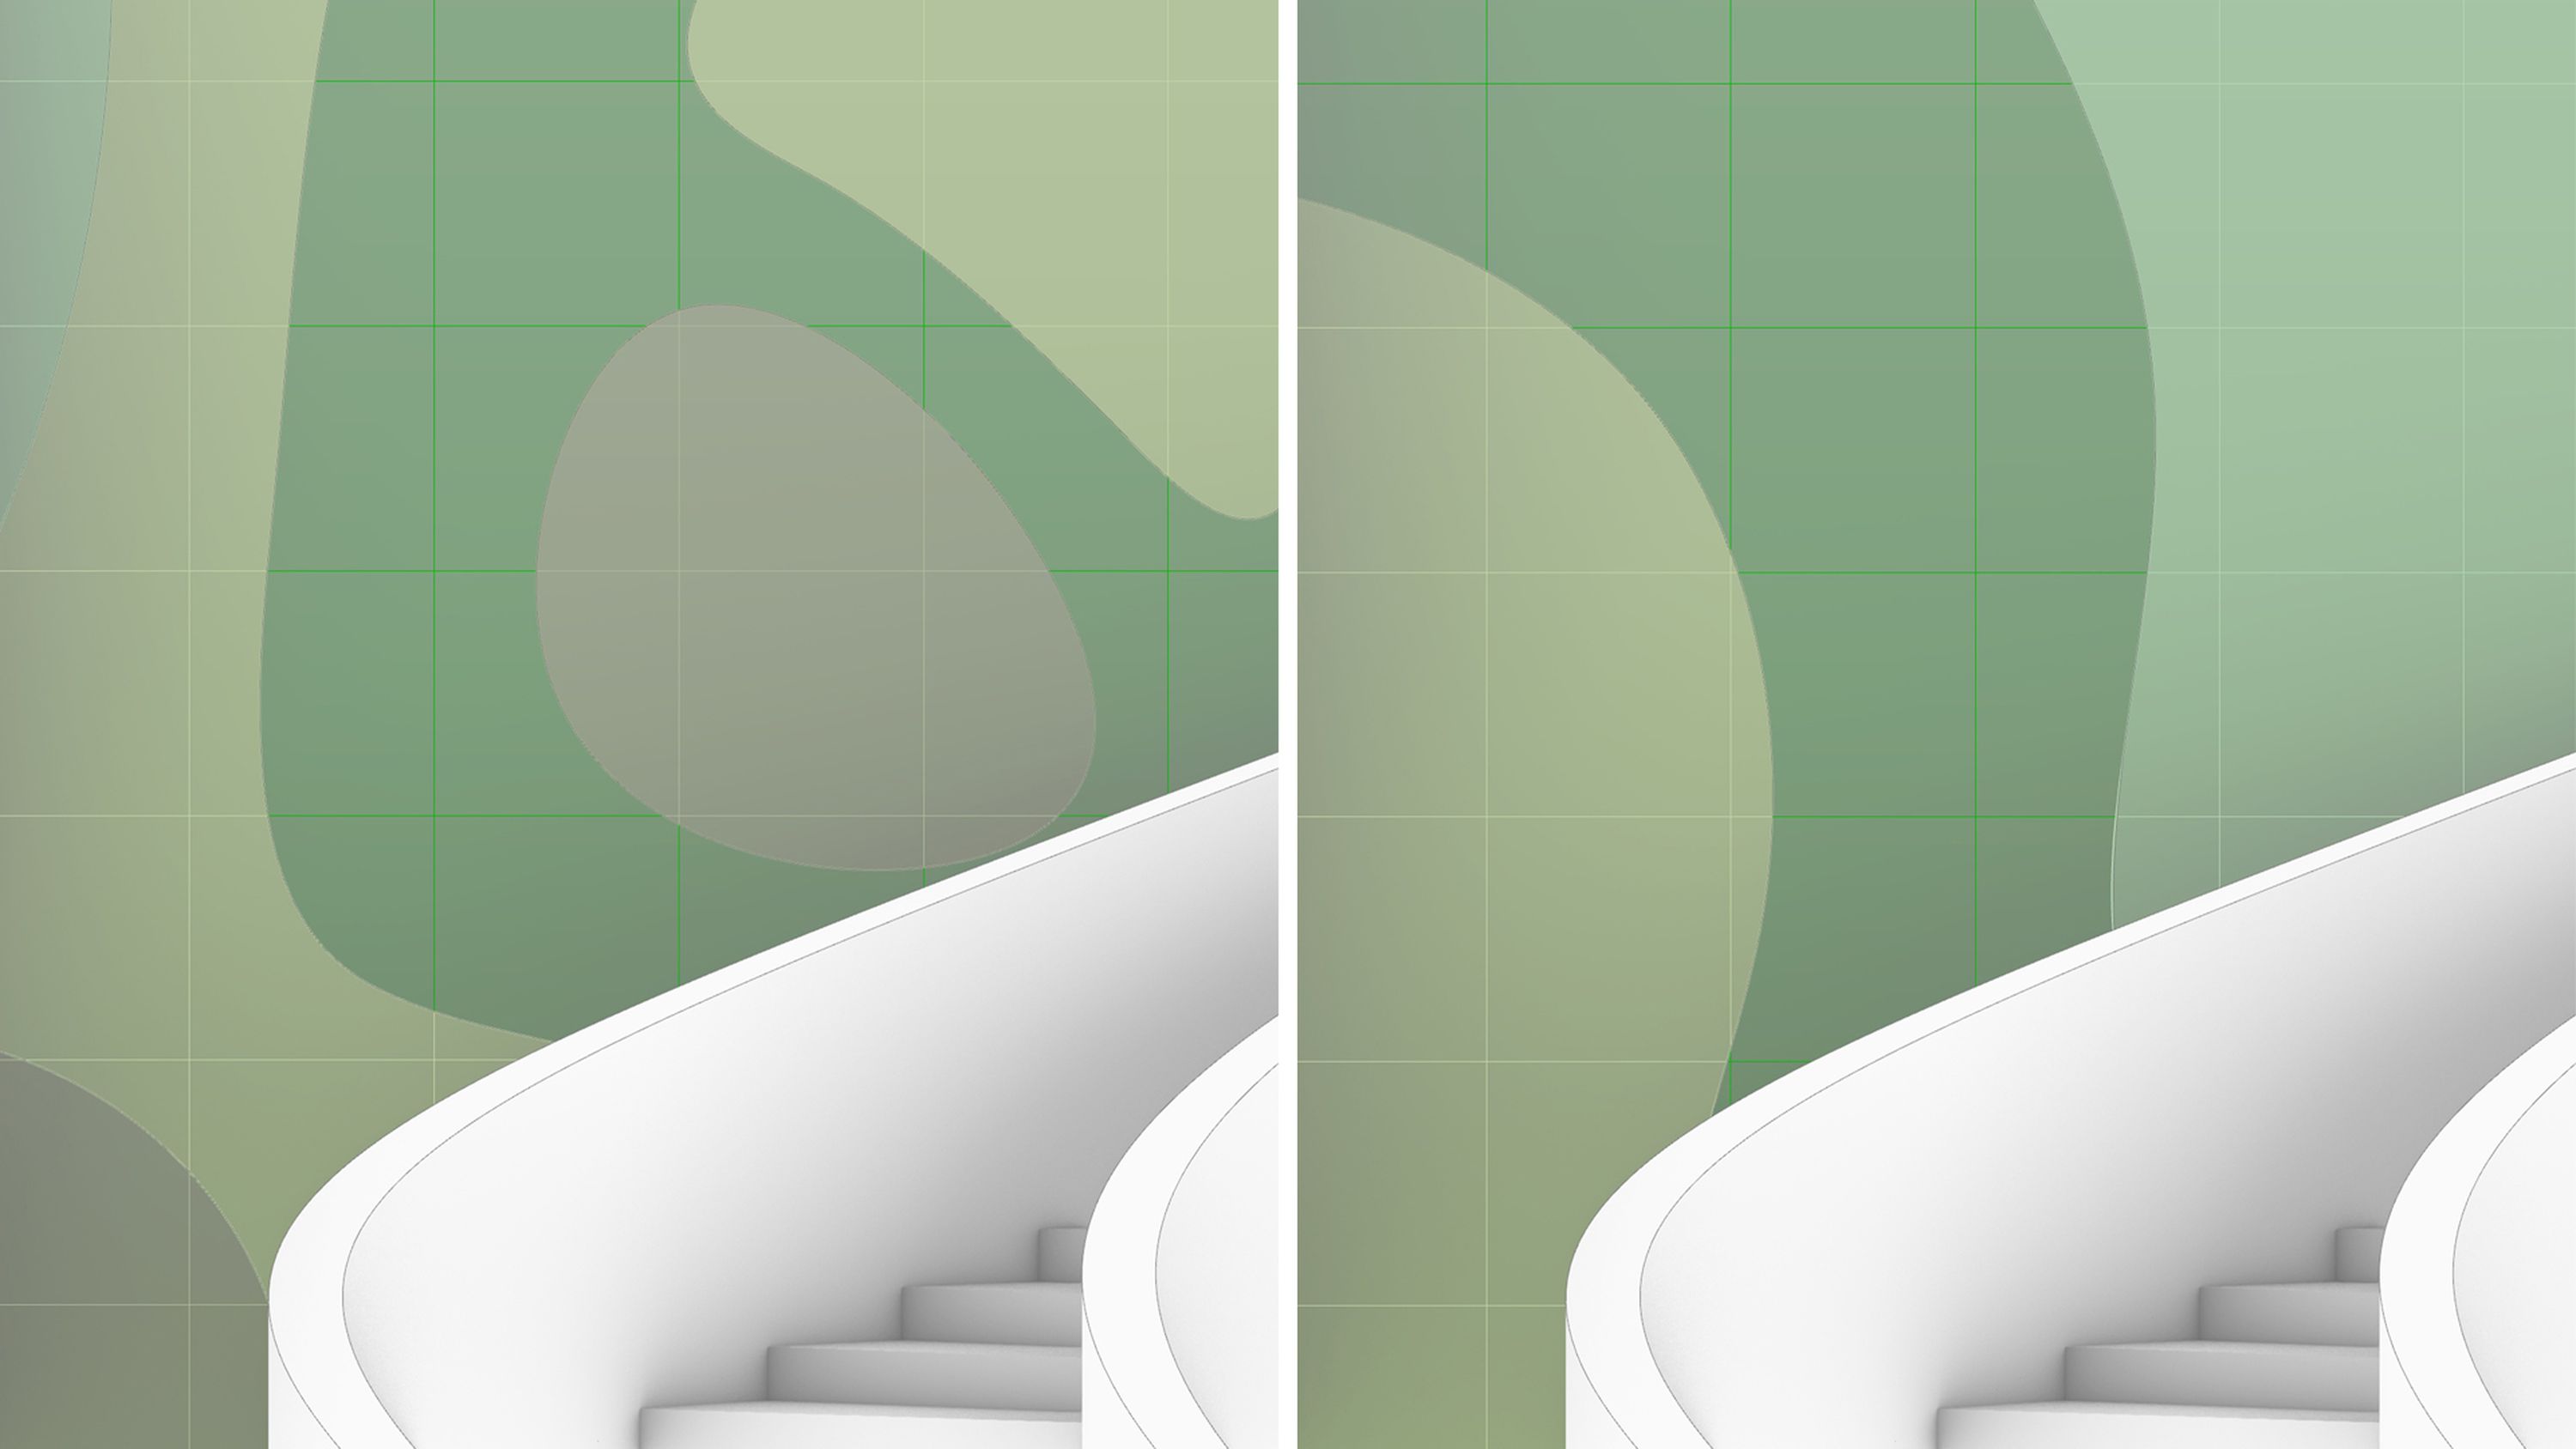
4. Split the surface
To make your green wall more compelling, you can adjust the 3D model by splitting the surface with different curves. This enables you to create a more complex pattern for the foliage instead of the uniform look that the single surface can offer.
With Lumion LiveSync enabled, you'll instantly see any changes to your model update in Lumion.
5. Add foliage
Click on material settings and then on show more options within the pop-up menu. From here, select the foliage options (look for the leaf icon) and choose your preferred leaf type. If you've have taken the step to customize your wall with shapes, then you can diversify the materials for each shape and apply a different foliage type to each of them.
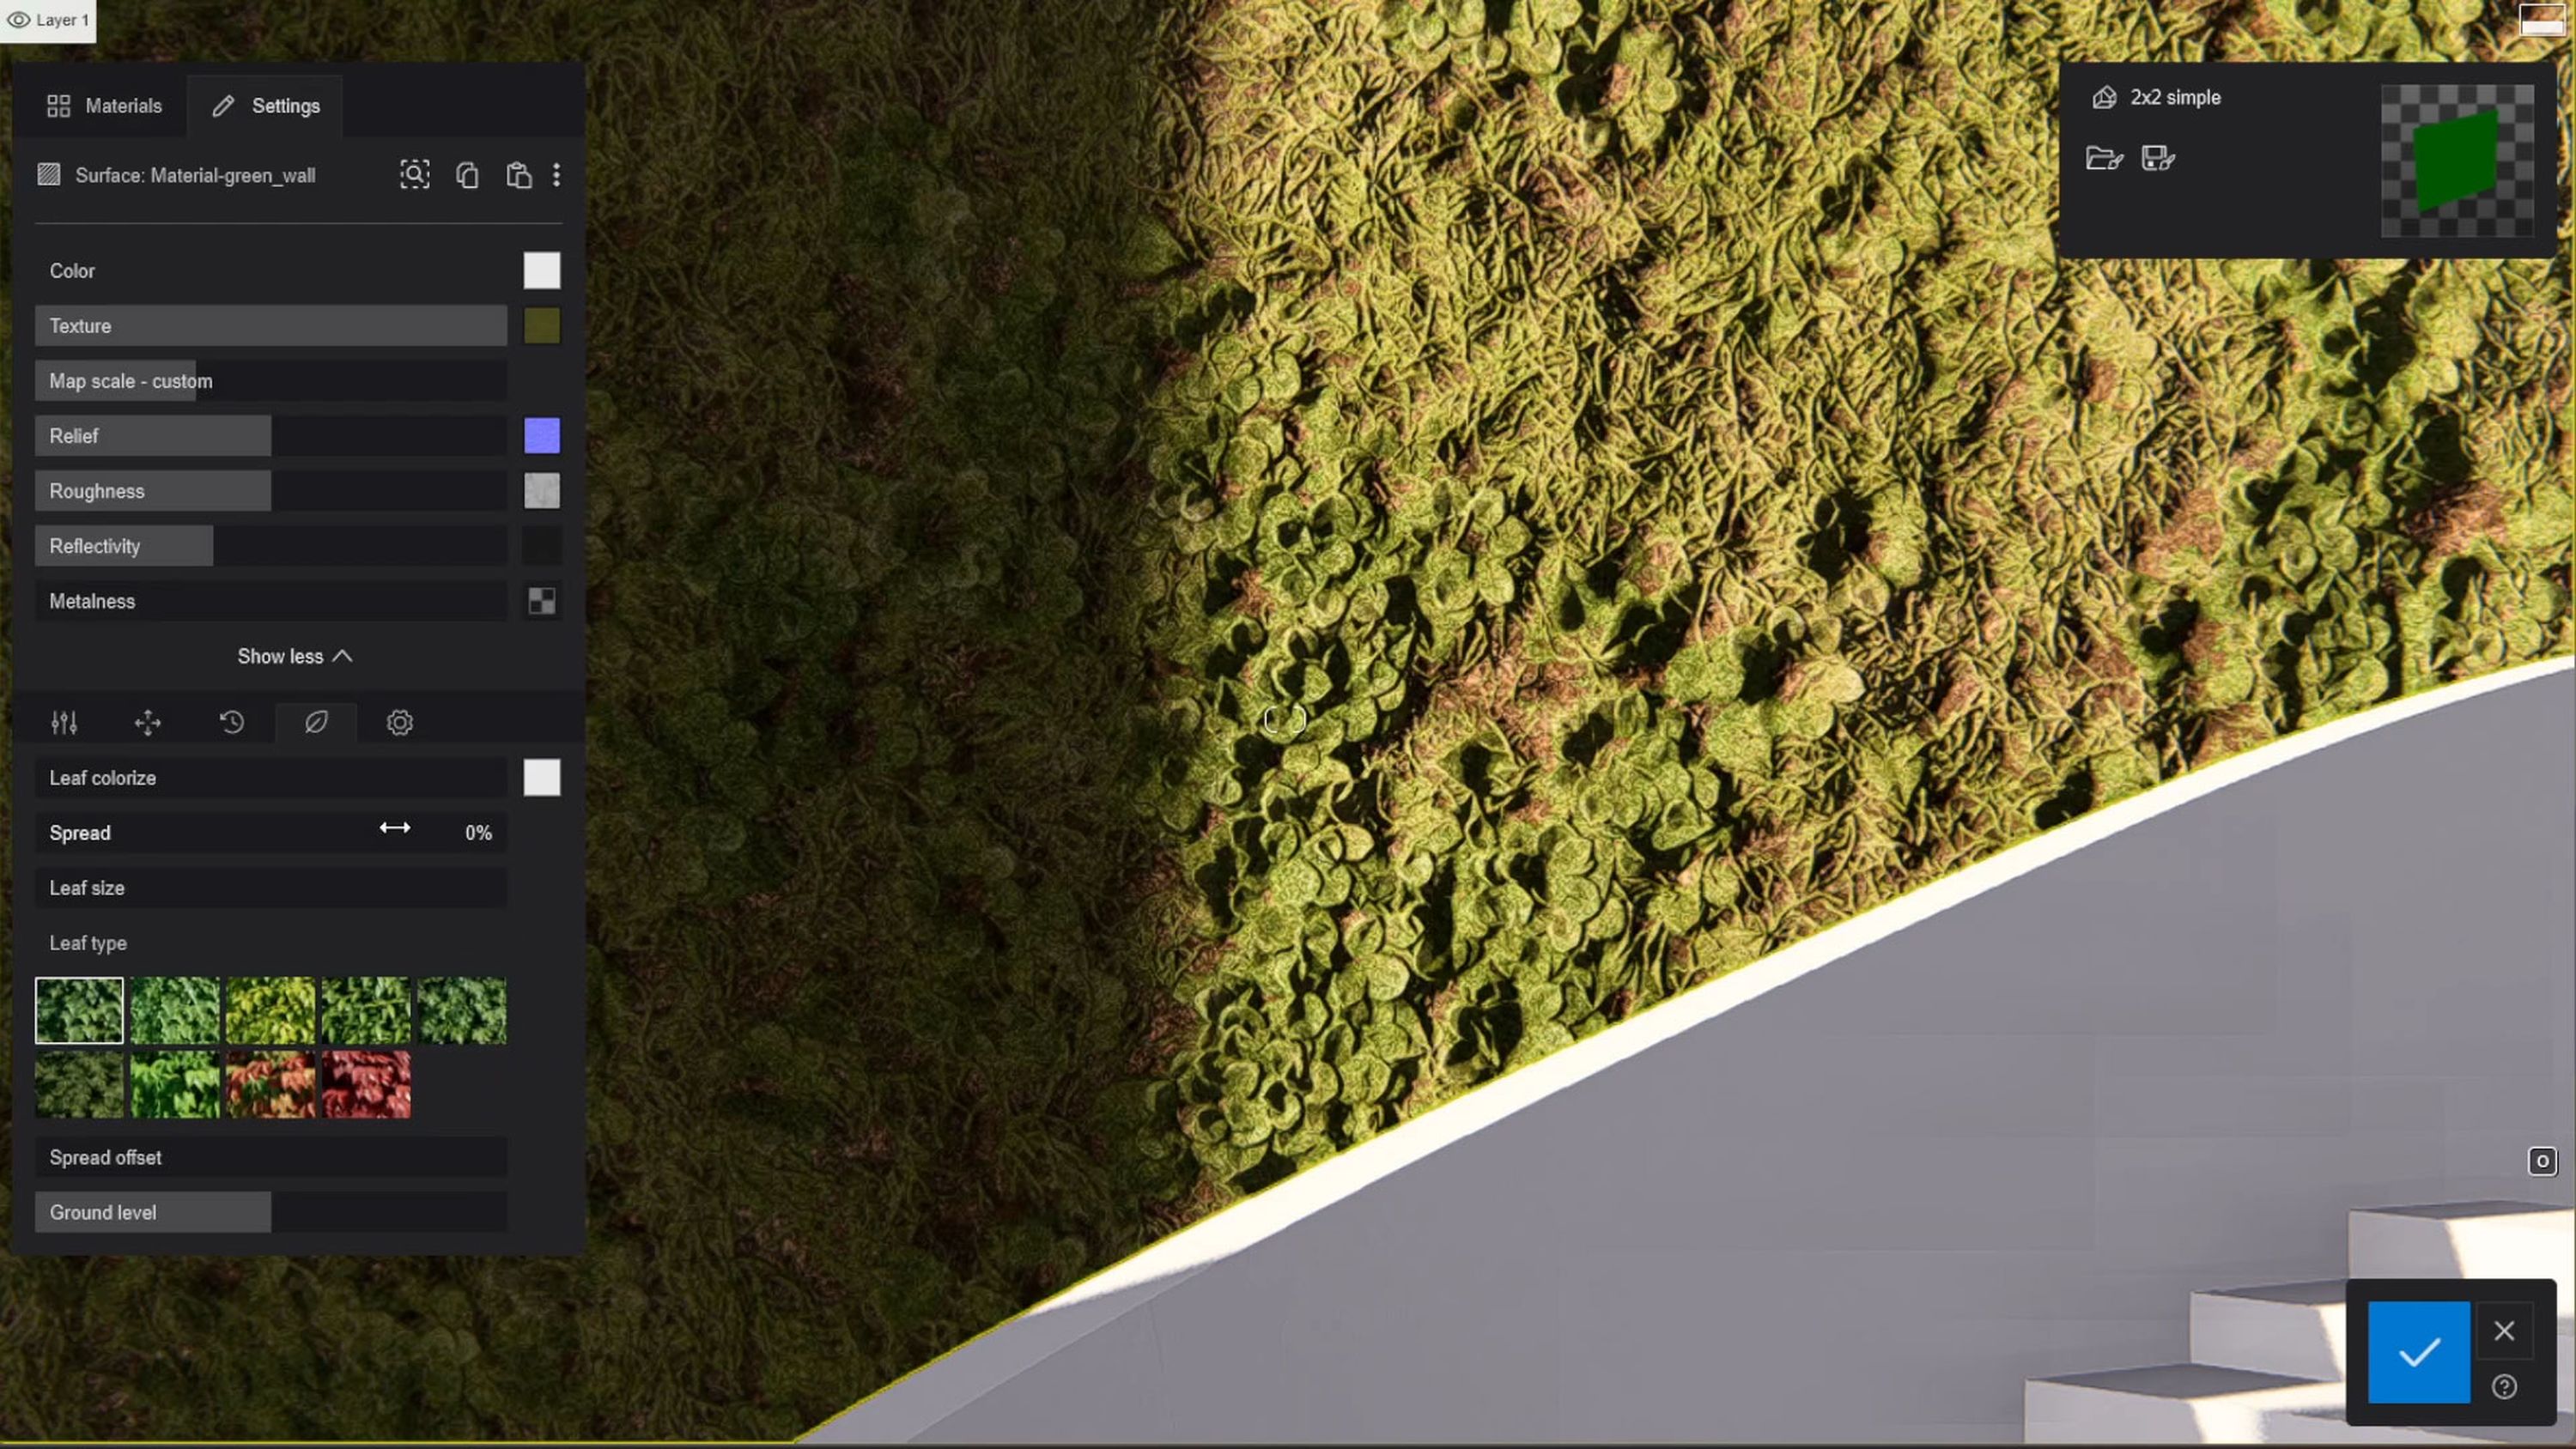
6. Make it pop
Now for the fun part! Set the ground level to calculate where you want the foliage to spread out from. Now increase the spread value and watch the foliage grow before your eyes! Let the spread grow until you’ve covered the desired area for your surface or geometry. From here you can also adjust the leaf size values to the correct scale.
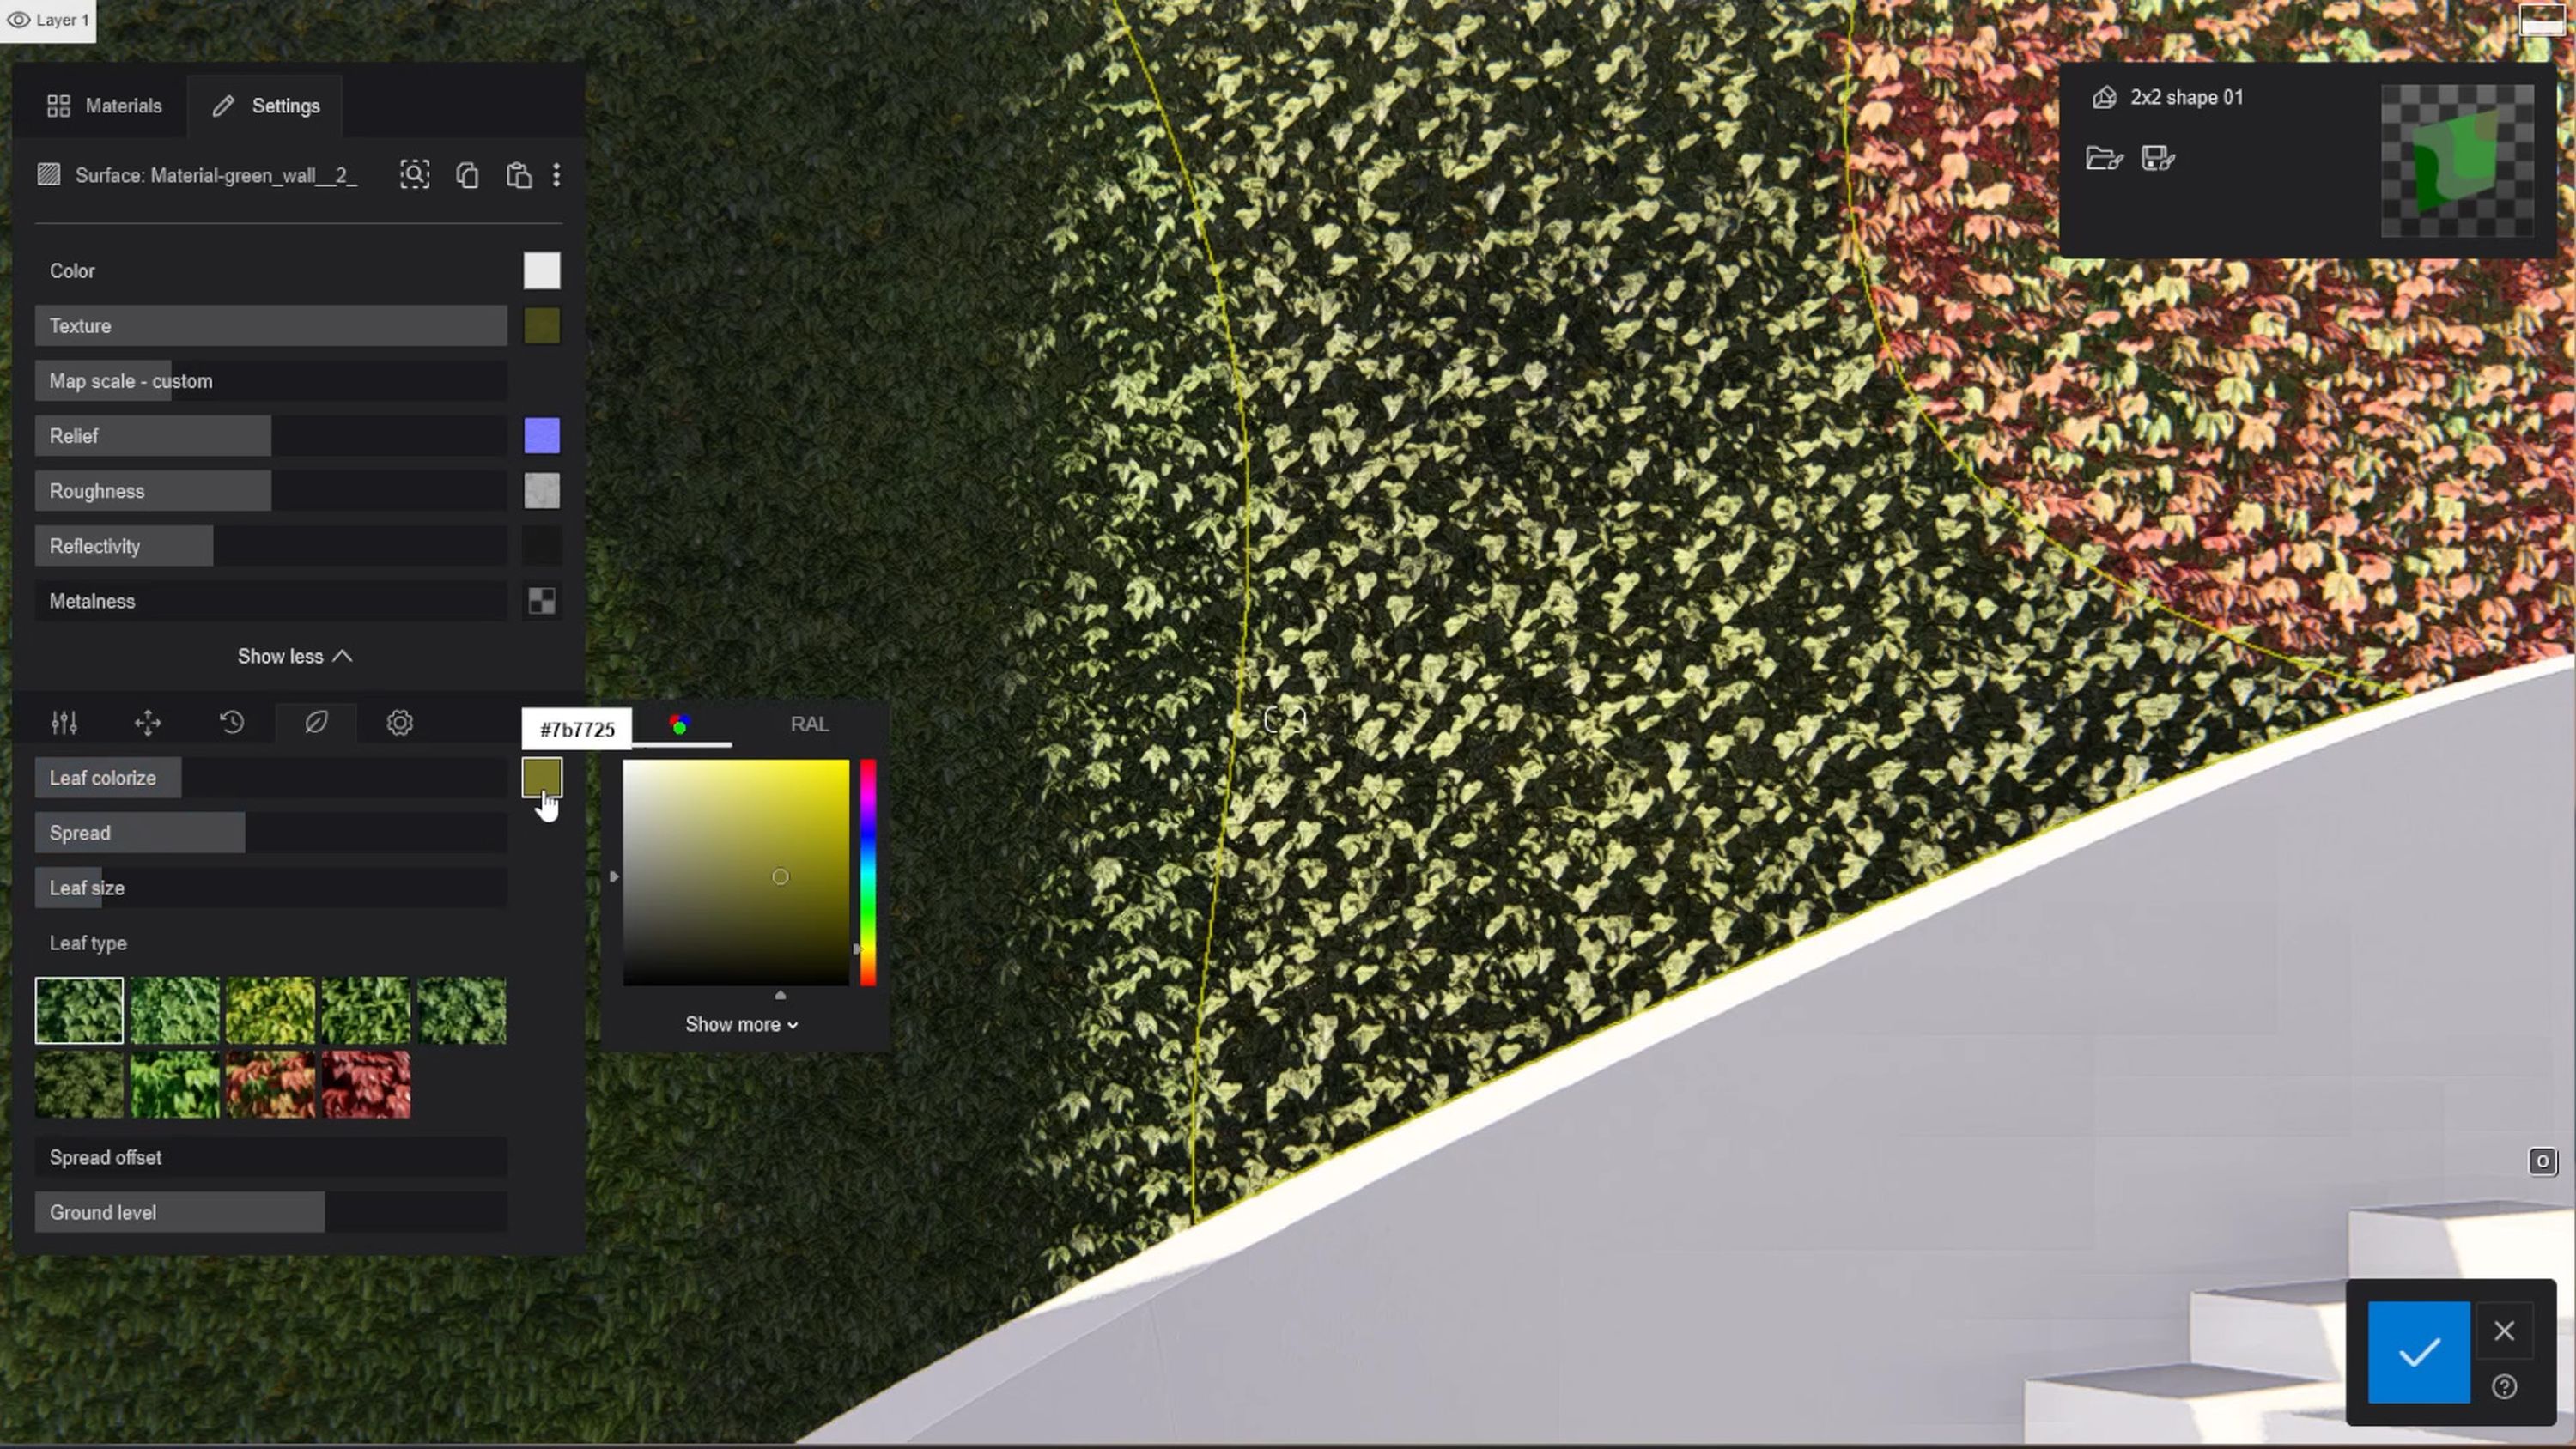
7. Add a touch of color
To add a subtle touch, adjust the color of the leaves to achieve a more distinct appearance. Simply use the leaf colorize slider to adjust the scale and the color picker box to the right of it to find the exact hue you require. And there you have it, you’ve just built a green wall! How easy was that?
Dive deeper
A simple wall of leaves can provide you with a nice look, but you can do so much more with Lumion, if you have the time. Here’s a few suggestions for how to create something more detailed and elaborate.

Pro-tip: Use the spread offset feature to randomize the boundaries of your foliage. This will aim to create a look where the youngest leaves appear towards the edge of those boundaries, as if the plants are still growing across your surface.
Select a range of your favorite plants from the hundreds available in the Lumion library. Try to find species that harmonize and fit well together aesthetically. In our example we selected the following plants:
False Yucca
KentiaPalm
Dieffenbachia
Festuca
Button Fern (fine-detail)
Fern (fine-detail)
Sedge (fine-detail)
Use the single placement tool to add each plant onto your surface area.
To achieve a more natural look, it's worth taking the time to adjust the scale of different plants within the same species, so as to minimize the repetition and uniformity of how they appear. To alter their appearance, use the Select identical object option to group a species. Next, move to the advanced options menu in the top right of your Lumion window. Use the randomize size tool in order to adjust the scale of your plants.
For finer detailing, the gizmo tool will allow you to adjust the rotation of individual plants to your liking. The randomize rotation tool, which you may be familiar with, only affects the horizontal plane and so is unsuitable here.
Repeat these steps and layer up and detail your wall as you see fit.
Animate your designs
Take things to the next level by setting your design in motion. Video renders can help you tell a more impressive story, allowing you to zoom-in on carefully crafted details.
Lumion's pre-set camera paths enable you to quickly create animations. In this example, a simple orbital path is used to slowly traverse around some of the fine-detailed plants.
You can also use phased animations to suggest how your plants will grow over time, transforming the entire surface into a lush vertical garden.
Share your vertical garden creations
We would love to see what green walls and interior garden environments you can create in Lumion. Be sure to share your creations in our dedicated Community forum, or catch our eye on social media by tagging us with the hashtag #madewithlumion.
Curious to try Lumion?
If this guide has piqued your interest and you’re curious to apply these tips to your own designs, you can easily try the latest version of Lumion Pro with our free trial. Sign up below and start creating your own renders and videos today.