7 tips to creating photorealistic renders
How to produce renders that look like photos in Lumion
From render to reality
Photorealism is a common goal in architectural rendering – producing renders so convincing they could be mistaken for photos. But achieving that level of realism relies on mastering a few key techniques, including lighting that feels natural, materials that look tangible, and compositions that draw the eye.
In this guide, we’ll explore these essential elements, along with some other top tips, to help you successfully blur the line between render and reality.
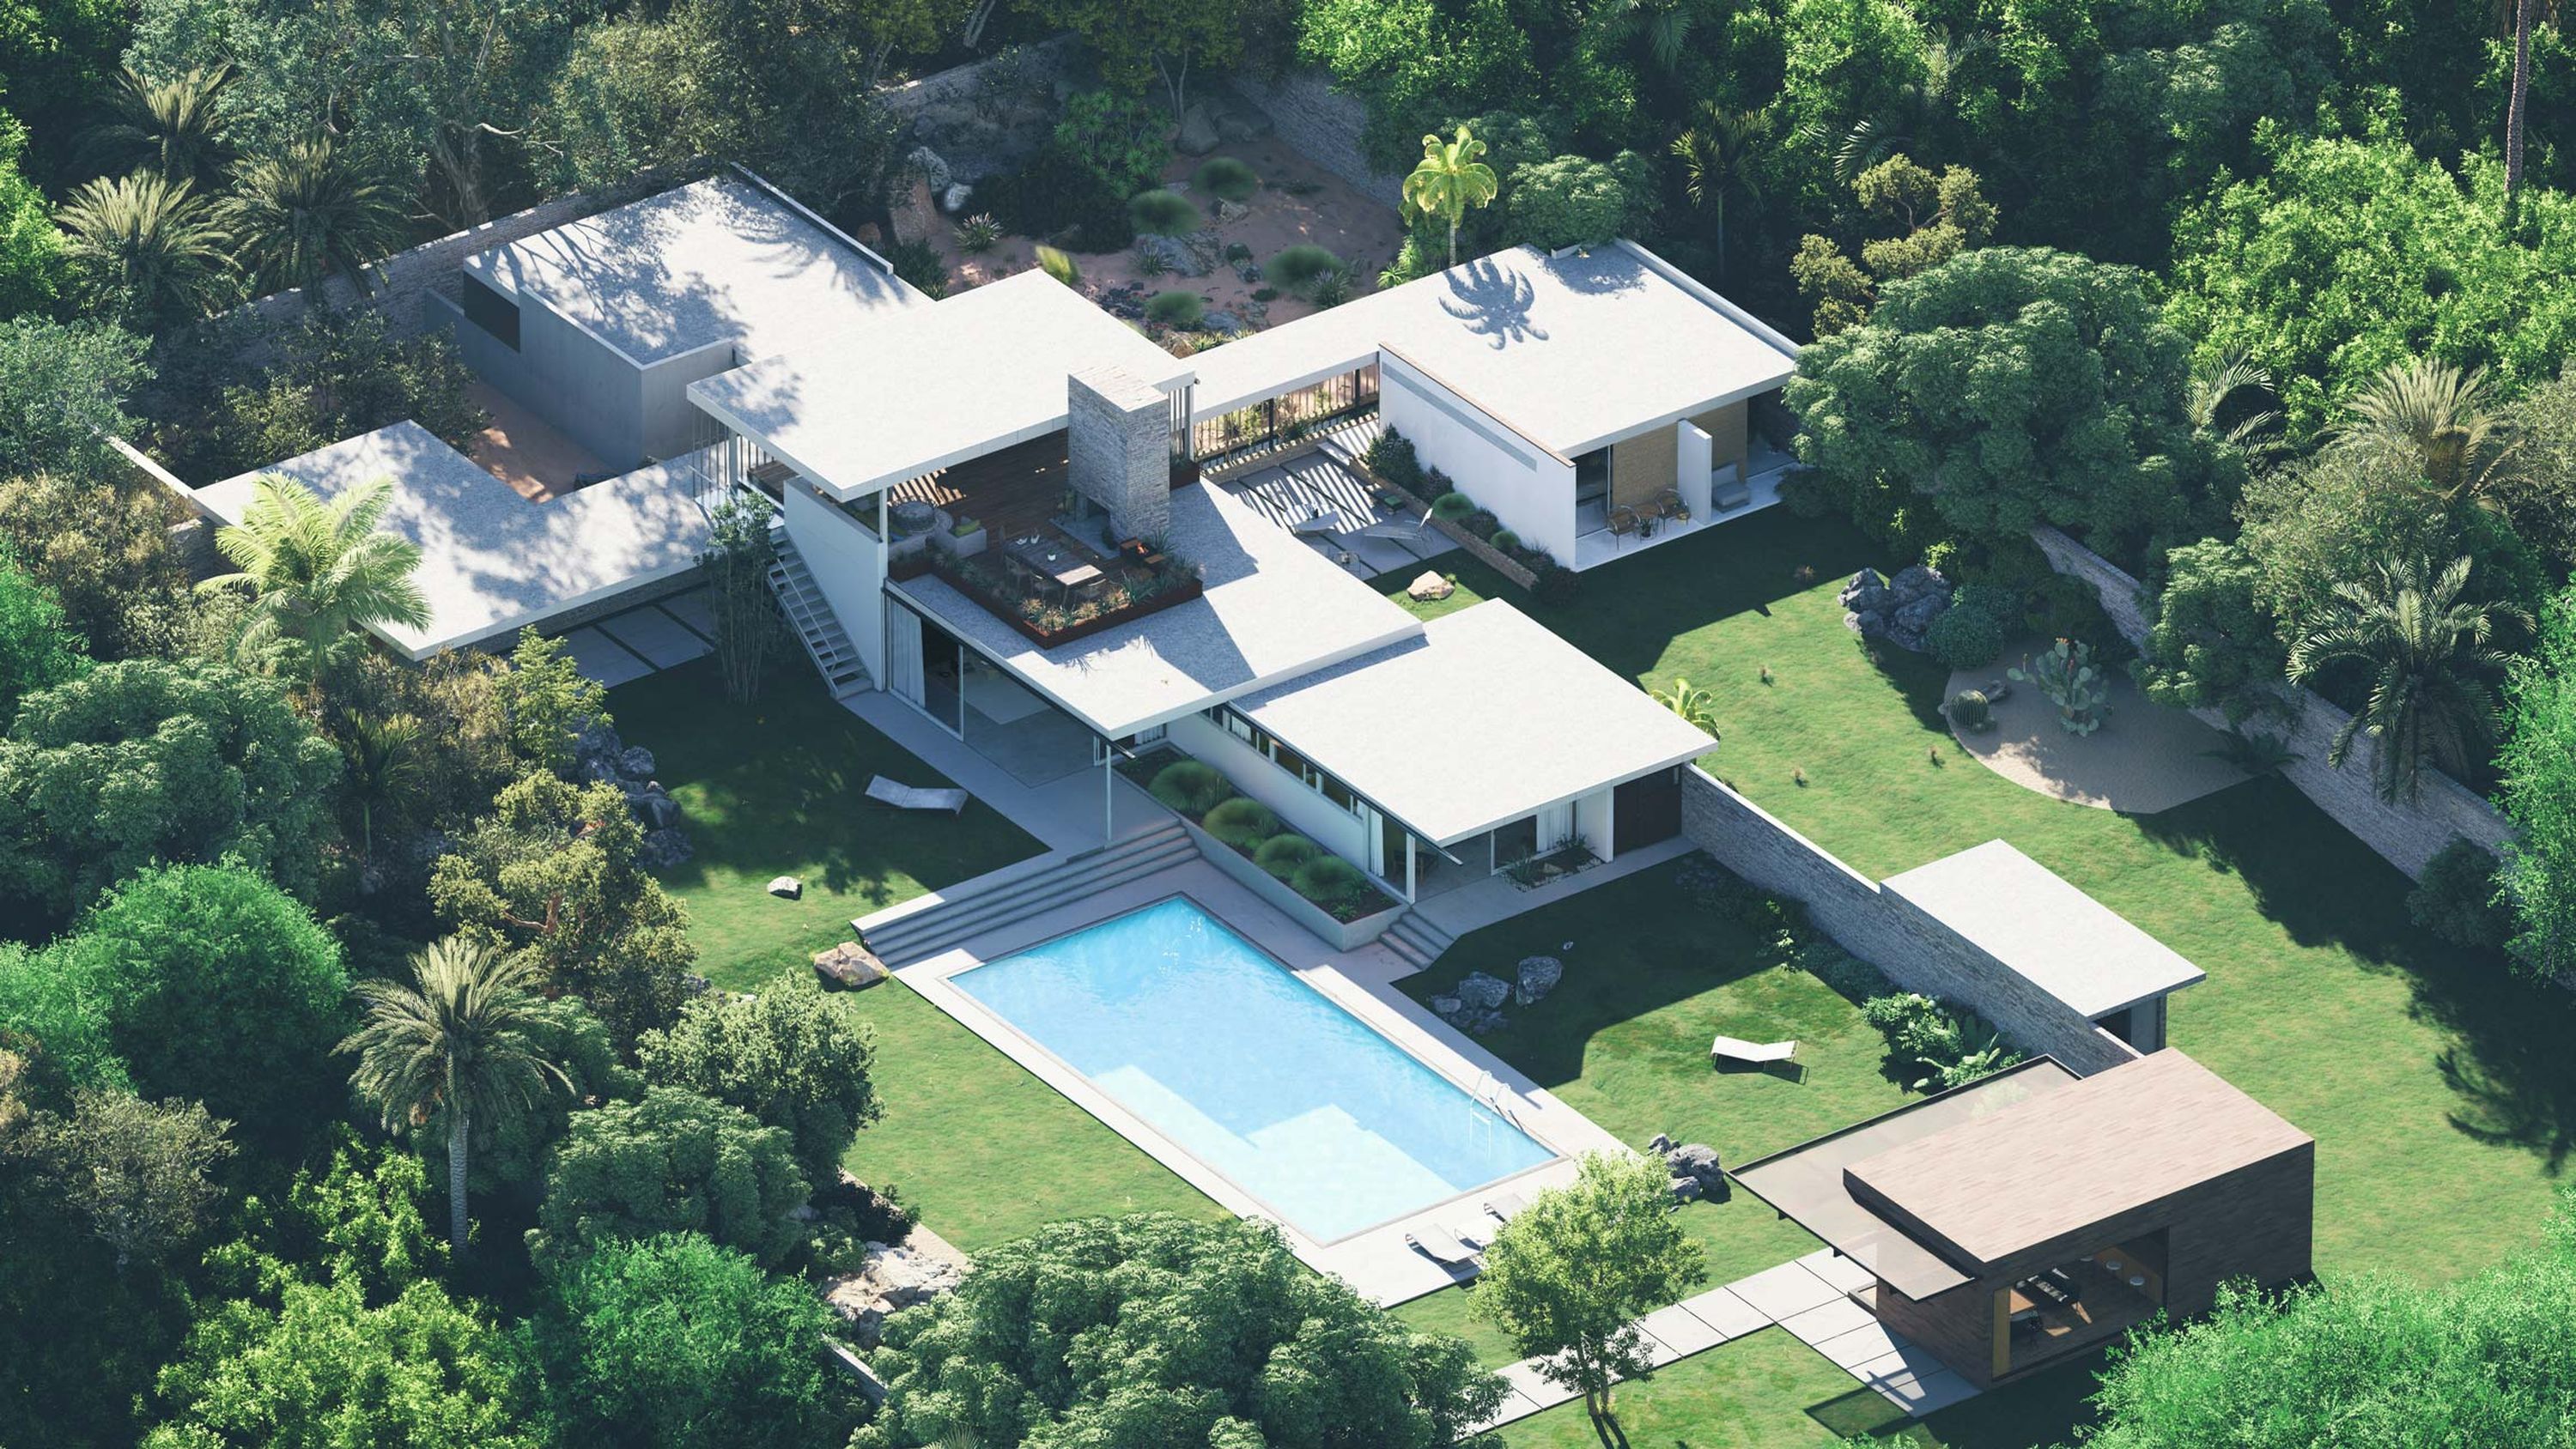
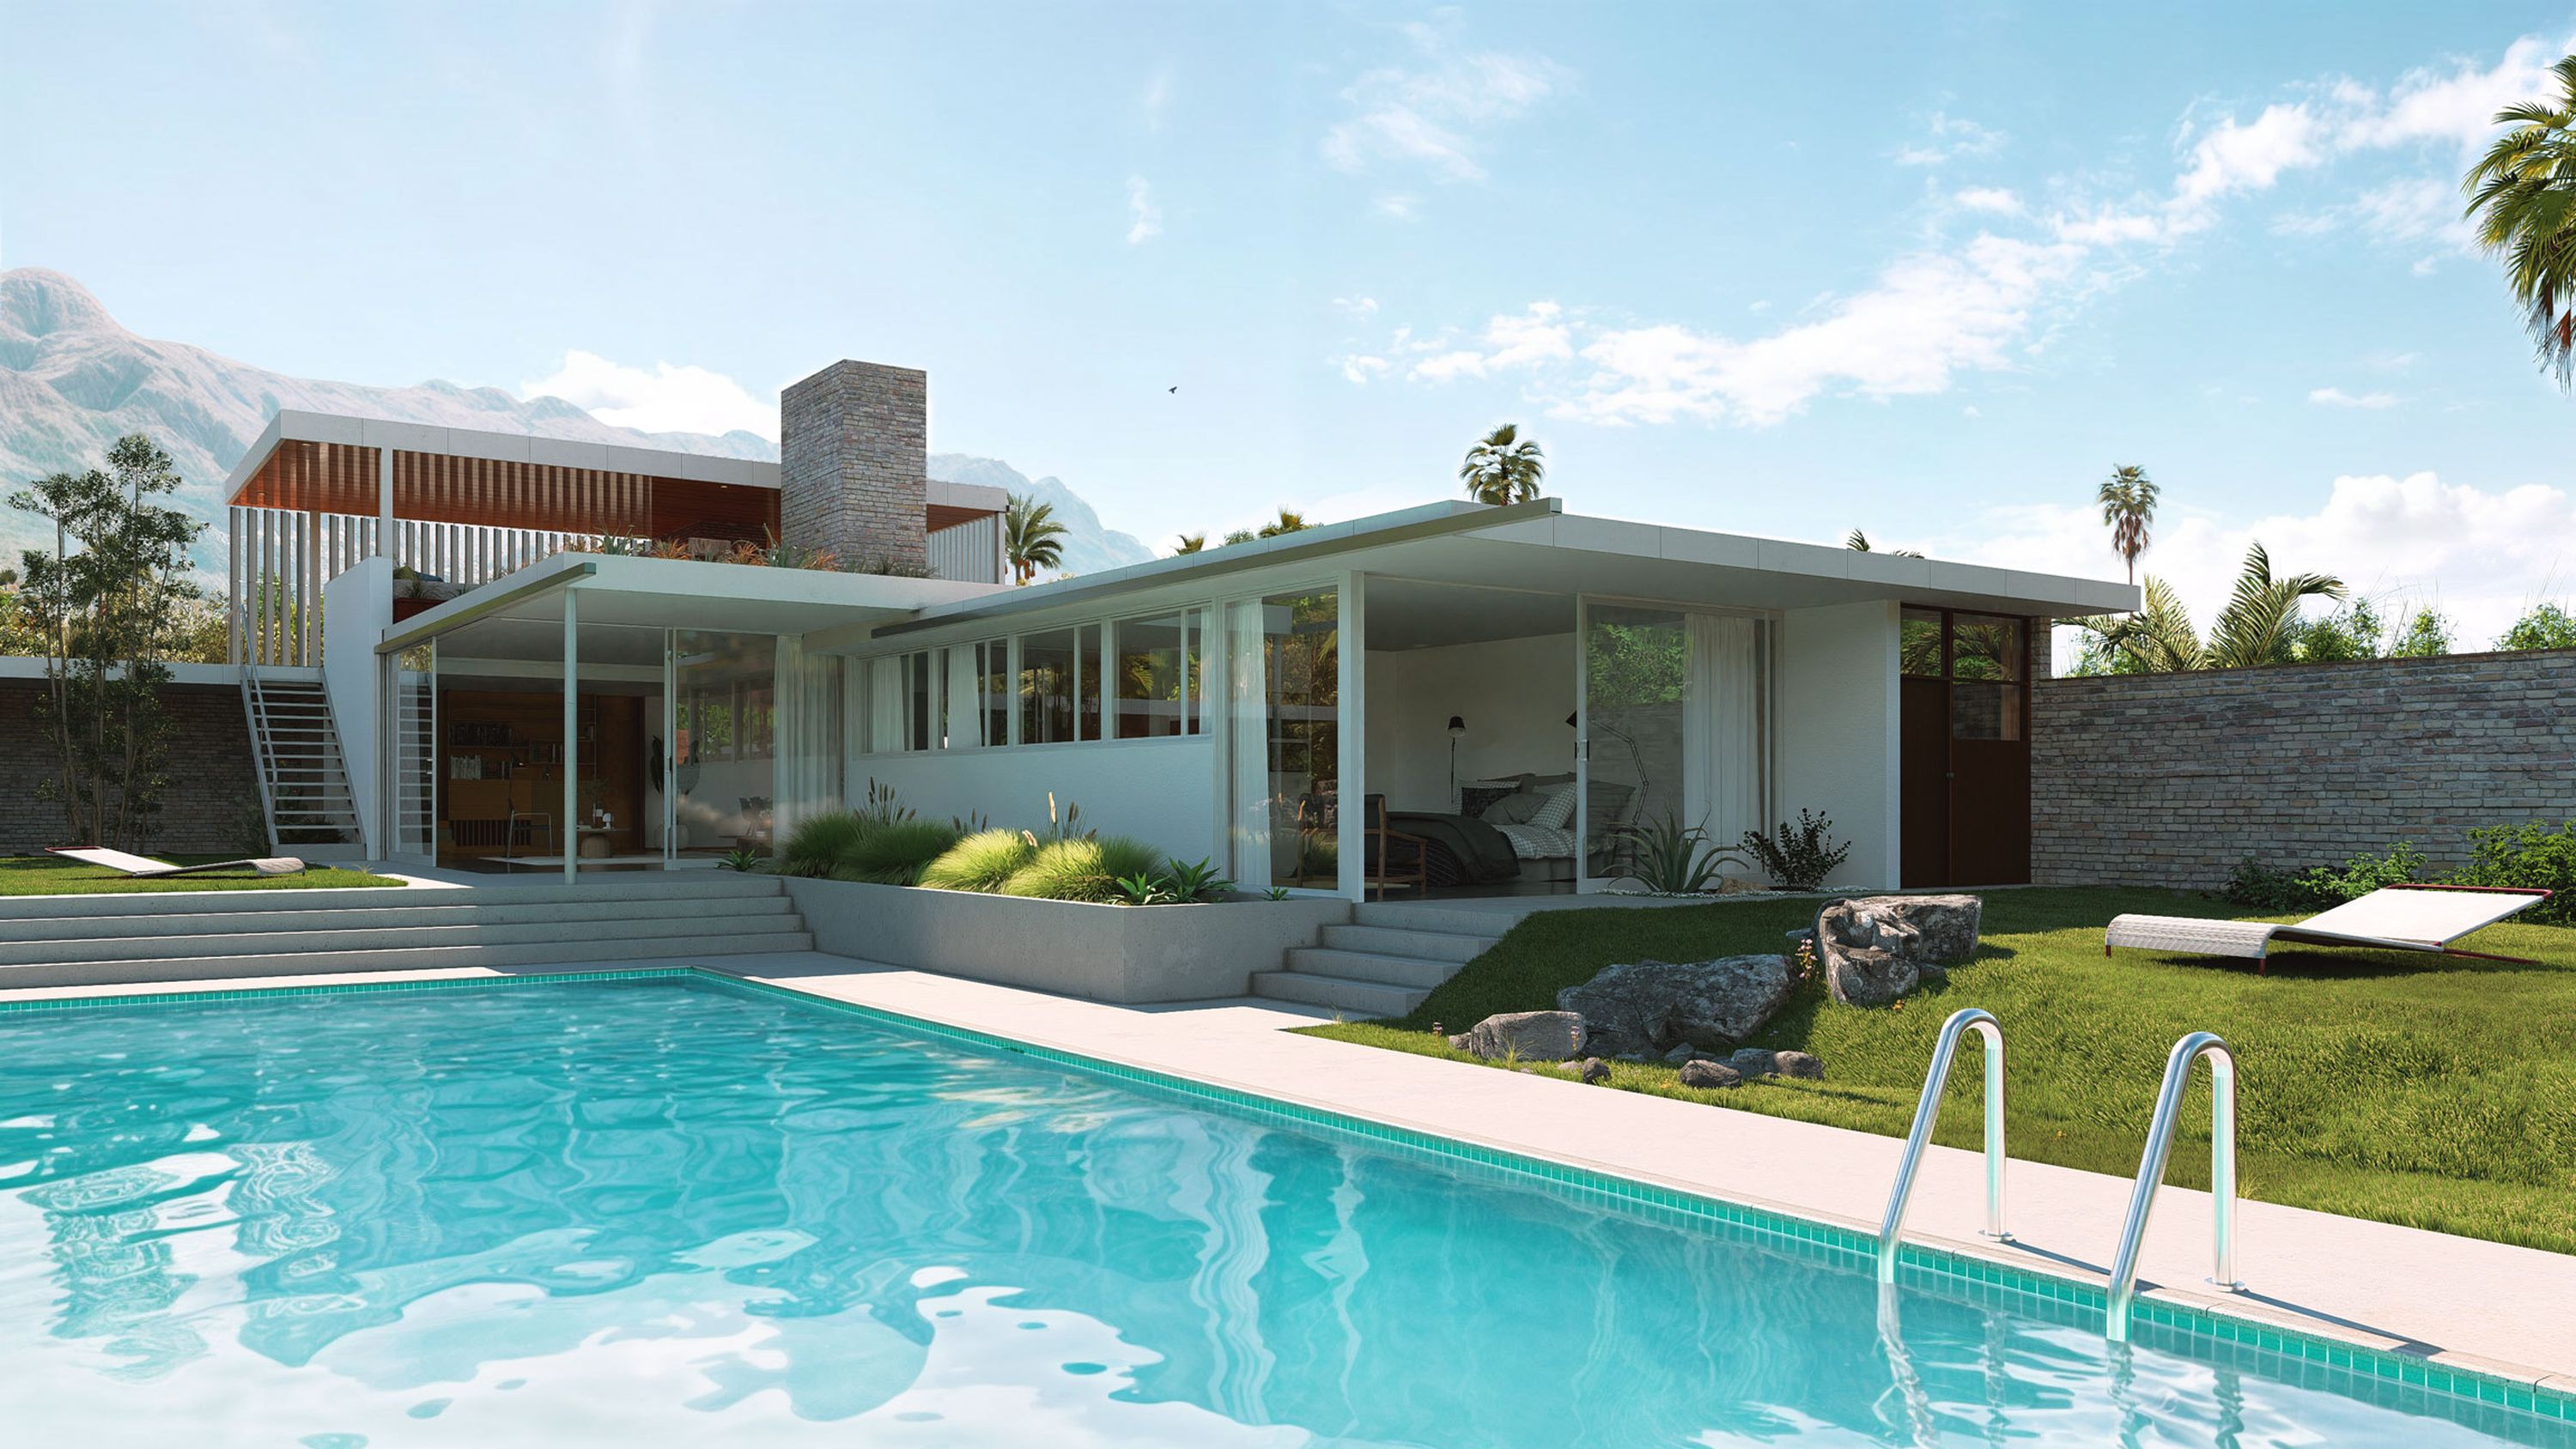
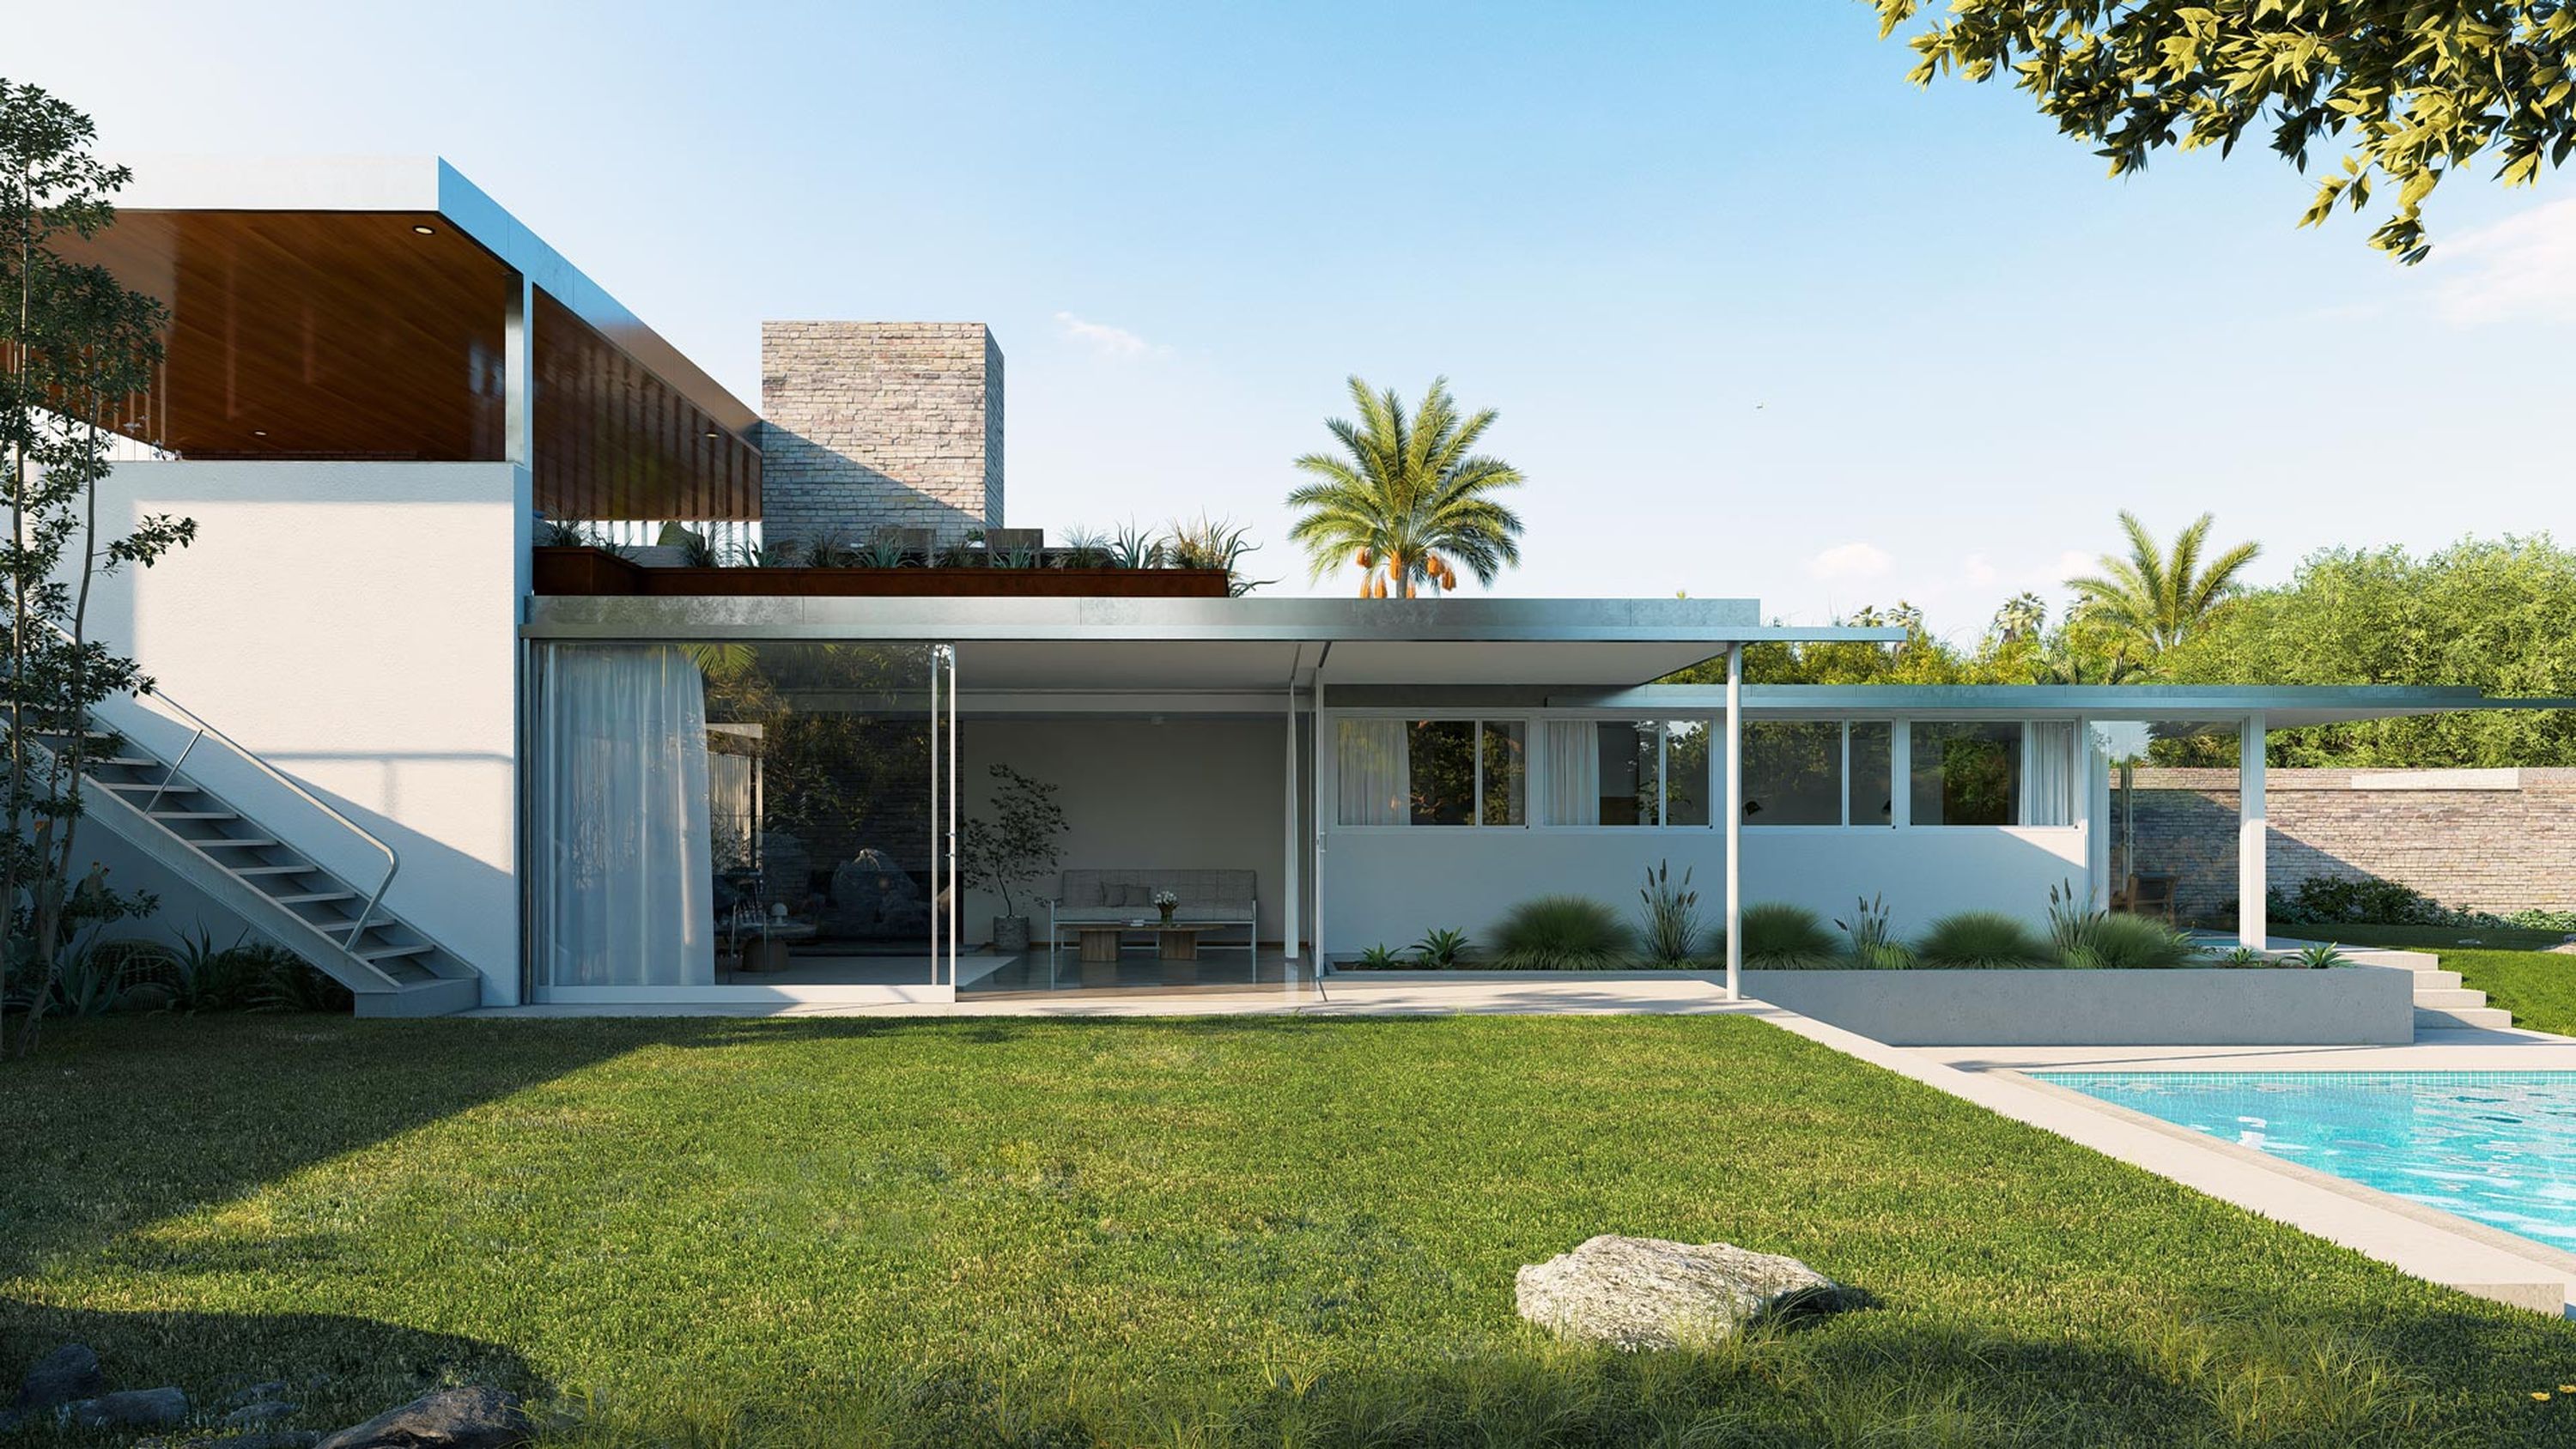
If you're interested in learning how this photorealistic replication of the iconic Kaufmann House photo was created, read the interview with visualization artist Carlos Rodriguez here, then keep scrolling for the tips.
#1
Make your model as detailed as possible
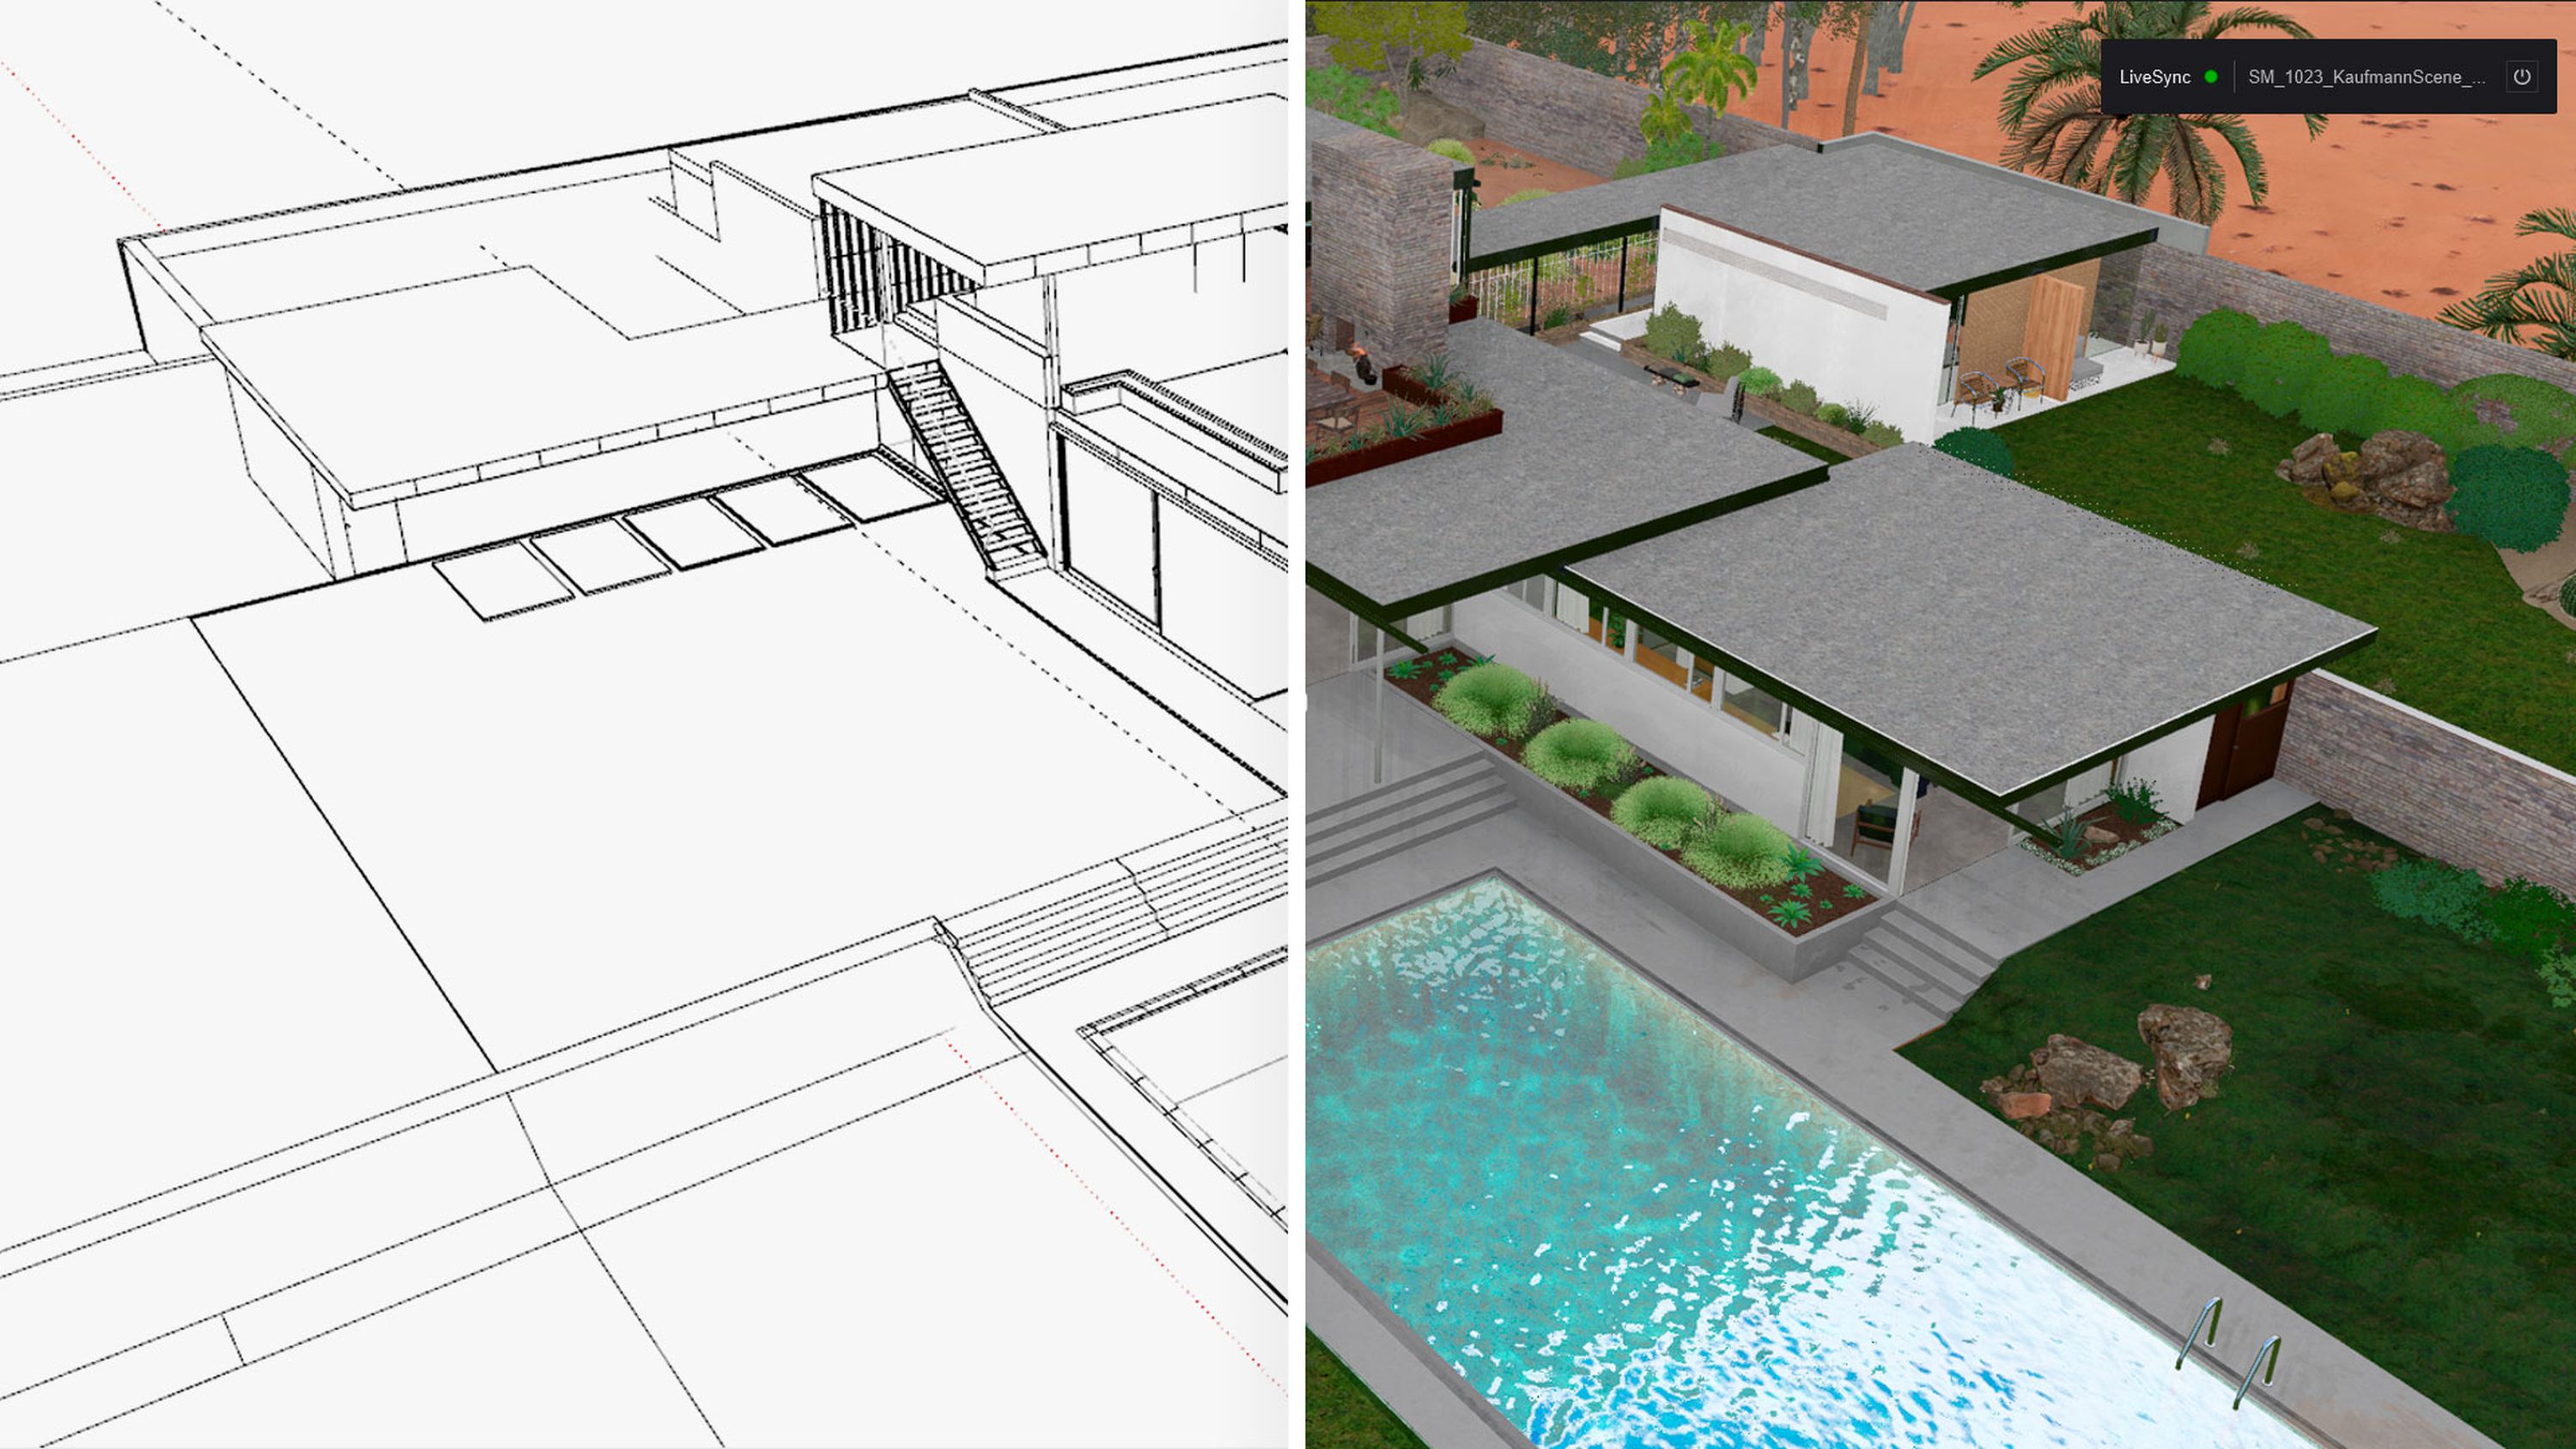
The more detailed your model, the more realistic your rendered image. Don’t forget to keep tweaking your model to ensure the best possible results in Lumion.
To streamline this process, create a live connection to your CAD software with Lumion LiveSync, so you can model and preview side by side. Quickly make changes to your model and test design ideas at any stage, while seeing the impact in real time.
#2
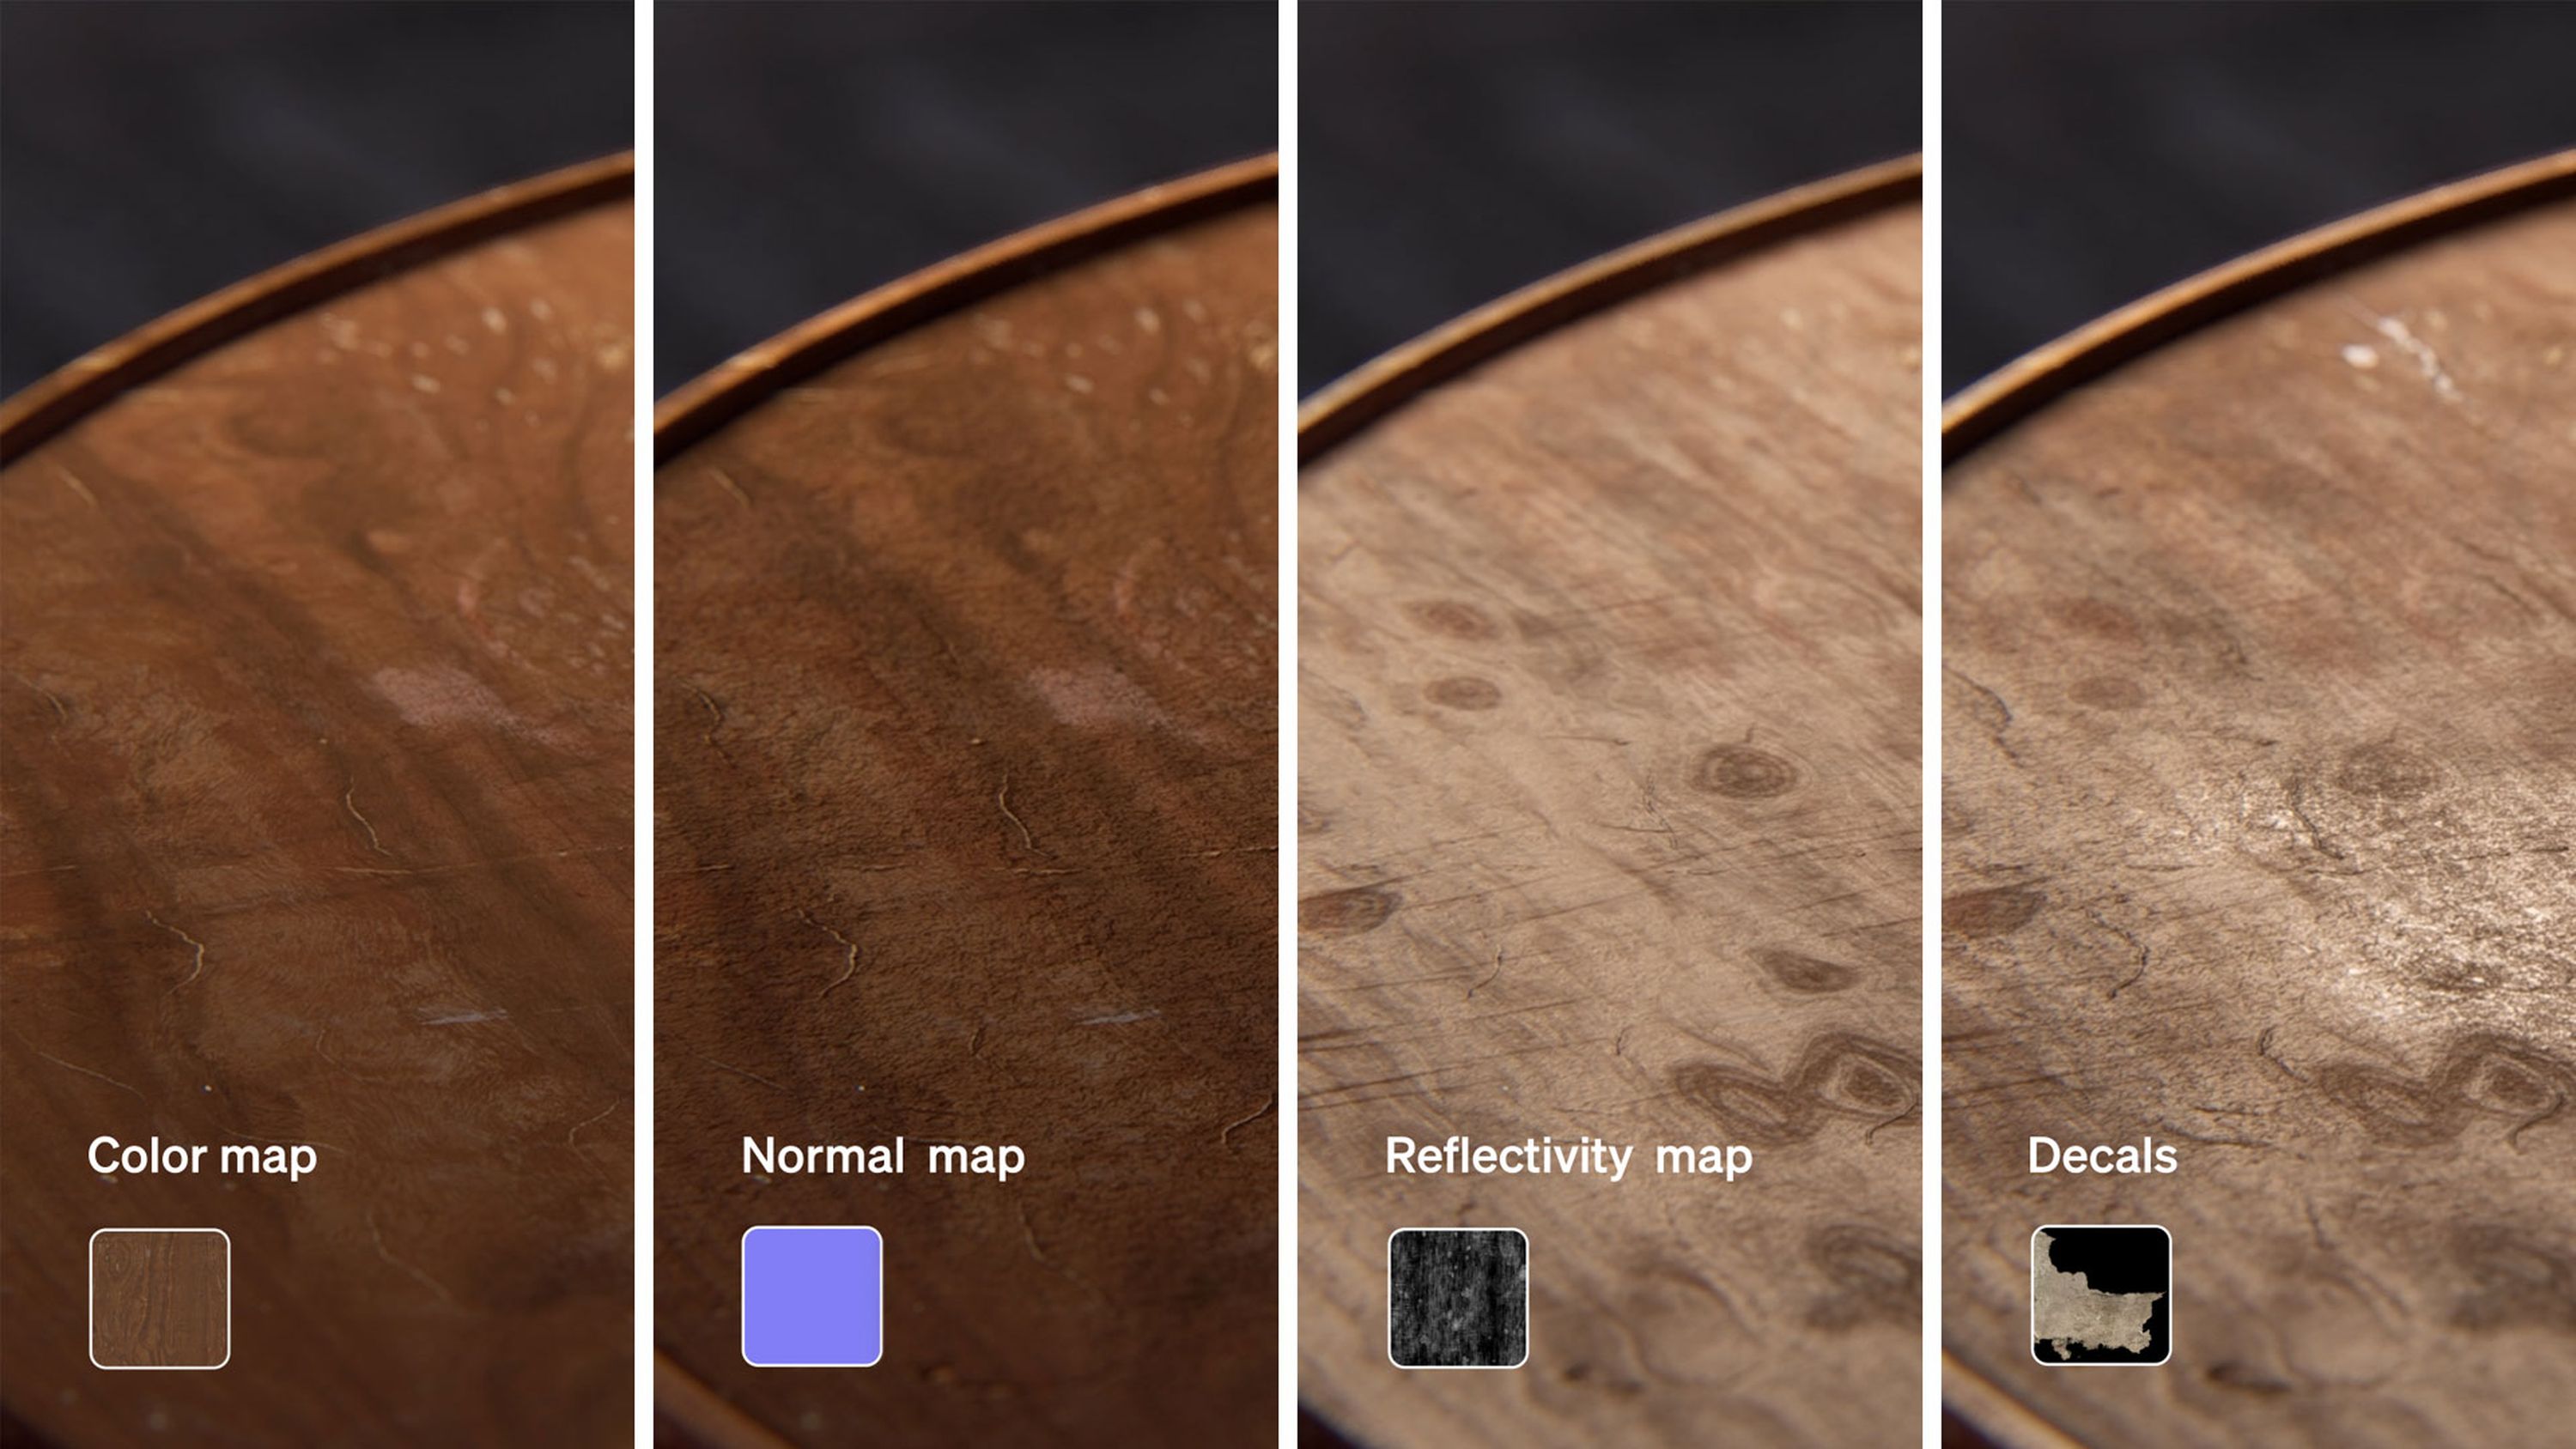
Detail surfaces with PBR materials
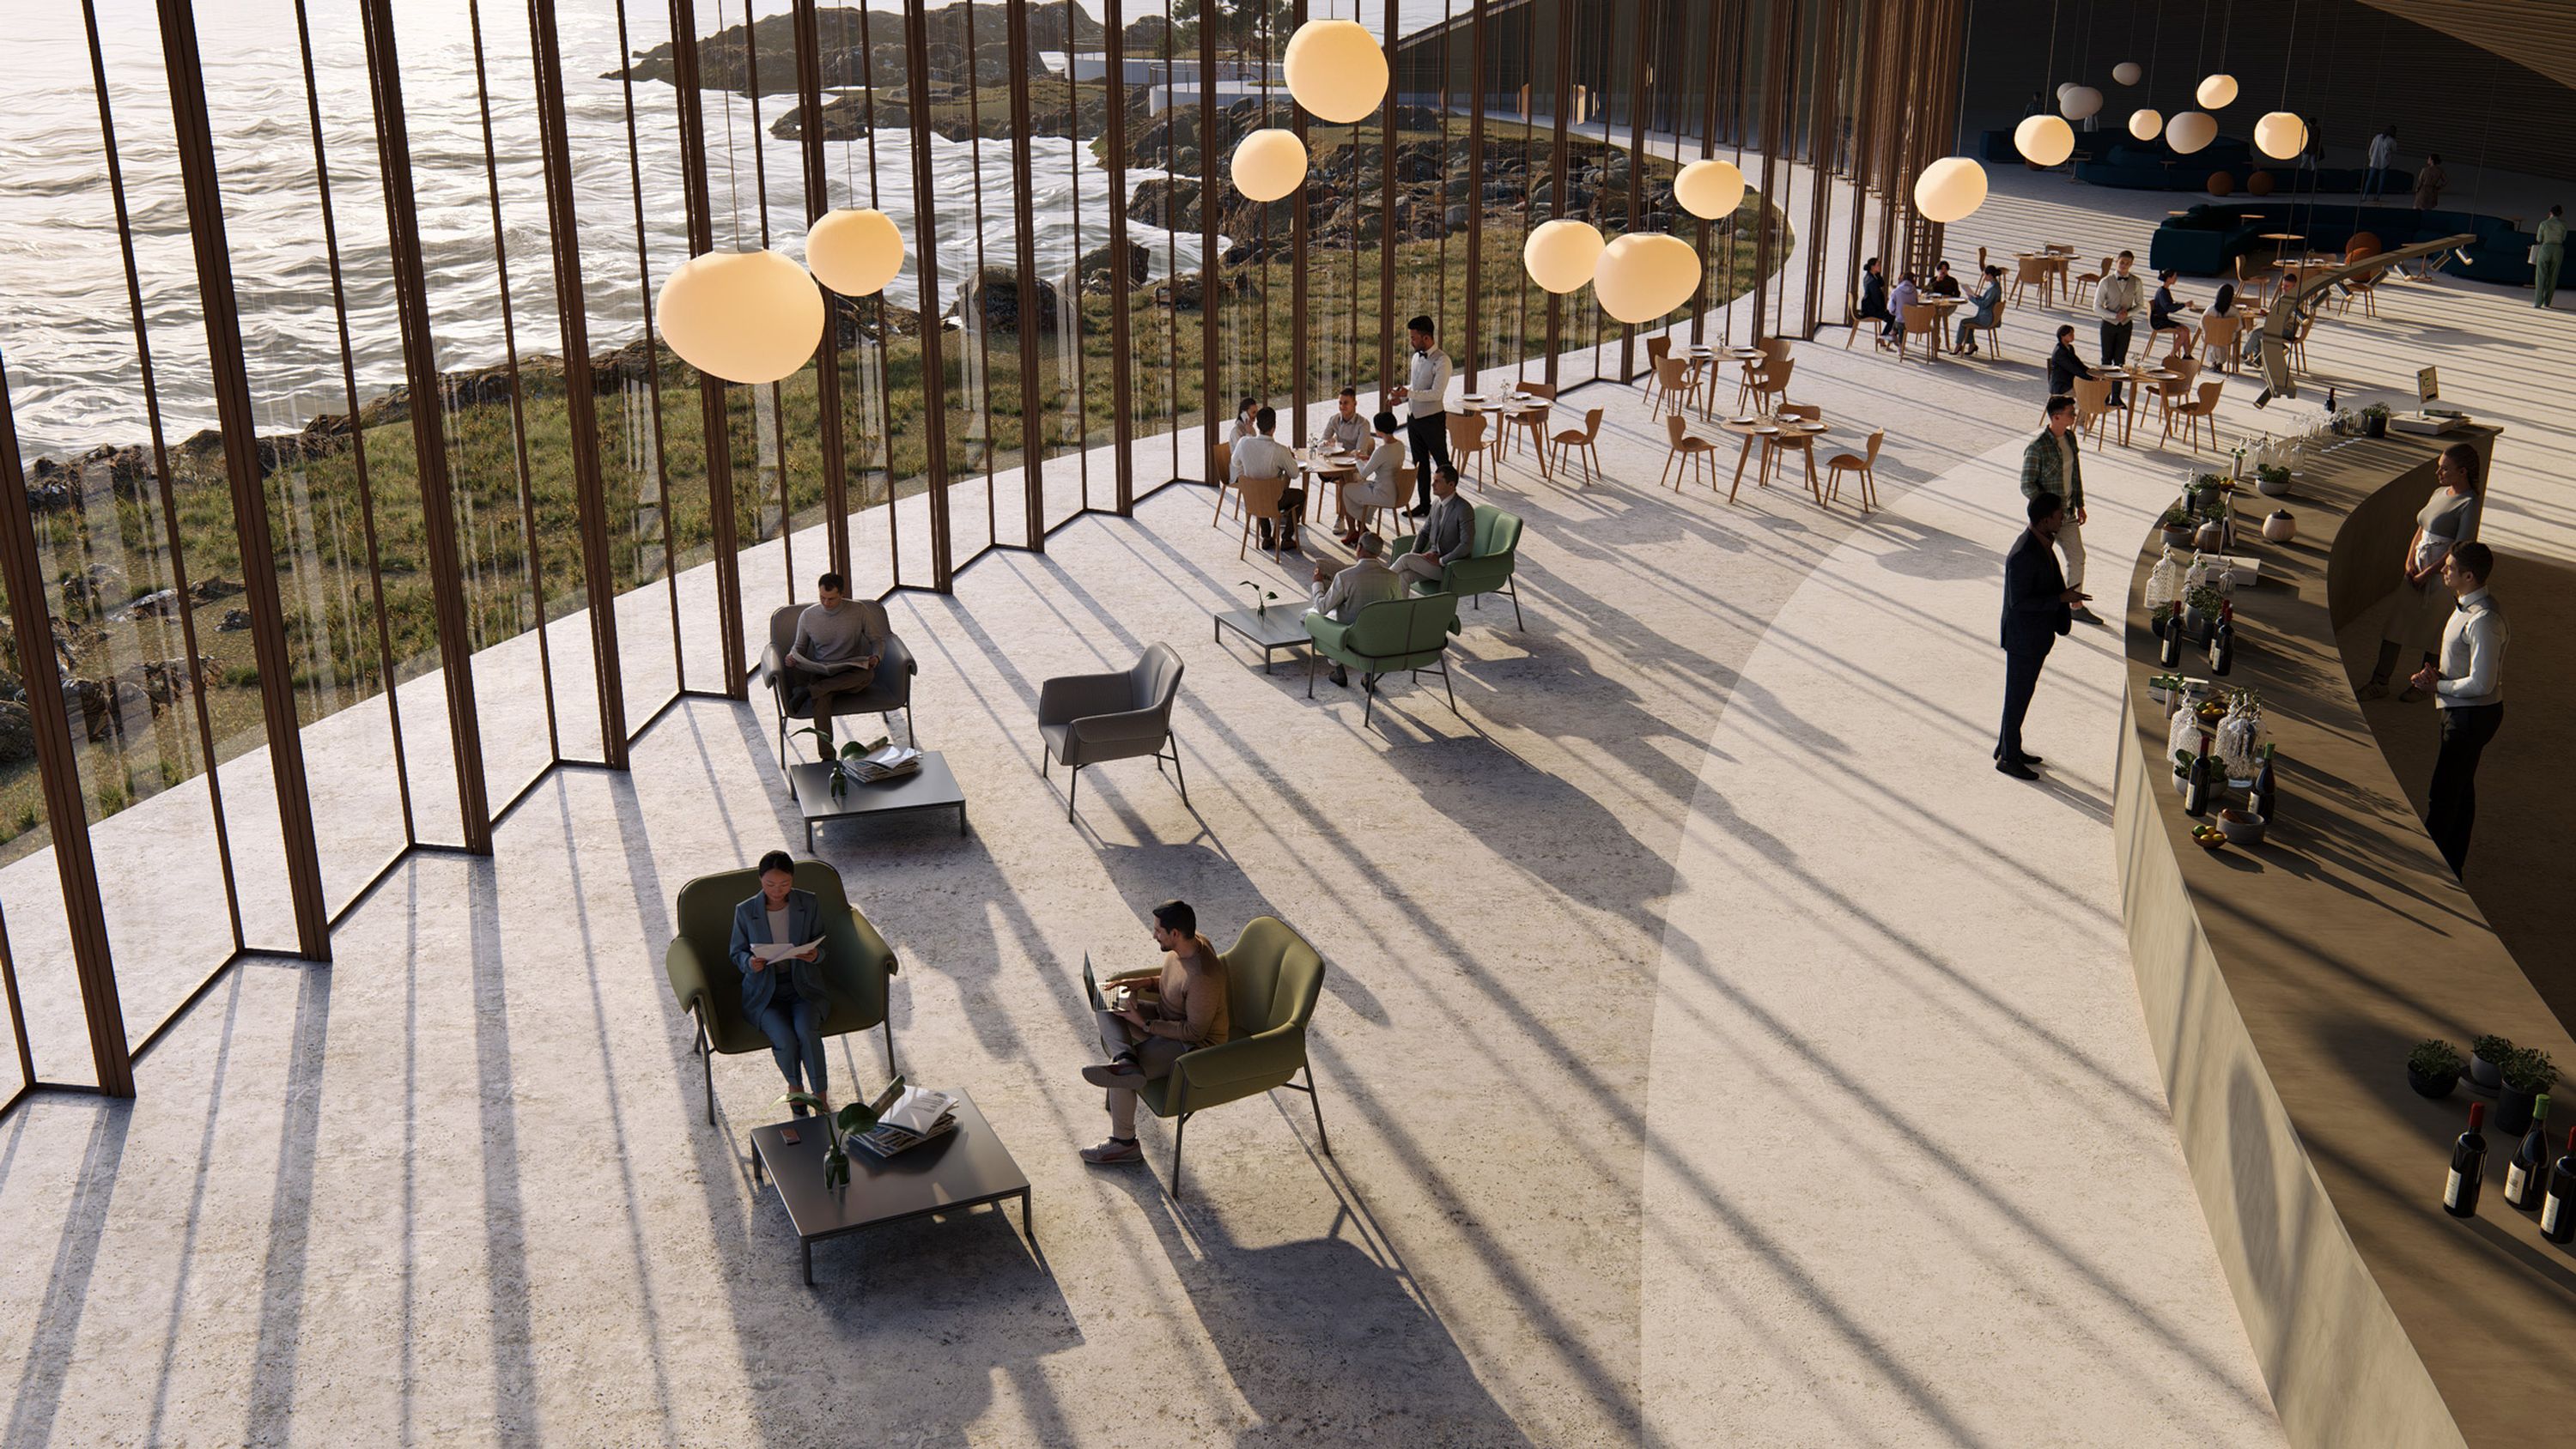
Realistic textures are the secret ingredient to achieving photorealistic images. Lumion’s PBR materials are invaluable here, as they mimic how light interacts with real-life surfaces.
The material editor also lets you define every last property of your wood, stone, or textiles, so you can add lifelike weathering, roughness, reflectivity, and more. When combined with the ray tracing effect – which we’ll come to a bit later on – your textures’ properties will appear even more true to life.
For further tips on using the material library and editor, check out this guide.
#3
Layer your composition
Every photograph you see has a foreground, middle ground, and background – or at least two of the three. These layers aren’t just compositional elements, but are essential for conveying depth and spatial relationships in your renders.
By structuring your scene in this way, you create a visual journey for the viewer, leading their eye from the starting point of the foreground, through the detail of the middle ground, and finally to the expansive background, broadening their perspective and fully immersing them in the space.
Keeping these distinct layers in mind as you build your scene allows you to craft more cohesive and dynamic renders that draw the viewer in and enhance the overall impact.
#4
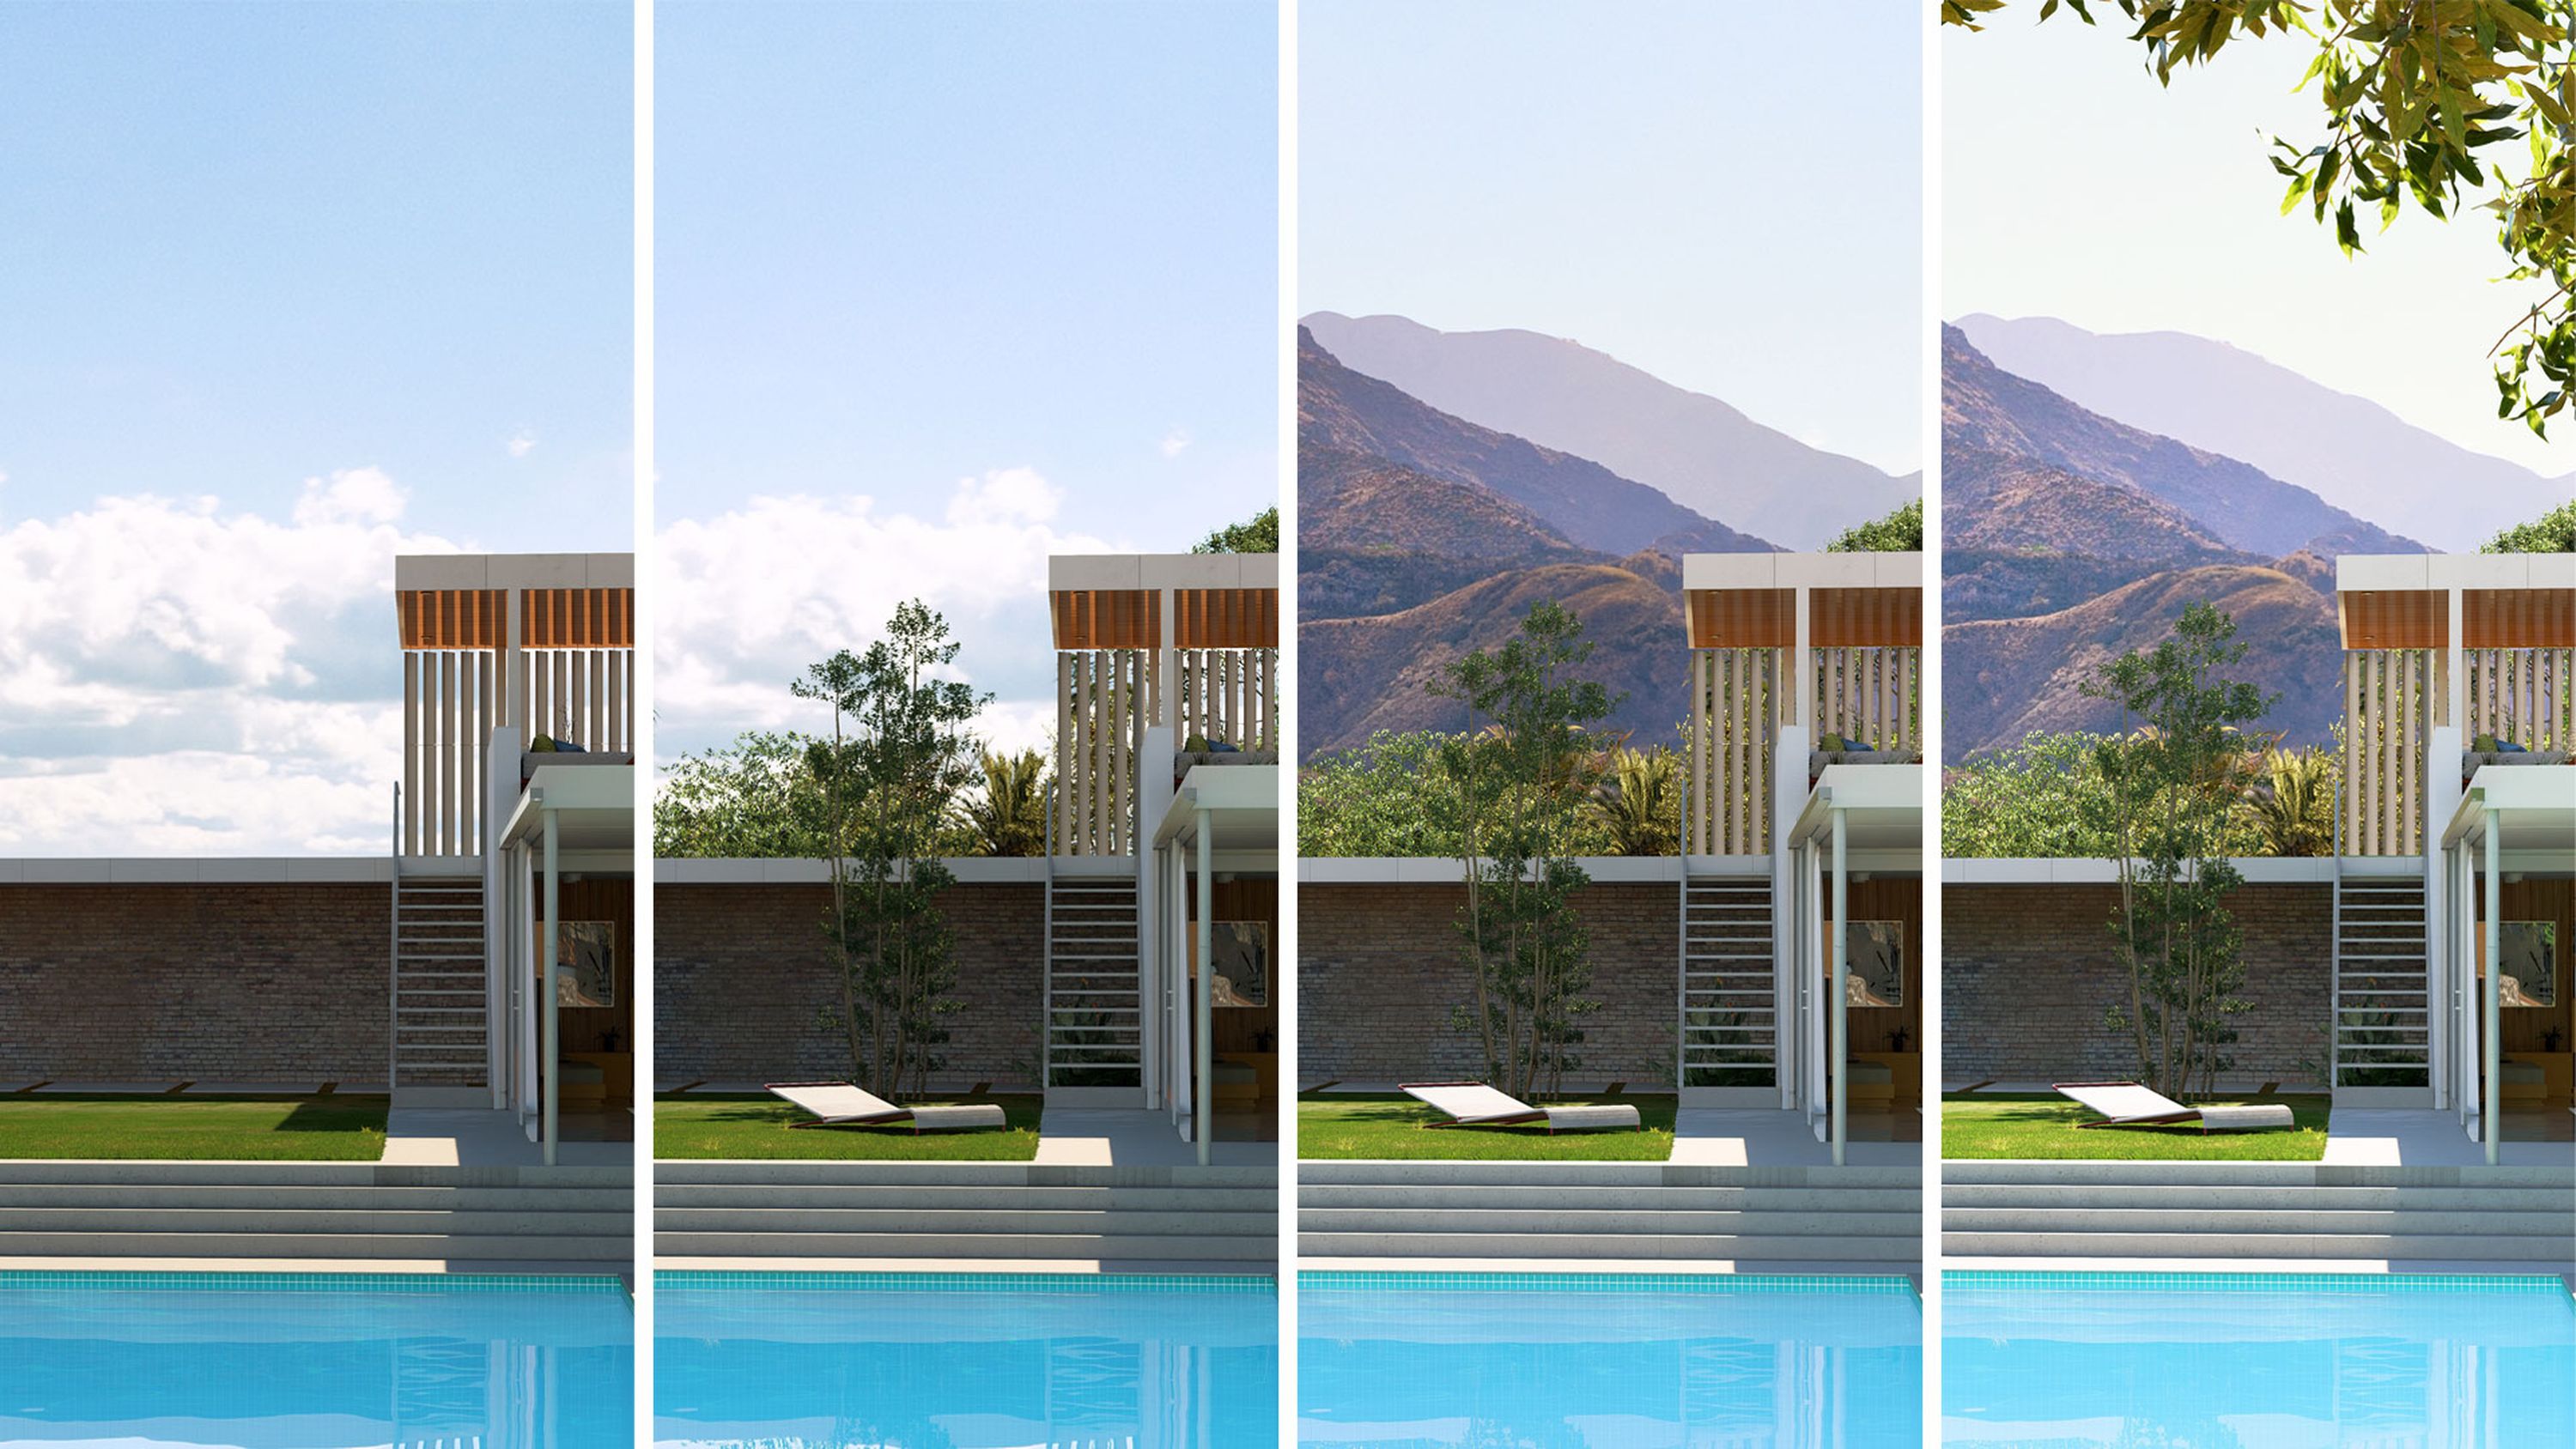
Recreate lighting conditions
To match a render to an existing photo, the lighting and weather conditions need to be exactly the same. The sun studies effect can help with this by simulating the lighting conditions of a specific part of the world at a specific day or time. Find it in +FX in photo mode, switch it on, then tweak the settings accordingly.
If the original photo was taken on a sunny morning in July, simply enter those details to recreate the same environment for your renders.
#5
Enhance realism with ray tracing
One of the most powerful tools for achieving photorealism is the ray tracing effect. By accurately simulating the natural behavior of light, it creates a shortcut to rendering scenes with stunningly realistic lighting, reflections, and shadows.
In Lumion, you’ll find it in +FX. Simply switch it on to increase the level of realism in your scenes. In the latest version of Lumion, you can also see the impact of ray tracing on your designs in real time, eliminating the need to wait for previews to load. If you plan to use ray tracing across all your photos or movies, you can add it to your custom FX stack and it will be applied to every shot.
#6
Get the composition just right
Unlike videos, images give you only a single frame to tell your story. That’s why composition is crucial. If you’re recreating an existing photo, it’s important to try and get the composition as close to the original as possible.
The grid that appears in the preview window of photo mode will help you out here – aligning certain elements of your design within it can create a balanced composition. The rule of thirds is a handy guideline that helps draw the viewer’s eye to your preferred focal points.
The 2-point perspective effect can also assist here, by helping vertical lines appear straight and removing any distortion. Once it’s enabled, you can adjust the slider to change how much the effect is applied.
Once this is all in place, you can choose your preferred aspect ratio by clicking the dropdown arrow to the bottom-right of the preview window. Aspect ratio helps tailor images to different media platforms. Choose from five predefined ones – 16:9, 1:1, 3:2, 4:5, or 1.91:1 – or flip between portrait and landscape by hitting the icon next to the menu.
#7
Direct the viewer’s focus
Other settings that allow for easy manipulation of what the viewer sees include focal length and camera height.
Adjusting the focal length in Lumion allows you to control how much of the scene is visible and how the spatial relationships between objects are portrayed. You can find the Focal length slider under the preview window in photo mode. For effectively capturing an architectural design within its context, a range of 24-35mm is recommended.
When it comes to camera height, eye level is typically recommended, to mimic views seen by the human eye. This range is usually somewhere between 1.5-1.8m, but you can set it to whatever you prefer using the box below the preview window.
Ready to create your own photorealistic render?
Now you’re equipped with the knowledge, why not give it a go? If you’re not up to date with the latest version of Lumion, you can experience it for free with a 14-day Pro trial. Get yours now to explore everything that’s available in the software. We hope you enjoy it!