Find your style: creating a signature look in Lumion
How to optimize styles and effects to achieve a bespoke look
Discover your own rendering style
We all want our renders to stand out. One surefire method of achieving this? Creating a signature style that can be applied to all your visualizations.
Doing so not only makes your work more distinctive and recognizable, it can help streamline your workflow and ensure consistency across the board. As long as it’s maintained across your renders, a signature visual style can be completely your own, encompassing any look and effect imaginable. And in a world where photorealism tends to dominate, sometimes an artistic or conceptual style can allow a render to truly shine.
There’s more than one way to achieve this in Lumion – and they all require minimal effort. In this guide, we’ll walk you through preset styles, LUTs and color correction, and how to build your own reusable effect stack. Ready to get started?
Select a style the easy way
Visualization isn’t only about achieving the most realistic results possible. By taking a more conceptual or artistic approach, you can more clearly communicate the ideas and intent behind a project, and emphasize certain aspects of a design much more effectively.
In the early stages of the design process, you're likely using visualization to communicate the form and function of a space, depicting its integration within the surrounding environment. To ensure the viewer is receptive to the core design intents, a contextual approach is often favored, avoiding too much aesthetic detail that might invite subjective bias.
One-click styles
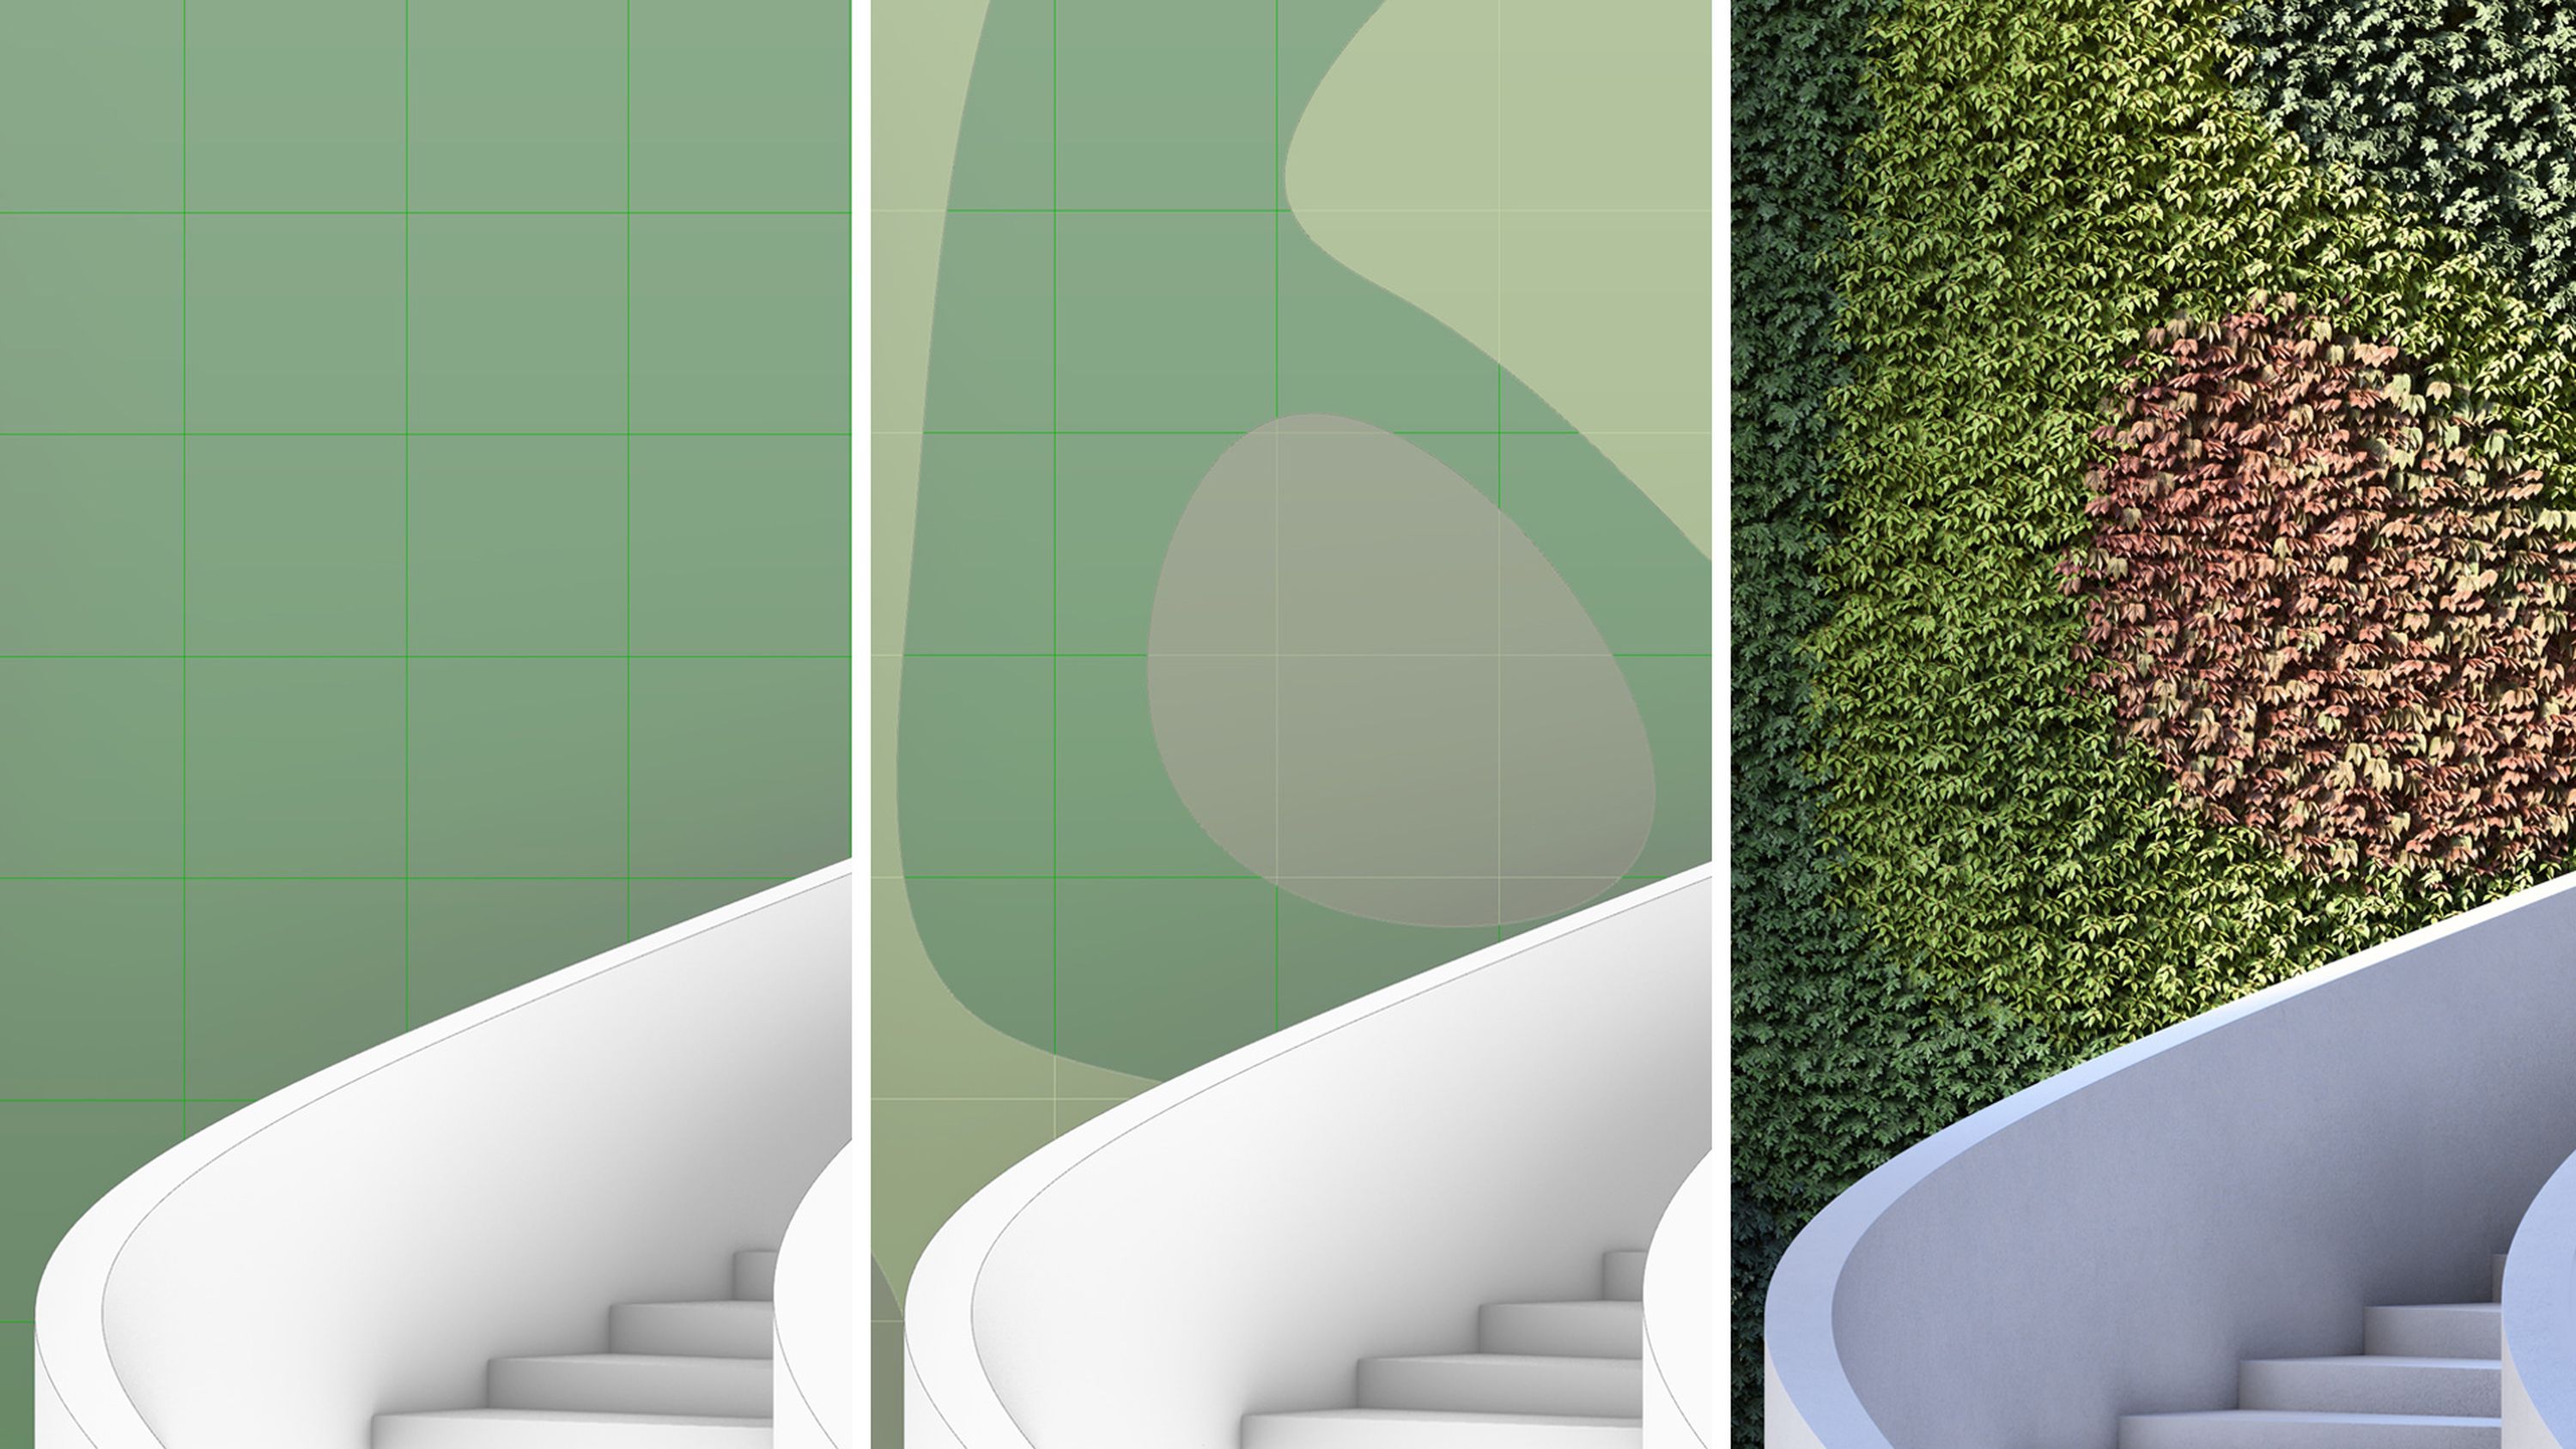
In Lumion, you’ll find a wide range of preset styles designed to help communicate your project in your preferred way and give your renders a personalized look. Head to photo or movie mode, then find the following style templates under the Custom Styles button in the top-left:
Custom style
Cinematic concept
Pen concept
Day
Evening
RT Day
RT Night
RT Overcast
RT Blue hour
You’ll also find further artistic and conceptual effects under the relevant tabs in +FX.
The magic of LUTs
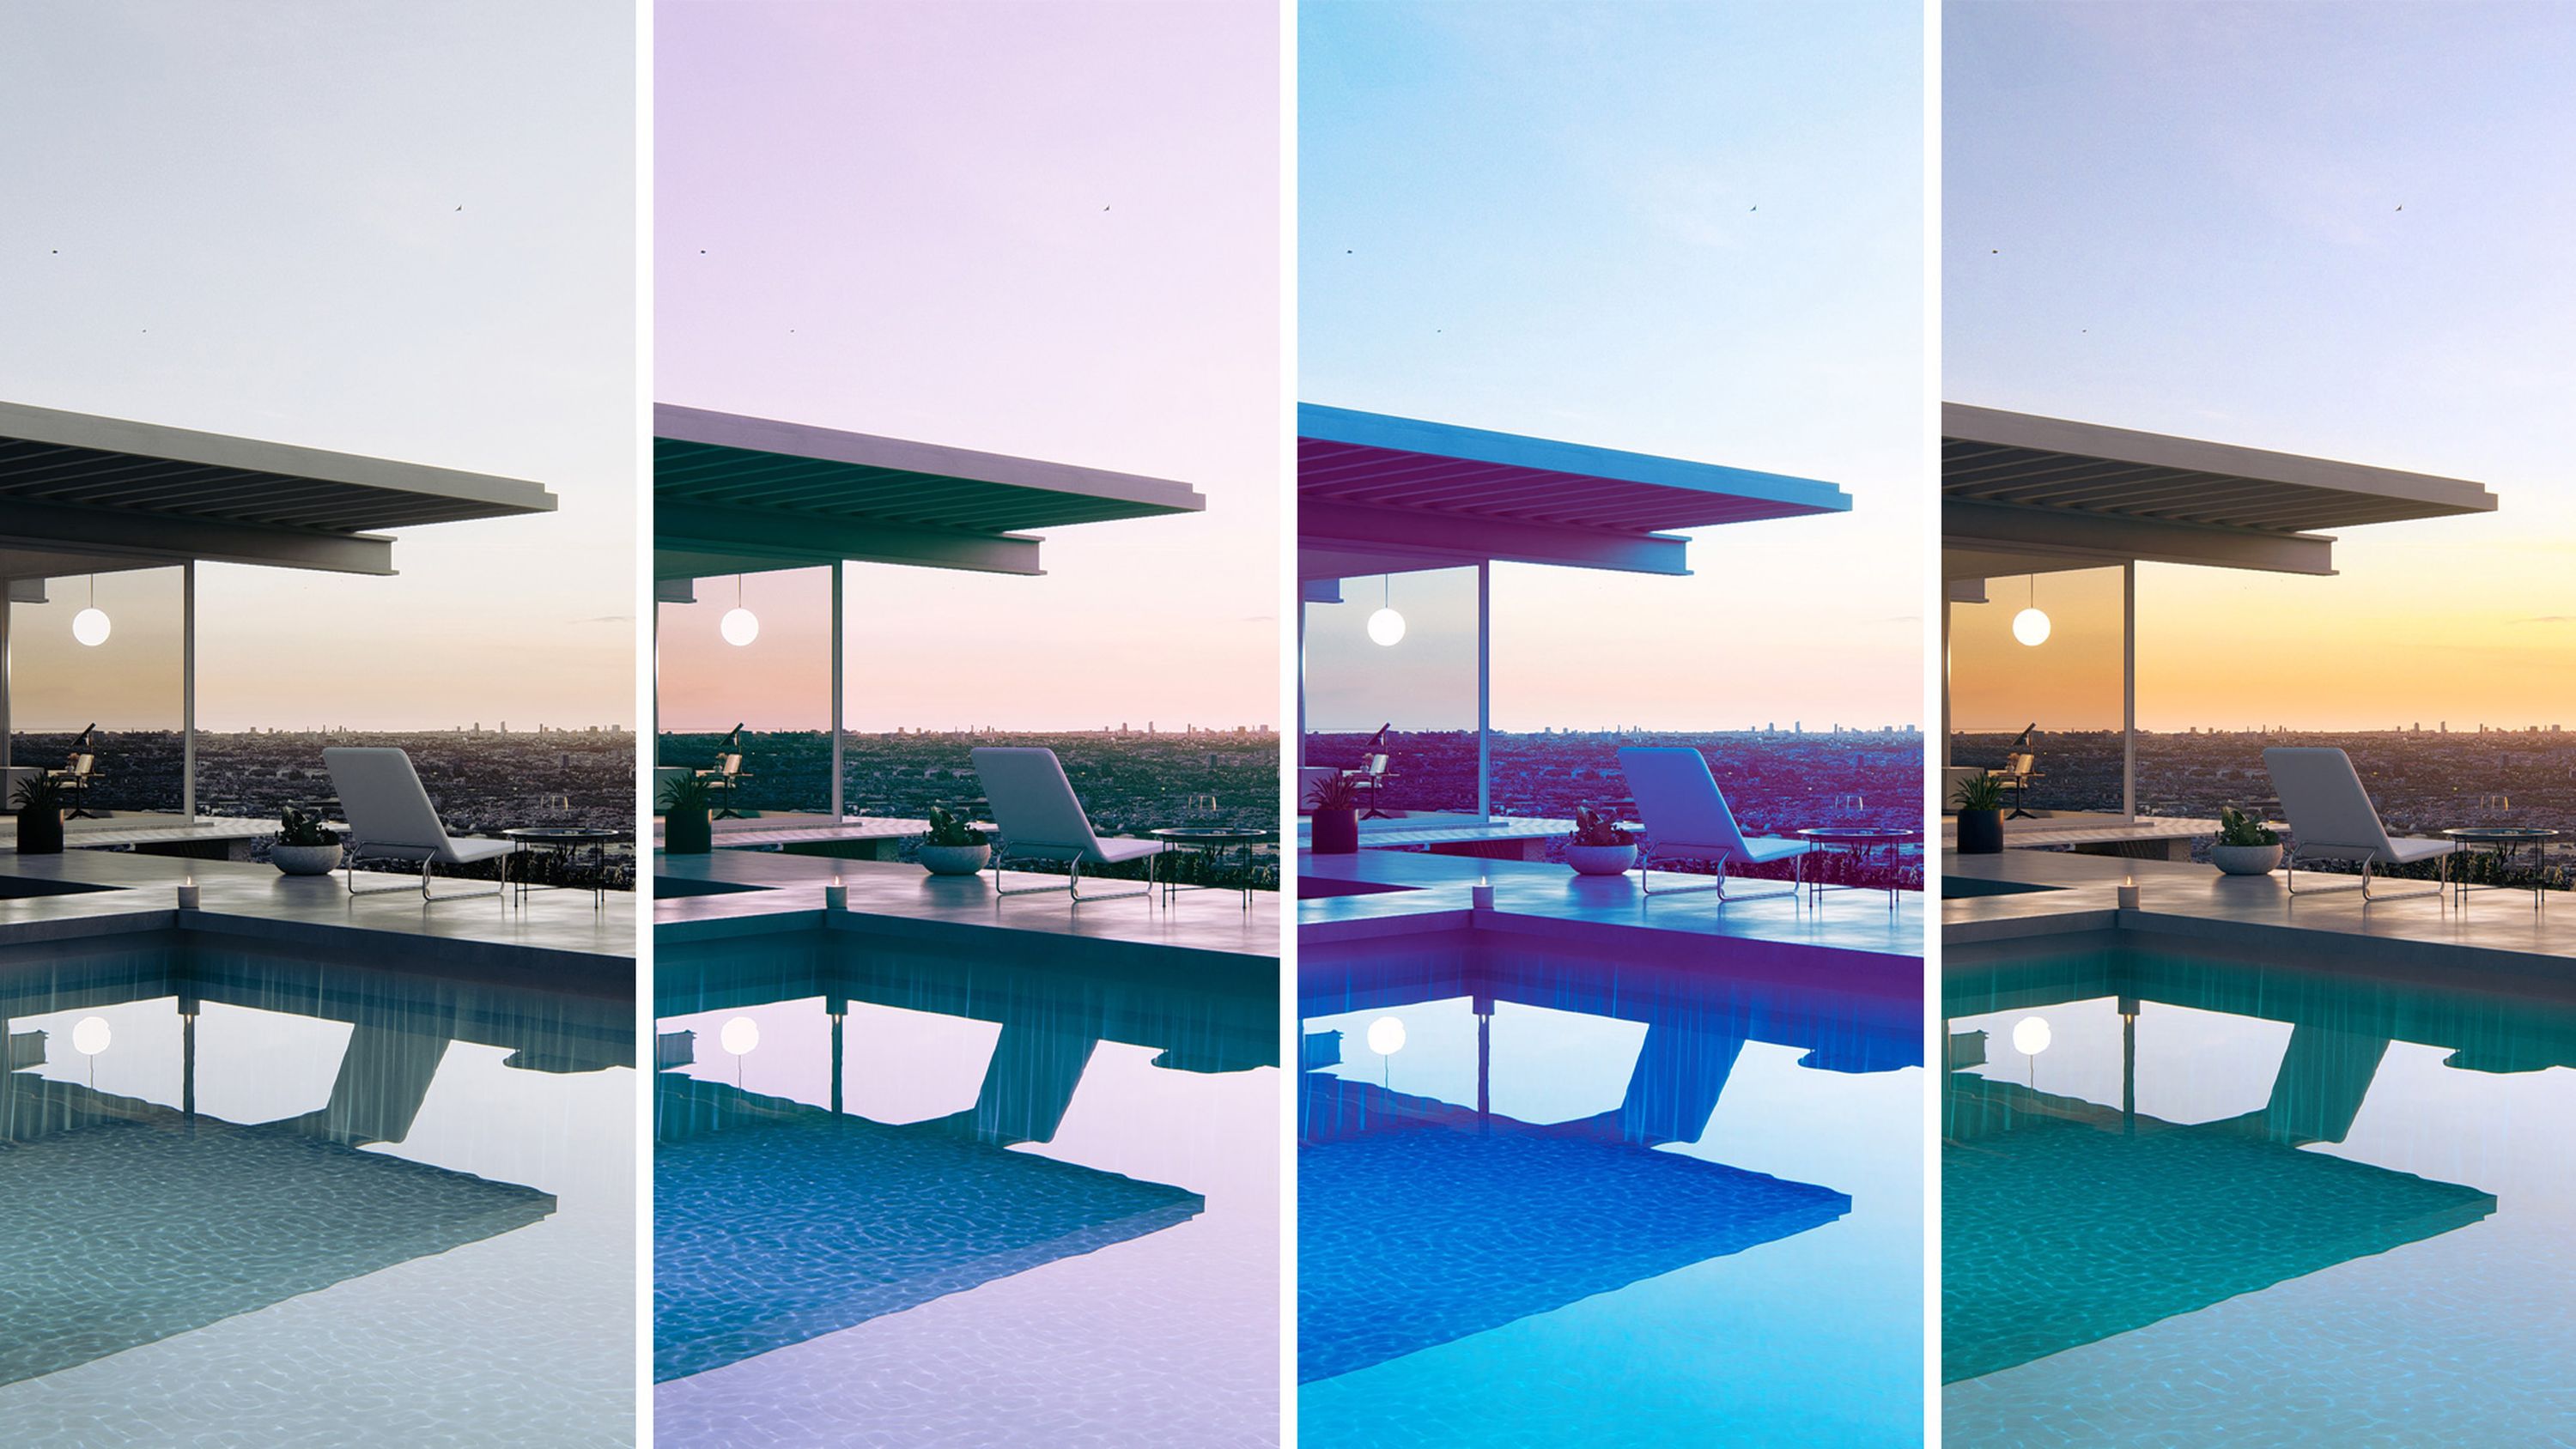
If a signature style is what you’re after, then look no further than Look-Up Tables (LUTs). By changing all of the tones of your image in one go, LUTs offer a quick and easy way of influencing the overall aesthetic and mood of a render.
Whether you notice it or not, sepia tones tend to tell a story of nostalgia, pastels help create a soft, dreamlike quality, and warm hues often evoke a cozy, inviting feeling.
Applying the same LUTs to your visualizations can also help maintain a cohesive visual style. By choosing a LUT that corresponds to the type of lighting in use, it will effortlessly apply the same selection of color adjustments to every render. Lumion comes with 12 ready-to-use LUT presets to help you achieve your desired look in seconds, plus the option to load a custom file of your own.
To choose your LUT, start in photo, movie, or 360 panorama mode, then click the +FX icon. Hit Color correction and you’ll see the options to either select or load a LUT underneath the histogram.
To select a preset, click the drop-down menu and choose from the options available.
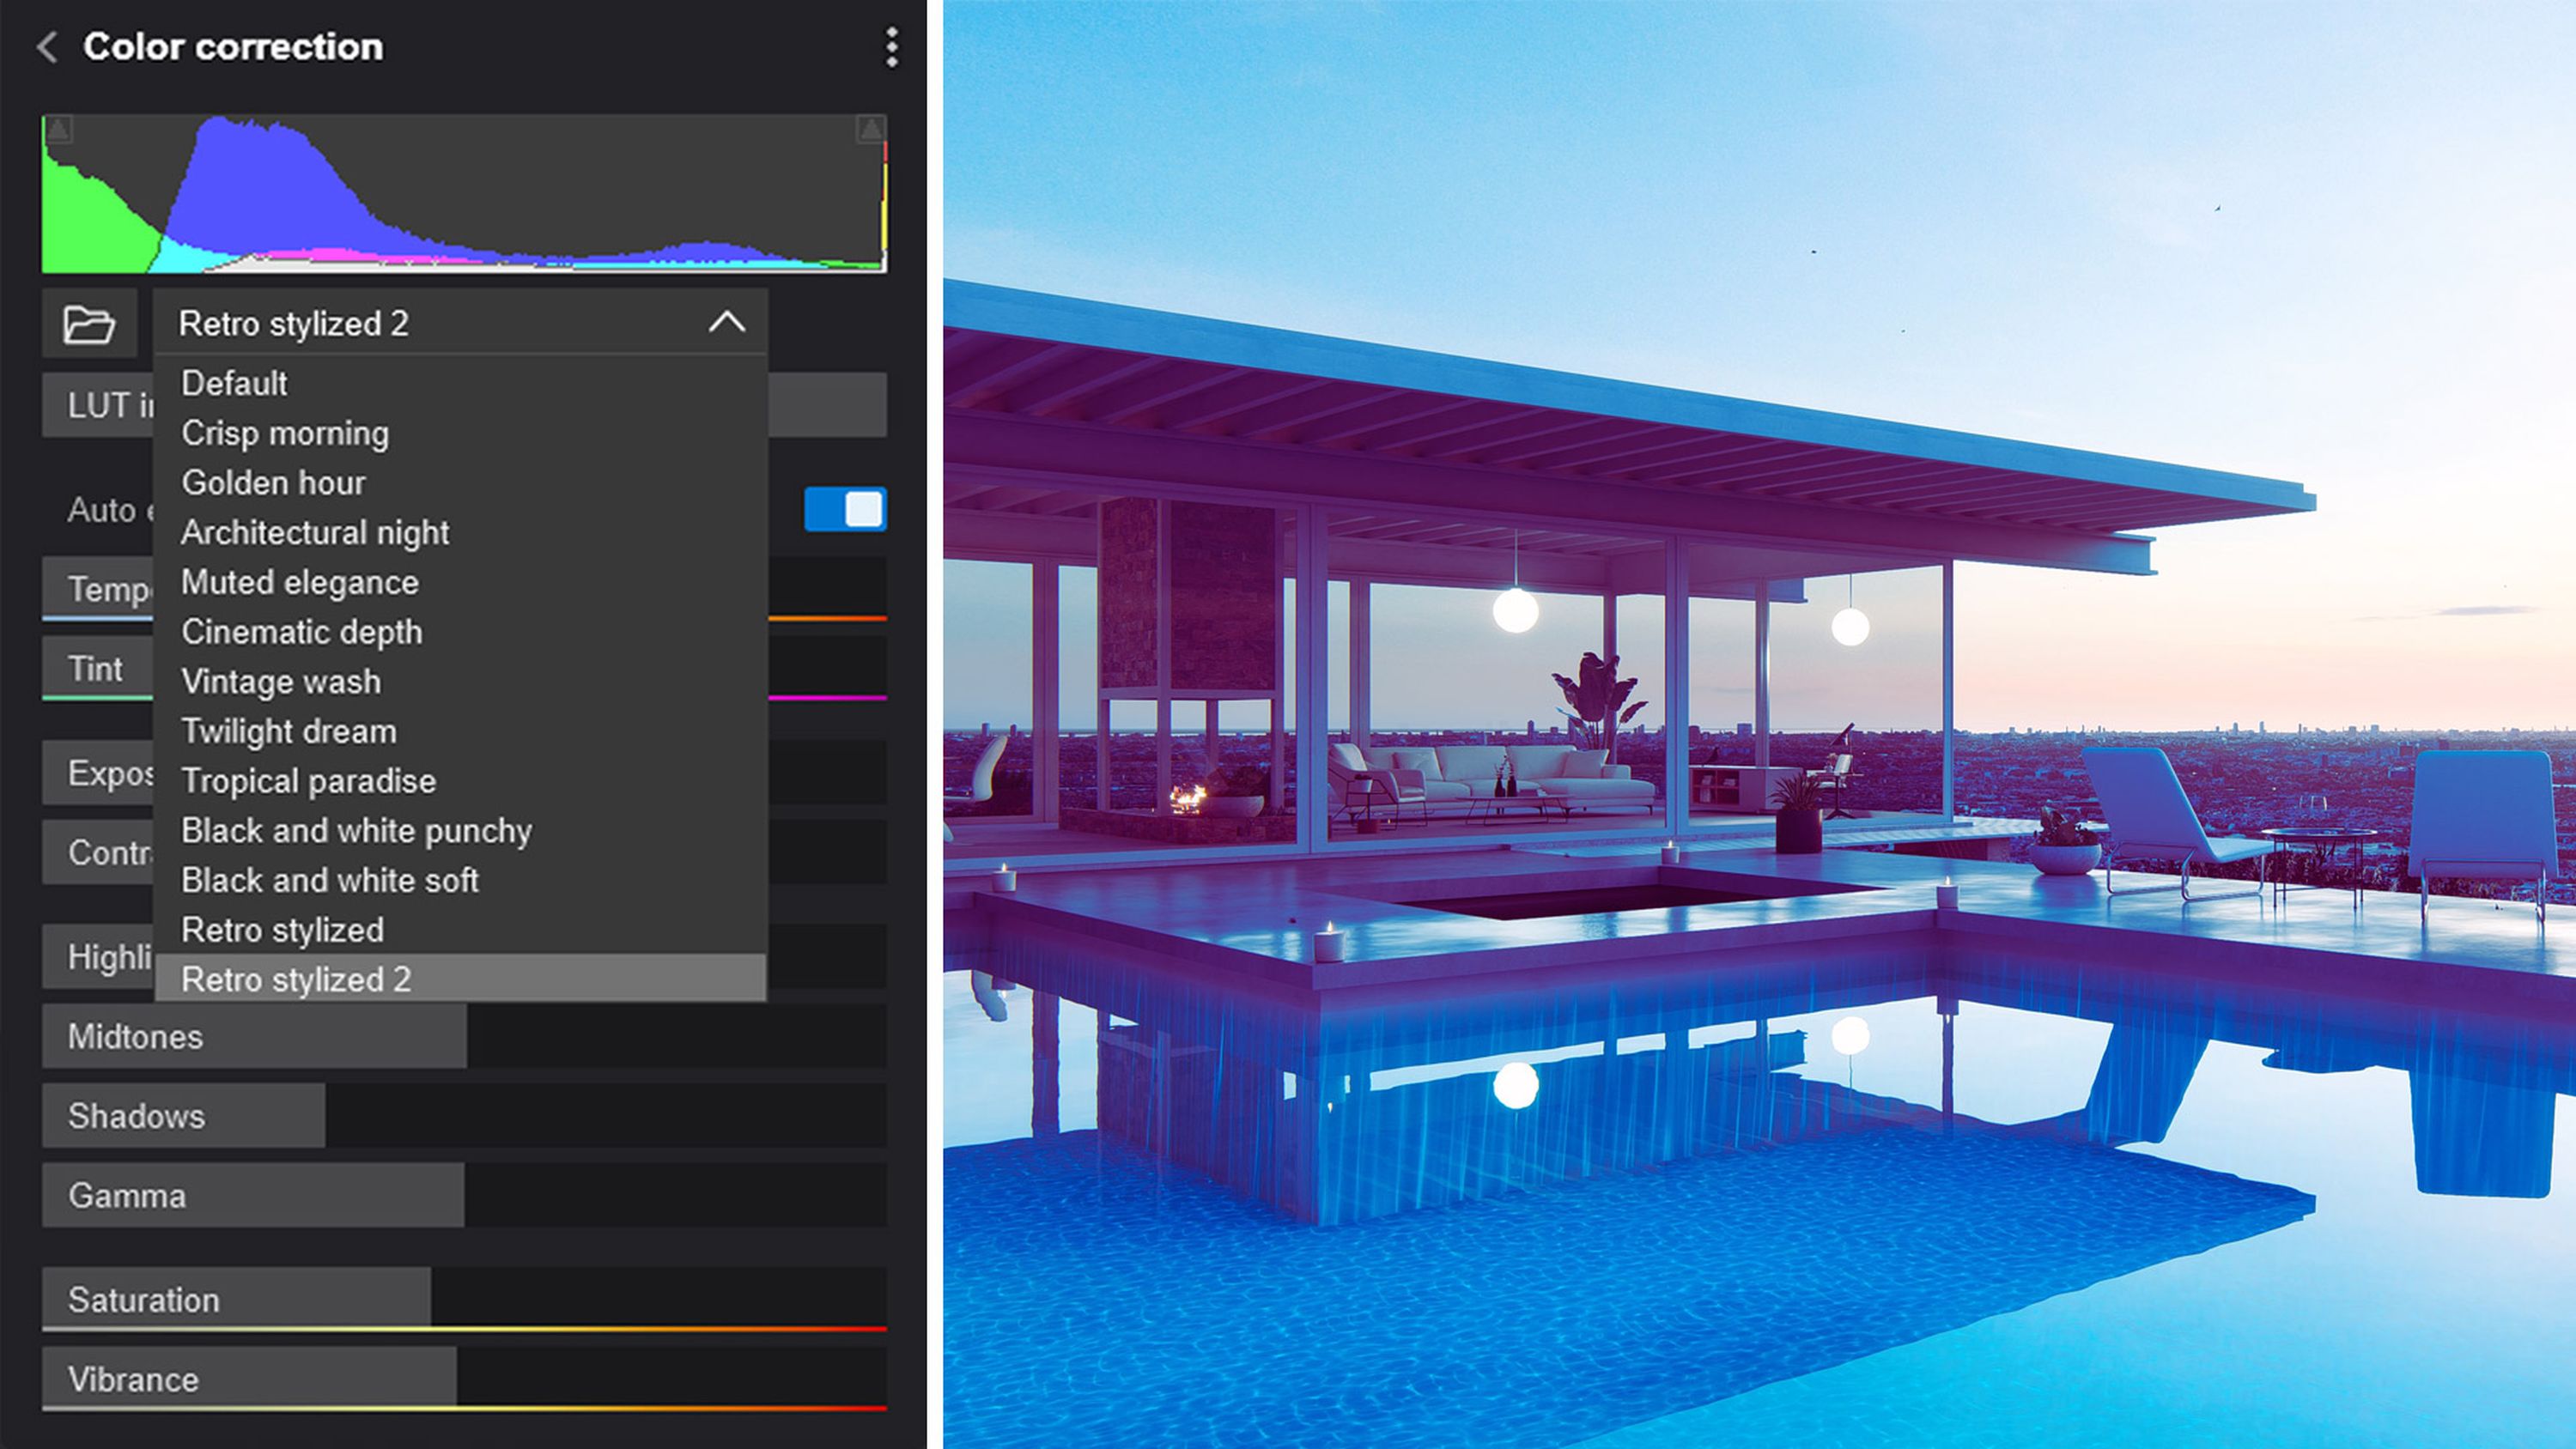
If you’d rather load a custom LUT file (.cube), you can browse using the folder button. If you need help finding the perfect LUT file for your project, we’ve gathered some handy resources for you here.
Prefer a stronger or subtler effect? Simply move the LUT intensity slider to refine your desired look.
Customize the color correction settings
Even with your chosen LUT applied, you might wish to further customize the color correction settings.
You’ll find a selection of settings below LUTs to help you perfectly balance the tone of your renders.
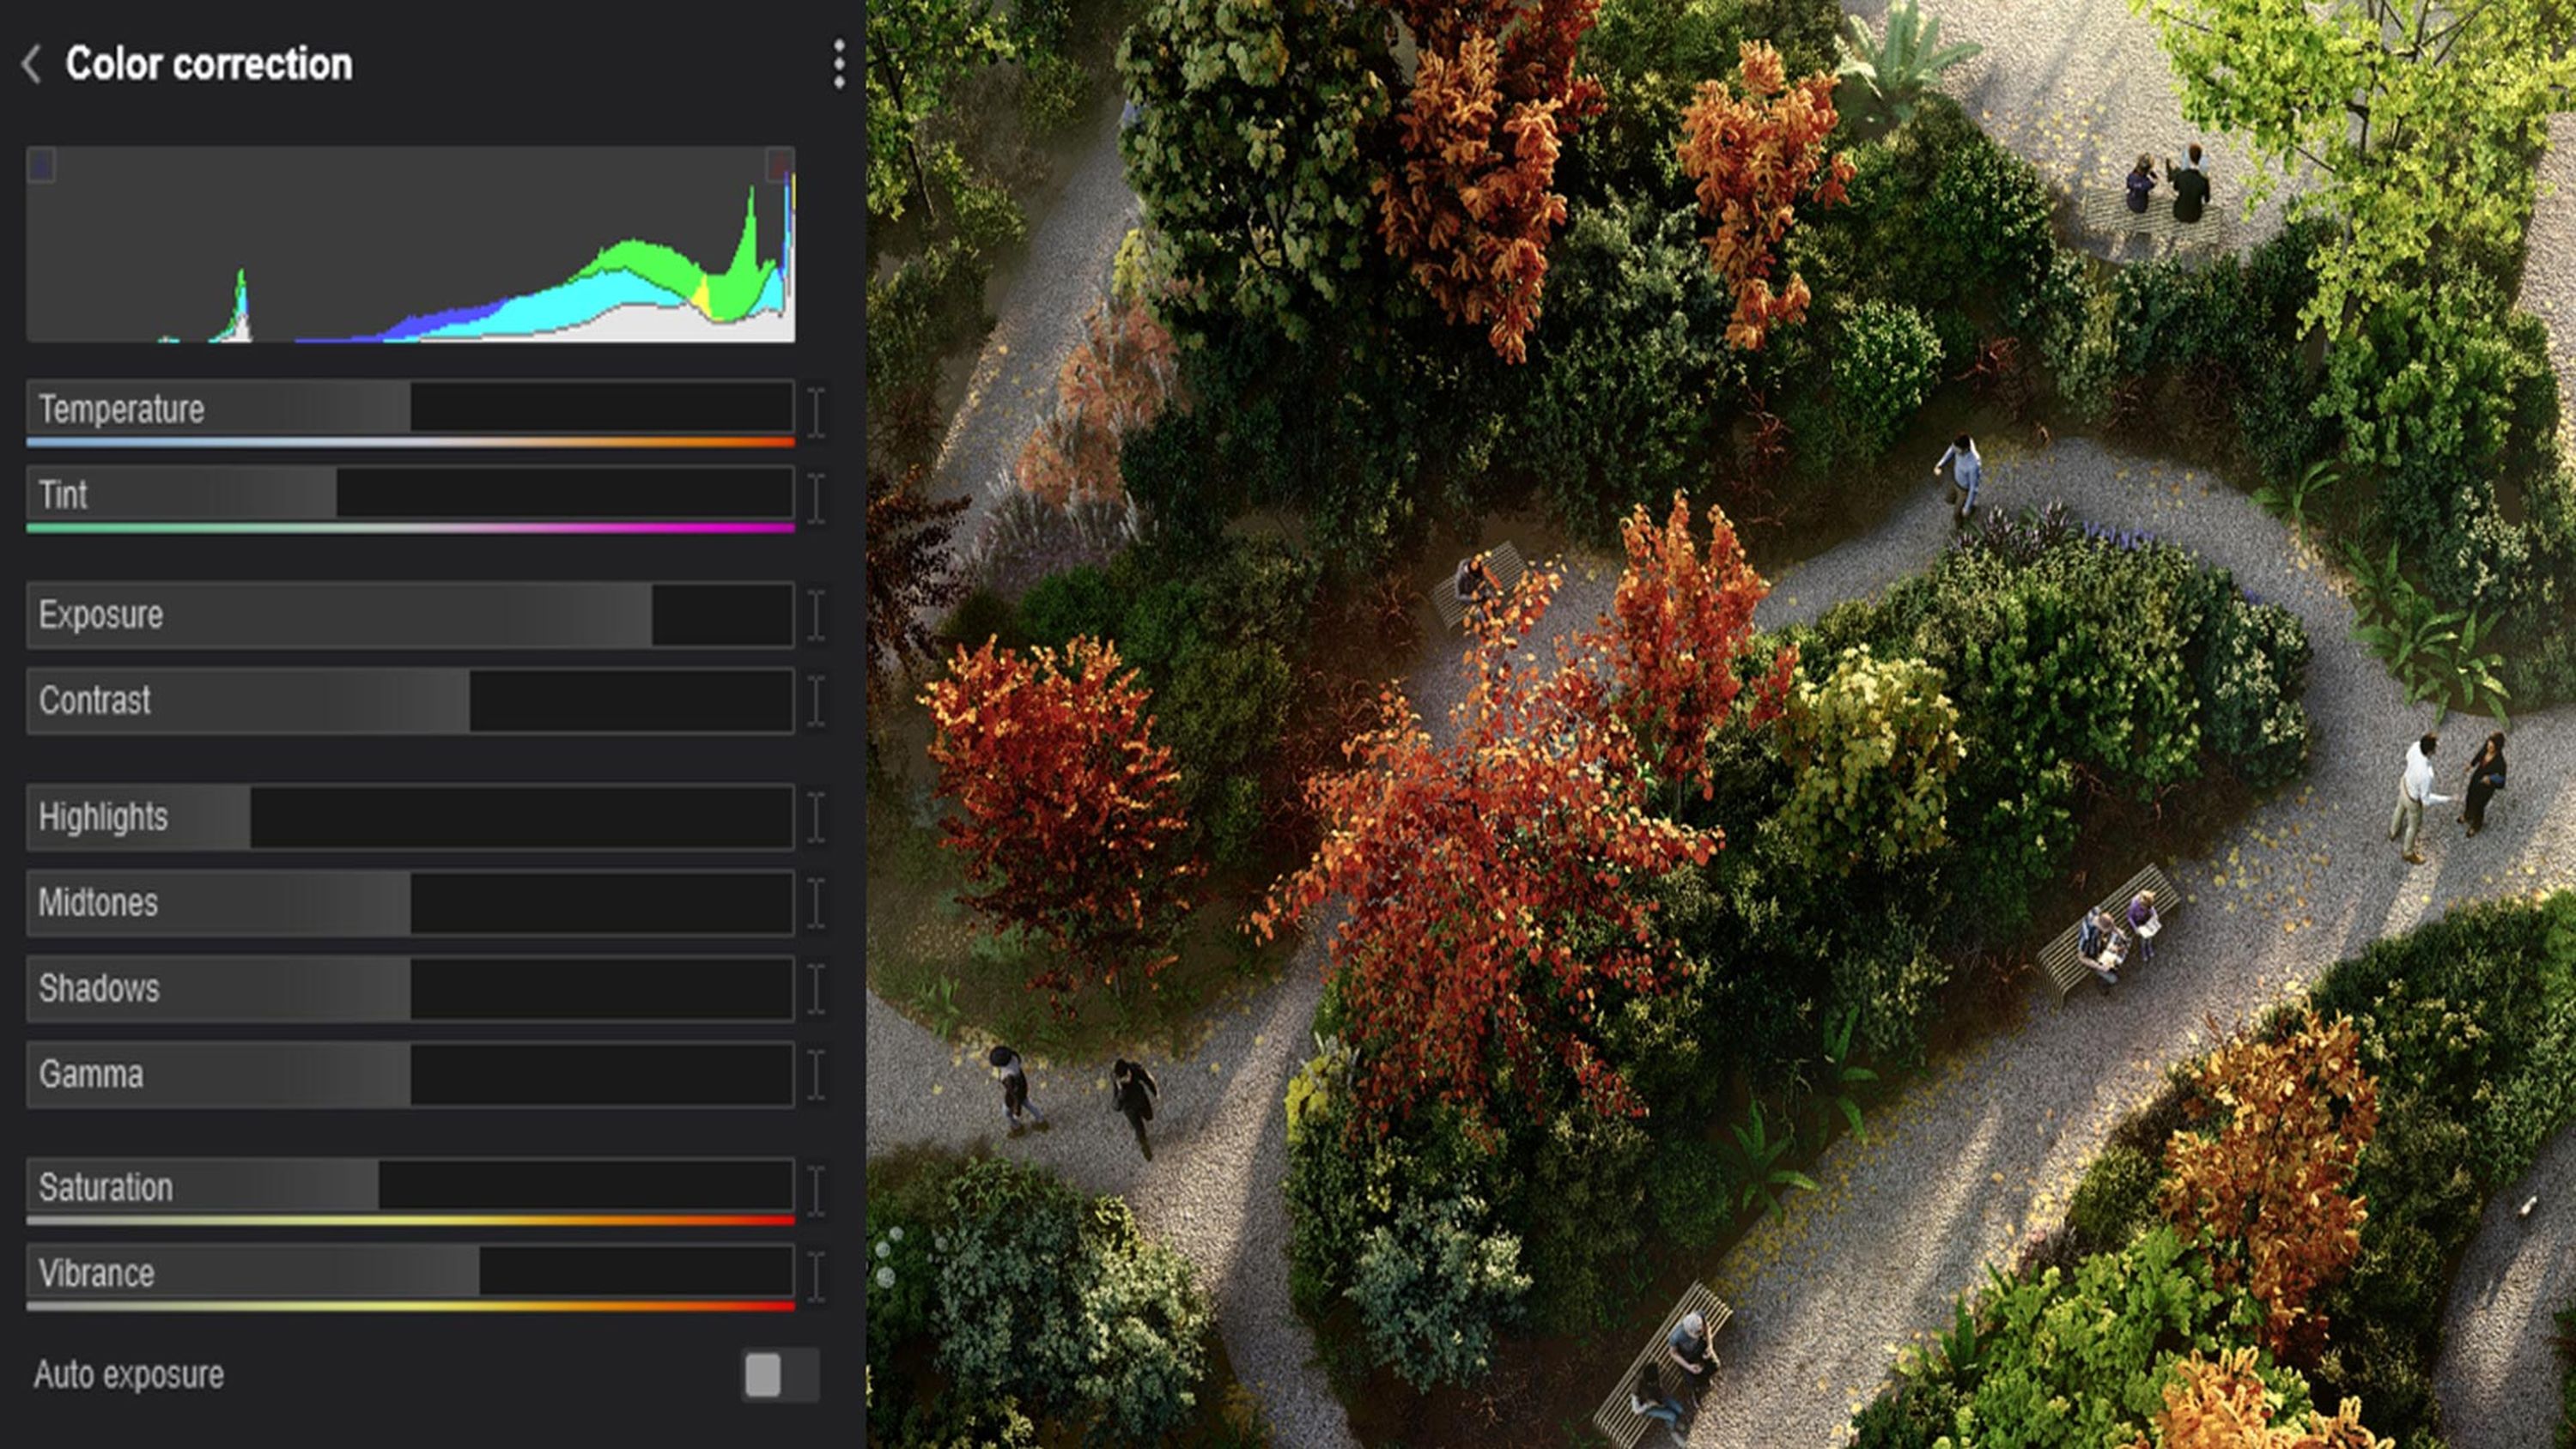
You can tweak the Temperature to determine how warm or cool your scene feels, adjust the Tint to correct any color imbalances, change the Contrast to create a sense of depth, and much more.
For further information about what these settings do, check out this guide.
An effect for every aesthetic
Post processing effects offer another quick and easy way of establishing a cohesive and recognizable visual style. You’ll find a range of effects in photo, movie, or panorama mode to help you style your renders however you please.
If you’re after a cinematic style that creates a strong emotional connection to the viewer, you might select lens flare or chromatic aberrations under the Camera tab in +FX.
While lens flare simulates the bright spots of real-world cameras and evokes the aesthetics of film cameras, chromatic aberrations add visual distortions often associated with vintage or artistic photography.
There are multiple other effects to choose from which can easily achieve certain aesthetics and become a part of your creative identity.
Save and load your FX stack
Got an individual or house style that makes your renders unique? Lumion makes it easy to replicate that same look across all of your photos, movies, and panoramas.
A custom FX stack acts as a shortcut for applying a set of effects in one go, with the aim of achieving a certain style. By quickly loading a pre-saved stack, you can more easily create a distinctive, consistent visual style that sets your projects apart.
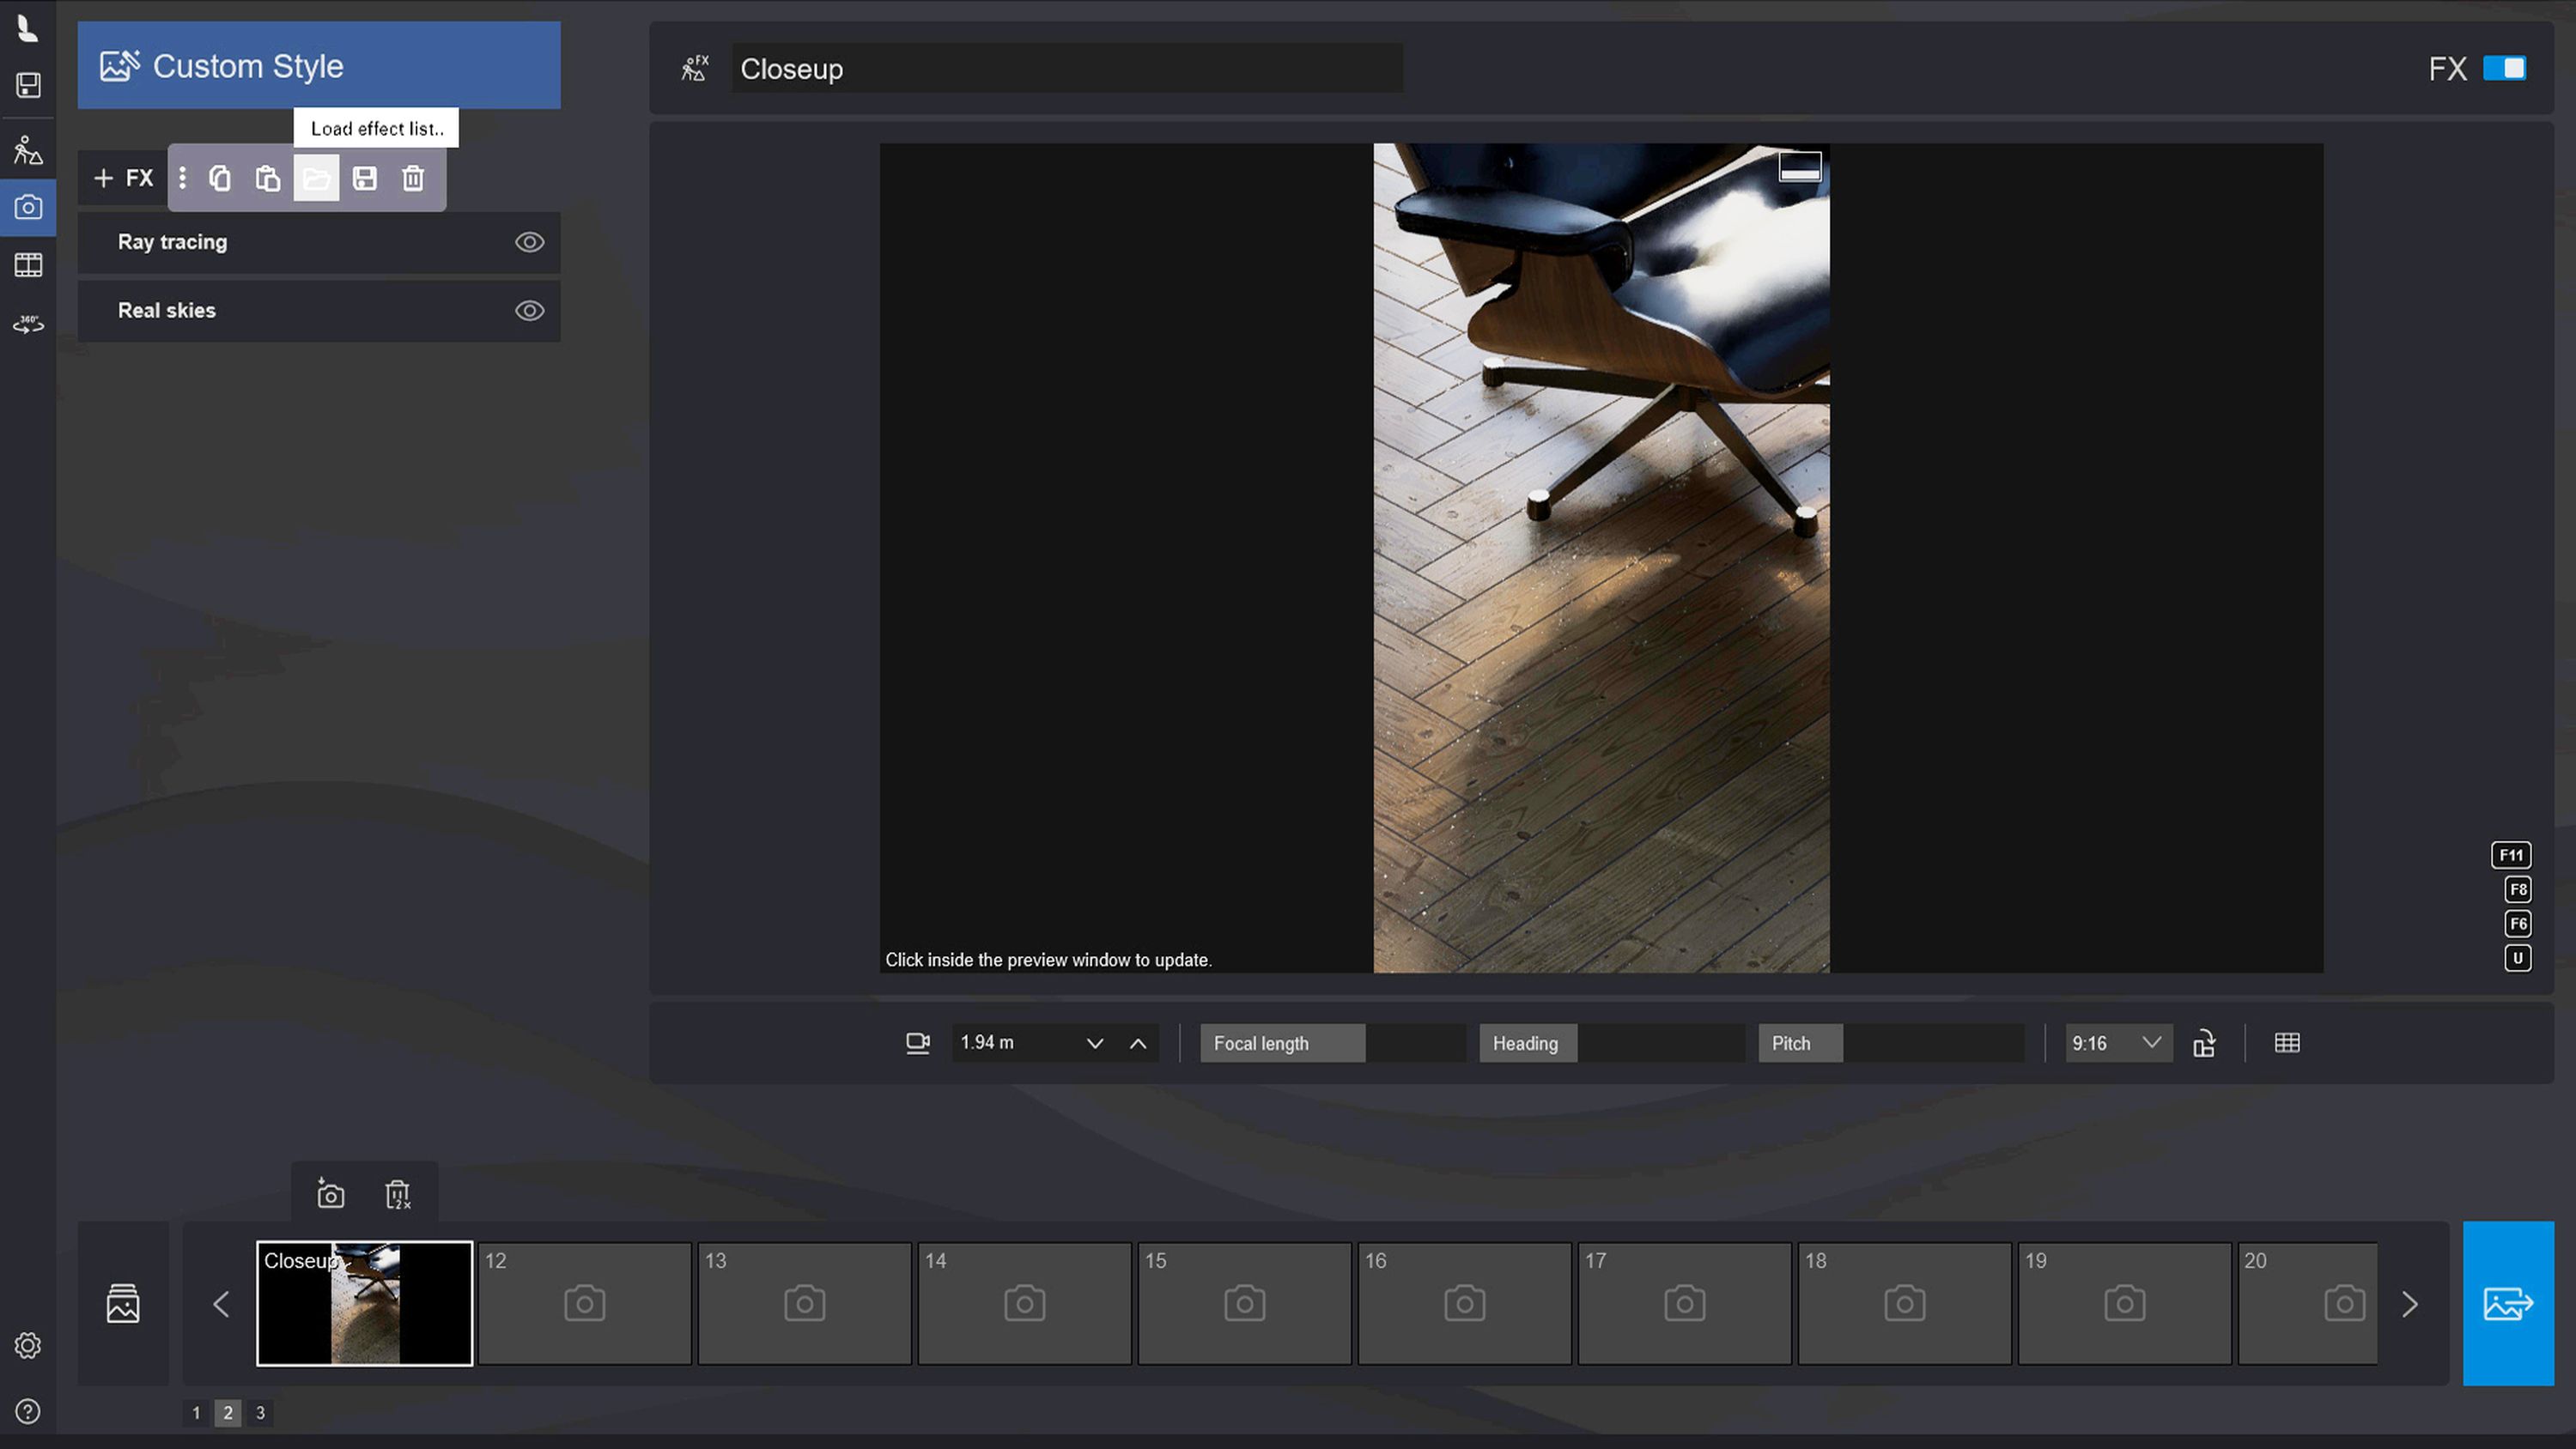
If you’ve found the perfect combination of effects and don’t want to lose them, there’s good news – you don’t have to. Simply save these settings as a custom FX stack by hitting the three dots next to +FX in photo or movie mode. Once it’s saved, you and your team can easily load and apply it to other scenes, saving you precious time. See the steps in more detail in this support guide.
Found your signature style?
We want to see it! Share your renders that utilize styles, LUTs, or your favorite FX stack over on the Lumion Community. You can always grab our attention on social media by using the hashtag #madewithlumion.
If you’re new to Lumion, no problem – you can put this tutorial to the test for free with a 14-day Lumion Pro trial.
